As an Amazon Associate, we earn from qualifying purchases. Some links on this site are affiliate links at no extra cost to you. Our recommendations are based on thorough research and editorial judgment.

Understanding Audio Normalization Vs Compression
Audio normalization and compression are crucial for great sound. Normalization adjusts audio so the loudest peaks hit around -1 dB, keeping tracks consistent without altering dynamics. Meanwhile, compression controls the dynamic range, lowering loud sounds and boosting quieter ones—kind of like giving your mix a nice, even haircut. It can be tricky to choose which technique to use, but both play important roles. Stick around, and you’ll soon get more tips on mastering these essential audio tools!
Key Takeaways
- Audio normalization adjusts a track’s overall volume to ensure the loudest peak reaches around 0 dB without altering its dynamics.
- Compression reduces the dynamic range by lowering loud sounds while boosting softer ones, enhancing perceived loudness and clarity.
- Normalization ensures consistent loudness across tracks, while compression controls audio peaks for a more uniform sound.
- Over-compression can lead to lifeless sound, whereas normalization simply boosts volume without compromising dynamics.
- Both techniques serve different purposes: normalization for loudness leveling and compression for better dynamic control and tonal shaping.
Definition of Audio Normalization
Audio normalization is like a fine-tuning instrument for sound, making certain that every track in a playlist can shine without overpowering the others. It’s the process of adjusting volume levels so that the loudest peaks reach a target, often around 0 dB, without clipping. There are various types of audio normalization, including peak normalization, which checks the highest amplitude of an audio track, and loudness normalization, which aligns with perceived loudness standards. This guarantees consistent volume across tracks, keeps the dynamic range intact, and enhances your listening experience. Whether in music albums or podcasts, to normalize an audio means less volume drama, and more smooth sailing. So, say goodbye to unexpected volume spikes – your ears will thank you! Similar to how smart chip technology prevents overcharging in power banks, audio normalization implements safeguards to prevent audio distortion and clipping.
Importance of Staying Below 0dB
Maintaining volume levels below 0dB is a crucial aspect of audio production. Staying within this limit helps prevent digital distortion, which can wreak havoc on sound quality. Exceeding 0dB leads to clipping, chopping off audio peaks and creating an unpleasant listening experience. Normalization, which raises a track’s volume until the loudest peak hits 0dB, maximizes loudness without distortion, but care must be taken. It’s important to keep at least 1dB of headroom for any added effects, avoiding that dreaded clipping during processing. Regularly monitoring volume levels during mixing guarantees audio integrity, making for a comfortable listener experience. Remember, nobody wants that ear-piercing sound! So keep those volumes in check, and your audience will thank you later. For optimal live streaming audio, aim for a signal-to-noise ratio of at least 70dB to ensure crystal-clear sound quality without unwanted background interference.
Understanding the Normalization Process
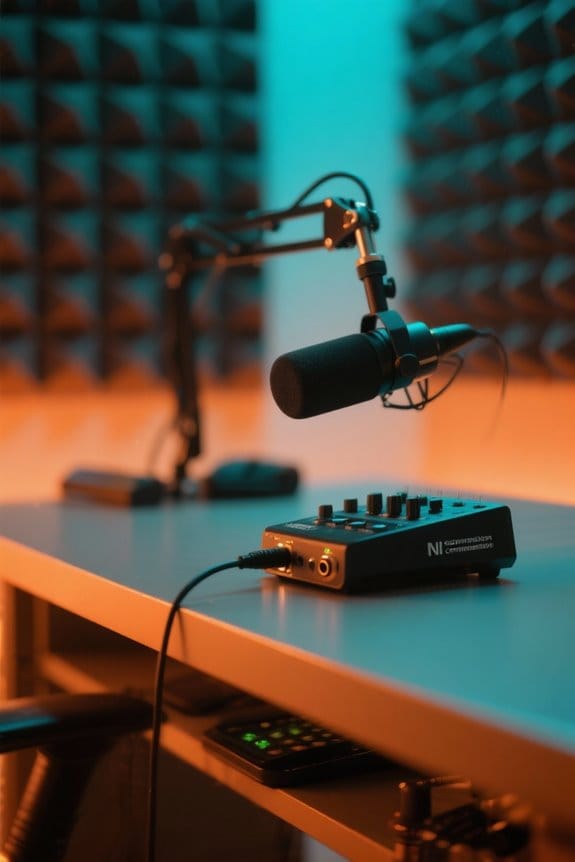
When it comes to optimizing sound quality, understanding normalization can make a world of difference. Normalization adjusts the amplitude of an audio track to guarantee its overall level aligns with a specified target, usually around -1 dB. This process involves analyzing an audio track for its loudest peak and adjusting accordingly. There are two main types: peak normalization and loudness normalization, the latter focusing on perceived loudness measured in LUFS. Many Digital Audio Workstations (DAWs) automate this process, guaranteeing volume consistency across multiple tracks. However, one must monitor for potential distortion post-normalization—especially at higher target levels—to keep that dynamic range intact. After all, nobody wants surprise clipping ruining their masterpiece! Modern high-resolution recording capabilities, like those found in the MAONO USB microphone with 192kHz/24Bit sampling rates, can significantly enhance the normalization process by providing cleaner source audio.
How to Adjust Audio Levels Without Normalization
While some might think normalization is the go-to for boosting audio levels, there are other effective ways to achieve that perfect sound without losing dynamic range. One such method is clip gain control, allowing audio editing pros to adjust sound volume without altering sound dynamics. In your Digital Audio Workstation (DAW), you can select an audio clip and drag the gain handle for precise adjustments, avoiding the common pitfall of digital clipping. Monitoring your levels is vital; exceeding 0dBFS can distort tunes. Each DAW has unique tools for adjusting gain, so getting familiar with them is important. Programs like MAGIX Music Maker offer intuitive track creation tools that make gain adjustments more accessible to users of all skill levels. Norms aside, knowing how to skillfully manage your audio files guarantees sound quality that even the toughest critic would appreciate!
Overview of Compression and Its Function
Audio compression serves a different purpose than normalization, focusing on the dynamic range of sounds. It reduces the range by lowering loud volumes and boosting softer ones, creating consistent volume levels. Compression increases perceived loudness while using adjustable parameters like attack and release to fine-tune responses to audio peaks. However, beware of over-compression! This can squash the natural dynamics of instruments and vocals, resulting in a lifeless sound. It’s like flattening a beautifully crafted sculpture into a pancake. Unlike normalization, which just adjusts volume, compression fundamentally reshapes tonal characteristics and dynamics. Modern podcast equipment bundles often include noise reduction technology to complement compression techniques for optimal sound quality. So, when you’re aiming for a punchy or smooth sound, remember that careful compression can make all the difference. Happy mixing!
When to Choose Compression Over Normalization
Choosing compression instead of normalization can greatly impact the audio quality of a project. Compression is essential when controlling the dynamic range, especially to manage loud peaks that risk distortion while making softer sections clearer. It enhances the tonal quality, allowing sounds to feel “punchy” or “smooth,” depending on your settings. When working with high-energy music or dense audio tracks, compression retains clarity that normalization simply can’t achieve. Plus, in live recordings, compression helps even out levels from varying microphone distances. Using a high-gain preamp with at least 60dB gain ensures optimal signal strength for compression processing. Ideally, apply compression first and then normalization to optimize sound dynamics without sacrificing the signal-to-noise ratio. So, think of compression as your trusty sidekick—always ready to keep your audio crisp, clear, and consistently engaging!
Effects of Normalization and Compression on Sound Dynamics
Many people may not realize just how different normalization and compression can be when it comes to shaping sound dynamics. Normalization adjusts an audio signal’s overall volume, enhancing it until the loudest peak reaches around 0 dB, which doesn’t alter its dynamics. You get uniform loudness, but the dynamic range remains intact. On the flip side, compression reduces that dynamic range by lowering loud sounds while boosting softer ones, delivering a more consistent sound level. This can make your audio punchy or smooth, depending on your settings. While normalization might lead to clipping, compression strategically keeps peaks from distorting. So, choose wisely: normalization for leveling, compression for control—your sound’s personality hangs in the balance! For optimal results when recording, using an interface with zero-latency monitoring allows you to hear these effects in real-time while making adjustments.
Recommended Techniques for Effective Audio Treatment
Revealing the secrets of audio treatment can elevate any track from average to outstanding. To achieve effective audio treatment, it’s essential to follow some recommended techniques. Start by applying normalization standards, adjusting the overall volume so the loud parts hit a target level—usually around -1 dB—preserving dynamic range without distortion. When considering compression vs normalization, use compression sparingly to control peaks and enhance perceived volume while maintaining sound quality. Be sure to utilize gain staging techniques, as these keep levels optimal. Experiment with compressor settings like attack and release times, since they shape the overall feel of the audio. Finally, always monitor output levels to prevent digital clipping, ensuring the loudness of an audio track remains crisp and clear. Similar to how high CRI lighting enhances color accuracy in art studios, proper audio normalization ensures true sound representation in your recordings.
Tools and Applications for Normalization and Compression
After covering some effective audio treatment techniques, it’s time to contemplate the practical side of things—what tools can actually help users implement normalization and compression? Programs like Audacity and Sound Forge Pro have built-in normalization features, adjusting audio levels while keeping sound quality intact. For those seeking dynamic range control, compression plugins like Waves Compressor and FabFilter Pro-C allow precise adjustments, like attack and release times. If you have multiple audio files, Wavelab’s Meta Normalizer offers batch normalization for consistent loudness across the board. Auphonic is perfect for podcasters, automating normalization and compression with ease. iZotope RX plays an essential role in custom leveling, ensuring voice consistency for those long, riveting podcast episodes. For optimal recording quality, consider using a MAONO microphone kit that features cardioid design to minimize unwanted background noise during the normalization process. Sound cool, right?
Frequently Asked Questions
Is Audio Normalization the Same as Compression?
Audio normalization and compression are not the same; normalization focuses on loudness adjustment without altering dynamic range, while compression modifies the signal’s dynamics. Effective mastering workflow employs both for sound consistency and level balancing in audio processing.
Is Normalizing the Same as Compression?
Normalizing is not the same as compression. While normalization focuses on peak levels for volume adjustment, compression guarantees loudness consistency by manipulating dynamic range, impacting audio quality and sound clarity in various mixing techniques and mastering effects.
Do You Compress or Normalize First?
Typically, normalization methods precede compression techniques in audio processing. This approach stabilizes audio levels while preserving dynamic range, enhancing sound clarity and mixing effects, ultimately aiding mastering basics and improving overall recording practices within signal processing.
What Is the Difference Between Compressor and Normalizer?
Ironically, while a compressor wrestles with audio dynamics, sculpting peaks and valleys into a uniform canvas, a normalizer simply elevates loudness without disturbing the artistic essence, both competing silently in the relentless loudness wars of audio mixing.