As an Amazon Associate, we earn from qualifying purchases. Some links on this site are affiliate links at no extra cost to you. Our recommendations are based on thorough research and editorial judgment.

How to Configure a USB Microphone for Zoom and Teams Calls
To configure a USB microphone for Zoom and Teams calls, first plug it into your computer and check the sound settings to confirm it’s recognized. In Zoom, go to the Audio settings and select your microphone as input, then test it to check quality. For Teams, click on your profile picture, access Settings, and choose the microphone from the Devices tab. Don’t forget to test permissions. Stick around for more tips on getting that perfect audio setup!
Key Takeaways
- Plug the USB microphone into the computer and ensure it’s recognized in your operating system’s Sound settings.
- In Zoom, select the microphone in the Audio tab and utilize the test feature for sound quality.
- For Teams, choose the USB microphone in the Devices settings and adjust the volume as needed.
- Regularly check and optimize microphone input levels to prevent audio issues during calls.
- Consider using a backup audio strategy, like a phone call, if the microphone fails during a meeting.
Preparing Your USB Microphone for Use
When preparing a USB microphone for use, it’s essential to follow a few straightforward steps to guarantee peak performance during your Zoom or Teams calls. First, plug that microphone directly into your computer, ensuring a secure connection for exceptional audio quality. Next, check your operating system’s Sound settings—your microphone should pop up as an input device. Now, shifting to the audio settings in Zoom or Teams? Make sure to select the USB mic as your audio input device. Don’t forget to perform a quick microphone test. This helps you assess sound quality and adjust input levels if needed. Finally, familiarize yourself with any physical controls, like mute buttons. They can save you from unexpected audio blunders during those all-important calls! For optimal sound capture, position yourself within range of the microphone’s cardioid pickup pattern to effectively minimize unwanted background noise.
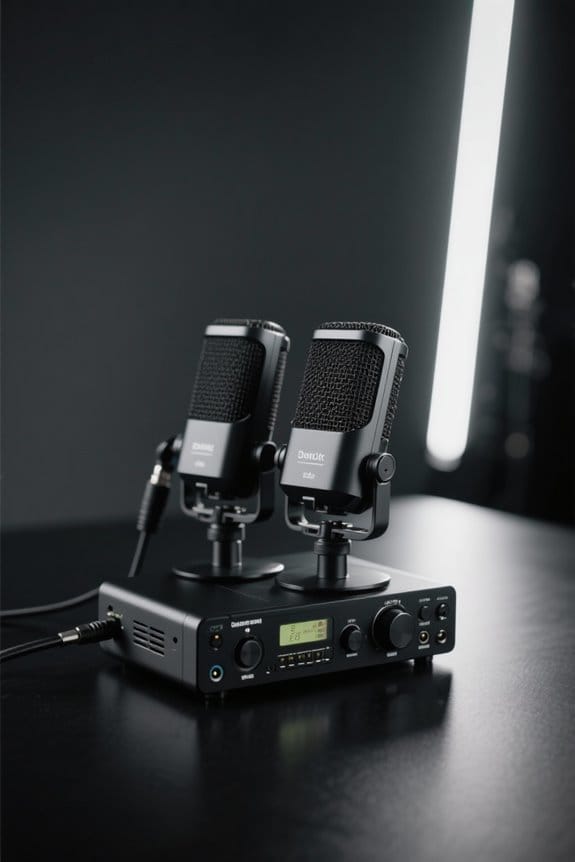
Recommended Products

Note: The X1 pro projector and C1000 Portable Power Station will be dispatched separately. Please be sure to check for both deliveries.

32 Channel 12MP NVR with (32) 4K 8MP@25FPS Two-Way Audio Full-Time Color Night Vision Dual Light Active Deterrence 2.8mm Wide Angle PoE Cameras (Built-in Mic and Speaker for 2-Way Talk and built in red/blue almarm dual lights for Smart Active Deterrence)

CANON USA AUTHORIZED - INCLUDES FULL USA WARRANTY | Pursue Imaging Excellence - The Canon EOS R5 Full Frame Mirrorless Camera features an all-new 45 MP CMOS sensor, 8K DCI video, Dual Pixel CMOS AF II, in-body image stabilization and more, the EOS R5 offers incredible imaging performance for portraits, landscapes, wildlife, cinematography and everything in between.
Accessing Audio Settings in Zoom

Accessing audio settings in Zoom is a simple yet essential step for clear communication during calls. To get started, log into the Zoom client and click on your profile picture. This opens the settings menu. From there, head to the Audio tab, where you can select your USB microphone as the input device. It’s also where you can test your microphone and speakers—definitely a must before any big meeting! If you’re already in a meeting, just click the arrow next to the Mute/Unmute button found in the meeting controls. Don’t forget to enable the option for automatic adjustment of microphone settings. For optimal audio quality, consider using a microphone with zero-latency monitoring capabilities that allow you to hear yourself in real-time while speaking. Happy chatting—your colleagues will thank you for clearer audio!
Recommended Products

16 x 22 Thunderbolt 3 audio interface with class-leading 24-bit/192 KHz conversion

Round-table ready: record up to four microphones at once with Discrete, studio-grade preamps and up to +75 dB of clean gain for clear voices and plenty of headroom.

Get everything you need in one box, and start recording straight away
Accessing Audio Settings in Microsoft Teams

For anyone diving into Microsoft Teams, finding the audio settings is a breeze! First, click your profile picture in the top-right corner and select “Settings.” Then, navigate to the “Devices” tab. Here, you can select your USB microphone from the dropdown menu. Adjust the microphone volume to test the input level—this is key for good microphone quality during calls. Don’t overlook the “Make a test call” feature! It’s a handy way to assess your audio enhancements and hear yourself in action, making you sound like a pro. If things go awry, remember these troubleshooting tips: check your operating system settings to guarantee Teams has the necessary microphone permissions. Many USB microphones support 24-bit audio resolution for crystal-clear sound quality during your calls. Happy chatting!
Recommended Products

Robust App Ecosystem: TIBURN Smartboard 75" MAX with Windows 11 Pro and Android 13 dual system allows you to seamlessly integrate popular apps you already use in your workflow, such as AutoCAD, Dropbox, Google Suite, Slack, Miro, Microsoft Teams and Figma for increased productivity

【Powerful Dual-System Performance】LINGHUFOX 86" 4K UHD smartboard delivers exceptional clarity and power with Windows 11 Pro (Intel 13th Gen i5-13450HX, 10 cores, 16 threads, 16GB RAM + 256GB SSD) and Android 13.0 (8GB RAM + 128GB ROM). The ultra-clear 4K display ensures stunning visuals, while the dual OS design offers faster processing and seamless multitasking. Ideal for meeting rooms, government, schools, real estate, and retail spaces to enhance collaboration and productivity.

【Google EDLA-Certified 4K Smart Boad】Experience a performance leap with this EDLA-Certified interactive whiteboard. It is powered by an advanced octa-core processor(4 A73 + 4 A53) and boasts a superior 50-point multi-touch, paired with 8GB RAM and 128GB storage. This crushing configuration ensures buttery-smooth operation of all applications, making it the ultimate smart board for classroom/office/home use.
Testing Your Microphone in Zoom

To guarantee crystal-clear audio in Zoom, testing the microphone should be a top priority before any meeting. To do this, click the arrow next to the Mute/Unmute button and select “Audio Settings.” Here, use the “Test Mic” feature for an audio quality assessment—record yourself speaking and listen back to check clarity. If your voice sounds like a muffled potato, it’s time to troubleshoot! Optimize the input level in the Microphone section, adjusting sensitivity based on your volume. Be sure to select “Automatically adjust microphone volume” for easy management of audio levels. Remember, regular checks of your microphone setup can save you from awkward, “Can you hear me now?” moments during important calls. For professional-grade audio quality during presentations, consider using a JBL EON ONE system which delivers an impressive 112 dB output with crystal clear sound reproduction.
Recommended Products

【Intel Core Ultra 7 255U】Built on Intel’s latest Core Ultra architecture, the 255U features a dedicated 12 TOPS NPU to accelerate AI-powered tasks like Copilot, voice processing, and background optimizations. Enjoy responsive multitasking, efficient performance, and smoother daily workflows for work, study, and modern productivity.

Intel Core Ultra 7 155U, 12C (2P + 8E + 2LPE) / 14T, Max Turbo up to 4.8GHz, 12MB. This new Intel Core Ultra processor delivers the next generation of hybrid architecture for supercharged computing. Thanks to a three tier multi-processing unit, business users can manage complex workloads by sending the right task to the right engine at the right time. A CPU manages lightweight low-latency AI tasks, a GPU manages media and visual AI rendering, and an NPU, manages sustained AI and AI offload.

【Inte Processor】 Intel Core Ultra 7 155U, 12C (2P + 8E + 2LPE) / 14T, Max Turbo up to 4.8GHz, 12MB. This 1st Gen Core Ultra processor has come to replace 13th generation Core processors; it has 12 cores (2 + 8 + 2) and 14 threads at its disposal. Its Performance cores, of which there are 2, are HT-enabled and run at up to 4.8 GHz while its Efficient cores, of which there are 10 (8 main cores plus 2 extra ones found in the Low Power Island) run at up to 3.8 GHz.
Testing Your Microphone in Microsoft Teams

Testing a microphone in Microsoft Teams is surprisingly straightforward and essential for smooth communication. To start, head to Settings > Devices and confirm the correct microphone is selected. Microsoft Teams offers a handy “Make a test call” feature, perfect for gauging microphone quality enhancement and adjusting input levels if needed. During any meeting, just click on More options (those three dots) and check Device settings to verify your mic isn’t muted. Don’t forget to set microphone permissions in your operating system’s Privacy settings. If something’s awry, common troubleshooting tips include unplugging and reconnecting your USB mic or double-checking in Settings > Devices for recognition. With these advanced audio configurations, you’ll sound crystal clear! For optimal call clarity, consider using headsets with beamforming technology that captures your voice while minimizing background noise.
Recommended Products

【AI 2.0 Echo, Reverberation, and Noise Cancelling】Utilizing AI 2.0 noise, echo, and reverberation cancellation algorithms, our USB conference speakerphone ensures crystal-clear voice transmission even in noisy environments or glass conference rooms. Our AI-based voice optimization technology guarantees high-quality audio performance, making remote meetings feel like face-to-face conversations.

Sporting a 16" 2560 x 1600 IPS-type anti-glare display, this laptop delivers a 240 Hz refresh rate for fast performance. Plus, AMD FreeSync Premium and NVIDIA G-Sync ensure smooth on-screen action. Ready to get creative? The display features 100% sRGB coverage and is X-Rite Pantone factory-calibrated for accurate colors right out of the box.

Real-Time Collaboration: Ditch passive presentations. This smart board lets teams write, annotate, and brainstorm together in real time on a stunning 4K touchscreen. True multi-user touch turns long discussions into clear, actionable decisions, right in the room
Troubleshooting Microphone Connection Issues
Microphone connection issues can be frustrating, especially during important Zoom or Teams calls. First, verify your USB microphone is connected properly. It sounds simple, but common connection problems can sneak in. Check that Zoom or Teams recognizes it by verifying the correct device is selected in settings. If it’s missing from the dropdown, unplugging and reconnecting the mic can refresh recognition—sometimes, devices just need a little wake-up call! Confirm that the microphone is your computer’s default input device for best performance. Finally, take advantage of the testing features in both platforms. Recording and playing back your audio not only helps with diagnosing resolving audio issues but can impress your friends too! Microphone troubleshooting tips are always handy for smooth calls. For optimal audio quality during calls, consider using a USB lavalier microphone with a high sampling rate of 192kHz for crystal-clear sound reproduction.
Adjusting Sound Settings on Windows
Finding your way through the sound settings on Windows can feel a bit like maneuvering through a maze, but it’s easier than it seems! First, right-click the sound icon in the system tray and select “Sounds.” Next, head to the “Recording” tab to find your USB microphone listed there. Make sure it’s set as your default device. By clicking “Properties,” you can explore options for adjusting levels and enabling audio enhancements to really elevate your sound quality. Remember to unmute the microphone and set the input volume adequately within the Levels tab. If it’s still playing hard to get, try unplugging it and reconnecting, or check the system requirements to see if you need drivers. Happy chatting! For optimal voice clarity during calls, consider using a microphone with noise cancellation technology like the MAONO DGM20S that effectively eliminates background noise.
Ensuring Permissions for Microphone Access
After getting your USB microphone all set up in the sound settings, the next logical step is to guarantee apps like Zoom and Teams can actually use it. Check your microphone privacy permissions directly in your device settings. On Windows, head to Settings > Privacy > Microphone and make sure it’s enabled for all apps, especially Zoom and Teams. If you’re a macOS user, navigate to System Preferences > Security & Privacy > Privacy tab, select Microphone, and tick those boxes. Browser users for Teams, don’t forget to explore your browser’s application settings to allow access. Finally, keep an eye out for any physical mute switches on your device. Yes, even the sneaky little ones can ruin your day! For optimal audio quality during calls, consider using interfaces that support zero-latency monitoring to eliminate any delay in your voice feedback.
Utilizing Alternate Audio Options
When technology throws a curveball, having a solid backup plan can save the day. For instance, if a USB microphone fails during a Zoom or Teams call, don’t panic! You can utilize the “call back feature” to connect using phone audio. Simply enter your phone number, and you’ll receive a call linking you to the meeting while still sharing content on-screen. This strategy is one of the essential backup audio strategies—it’s reliable and effective. Additionally, having mobile audio options on hand, like using your smartphone as an alternative, can make life easier. Just remember to adjust your audio settings in the app to switch seamlessly. Many wireless microphones now offer dual wireless functionality over distances up to 65 feet, providing flexible backup options for virtual meetings. So, stay calm and dial in—you’re prepared!
Additional Resources for Zoom and Teams Support
Maneuvering audio issues can be tricky, especially with the demands of virtual meetings. To help navigate these challenges, users can tap into extensive Zoom resources. Their support center features troubleshooting guides and video tutorials focused on microphone settings. On the flip side, Teams documentation offers detailed setup instructions for various operating systems.
Both platforms also host community forums, where users can share solutions and ask questions about audio difficulties. It’s like a virtual coffee chat, but with troubleshooting tips! Regular updates and training courses keep users informed about new features and best practices. For personalized help, don’t forget about customer support, who can guide you through microphone configuration. So, plunge into it—there’s plenty of support ready for you! Just like LED lighting solutions can save up to 85% on energy consumption, optimizing your audio settings can significantly improve your virtual meeting experience.
Frequently Asked Questions
How to Use an External Microphone With Zoom?
To use an external microphone with Zoom, one must adjust microphone settings after connecting via USB connections. By ensuring proper configuration, they can enhance audio quality, leading to clearer communication during meetings and discussions.
Why Is Zoom Not Recognizing My External Microphone?
Zoom may not recognize an external microphone due to common connection issues or software settings review. Microphone troubleshooting tips include ensuring a secure connection, checking audio settings, and ensuring drivers are updated and active.
How to Get Teams to Recognize Their Microphone?
In the grand theater of virtual meetings, a user seeks the elusive harmony of Teams audio settings. By employing microphone troubleshooting tips and rigorously testing audio input, vivid clarity might finally echo through the digital abyss.
How to Set up a Microphone for a Zoom Meeting?
To set up a microphone for a Zoom meeting, guarantee proper microphone placement, adjust audio settings for clarity, and utilize sound enhancement features to optimize performance. Testing the microphone before the meeting is essential for effective communication.