As an Amazon Associate, we earn from qualifying purchases. Some links on this site are affiliate links at no extra cost to you. Our recommendations are based on thorough research and editorial judgment.
How to Set Up a Wireless Lavalier System for Video Recording
Setting up a wireless lavalier system for video recording is easy and fun! First, gather your components like the microphone, transmitter, and receiver. Position the receiver high with a clear line of sight for the best signal. Power it on first, then the transmitter, and don’t forget to sync them. Test the microphone to guarantee the audio is clear. Don’t overlook maintenance—cleaning and spare batteries are lifesavers. Stick around to discover more tips for mastering audio quality!
Key Takeaways
- Gather all necessary components, ensuring compatibility with your recording devices and using fully charged batteries to prevent interruptions.
- Position the receiver at a high location with clear line-of-sight and connect it to the recording device using appropriate cables.
- Power on the receiver first, followed by the transmitter, and use Automatic Frequency Selection for optimal channel clarity.
- Conduct thorough microphone tests, monitor battery levels, and perform range tests to ensure clear audio before recording.
- Regularly maintain the system by replacing batteries, cleaning components, and updating software for optimal performance.
What You Need Before Setting Up
Before diving into setting up a wireless lavalier system, it’s vital to gather some key components. First, you’ll need a wireless microphone, along with a transmitter and a receiver. These elements are the heart of your setup! Verify your wireless system is compatible with your recording device—whether it’s a camera, smartphone, or audio mixer—so you won’t face any unwanted connectivity issues. Fresh batteries or charged components are essential, as nobody wants to experience unexpected audio dropouts. Optional accessories, like a pop filter and cable organizers, can improve sound quality, making your recording sessions smoother. Keeping everything accessible during setup not only boosts efficiency but also enhances the audio captured. So, gather those pieces, and you’re ready to go!
Recommended Products

BUILT FOR LIVE: The single wireless karaoke microphone for adults with the 48kHz/24Bit UHF digital circuitry transmits encrypted signals to avoid signal crosstalk and deliver delay-free accurate sound. 15 UHF tunable frequencies in 902 - 928MHz fend against crowded spectrum conditions, available for simultaneous multiset hookup. The bodypack transmitter connects the headset/lapel singing microphone via the 3-pin mini XLR jack for free performance and pure sound, suitable for live performance.
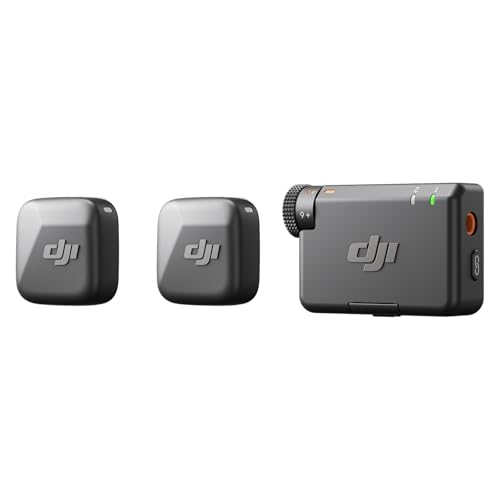
Small but Mighty - The DJI Mic Mini Transmitter is small and ultralight, weighing only 10 g, [1] making it comfortable to wear, discreet, and aesthetically pleasing on-camera.

[INCREDIBLY SMALL] Weighing just 9g, LARK M2 wireless lavalier microphone is the lightest mini microphone on the market. With its lossless sound reproduction and top-of-the-line recording capabilities, it brings you unmatched recording performance. The wireless audio transmission can reach up to 1,000ft line-of-sight range. Perfect for filmmakers, vloggers, and podcasters.
Unpack and Identify Components

Unpacking a wireless lavalier system is like opening a treasure chest, revealing a range of essential components. You’ll typically find a wireless lavalier microphone, transmitter, and receiver right away, along with antennas and power supplies. Don’t forget the necessary cables!
Confirm you choose the right type of microphone suited for your recording needs—whether it’s a lavalier or headset mic—for the best sound capture.
While unpacking, keep an eye out for extras like foam pop filters, clips, and cable organizers; these can really enhance your setup.
Finally, inspect everything for visible damage or missing parts. Familiarizing yourself with each component’s specs will help guarantee a seamless operation when you’re ready to roll. Happy recording!
For optimal audio clarity and minimal background noise, consider selecting a microphone with a high SNR rating between 60 to 80 dB.
Recommended Products

Wider Compatibility: No matter what kind of phone device you have, the wireless mini mic is compatible with android system and all the iPhone & iPad series, including iPhone 14 below and the latest iPhone 16, 17, series which is usb c port. Moreover, it can also with laptop and tablet, which is convenient for content creators to make recordings with various devices for podcasting, vlogging, live streaming and interviewing

【New Model Lavalier Wireless Microphone】: utilizes state-of-the-art Series V 2.4GHz digital transmission and proprietary , it delivers crystal-clear, incredibly stable audio with a range of up to 20m. True wireless is not restricted, it automatically pairs when turned on, no other operation is required, easy to operate, and can be used immediately, enjoying wireless freedom

Small but Mighty - The DJI Mic Mini Transmitter is small and ultralight, weighing only 10 g [1], making it comfortable to wear, discreet, and aesthetically pleasing.
Install the Receiver and Antennas

Setting up the receiver and antennas is like laying the groundwork for a successful performance. Place the receiver high, with a clear line of sight to the wireless microphones, to boost signal reception and dodge interference. Don’t forget to extend and secure the antennas—this really helps with stability! Connect the receiver to your sound system or recording device using the right cables, like 3.5mm or XLR. It’s smart to test the receiver’s placement before the big moment, ensuring nothing blocks that precious signal. Oh, and a quick tip: use cable organizers to keep everything neat and tidy. That way, you’ll avoid any “oops” moments with accidental disconnections. Remember, a happy setup leads to happy recording! For optimal performance, look for receivers that offer studio-grade audio quality at 48kHz/24-bit sampling rates.
Recommended Products


BNC amateur radio antenna connector type: BNC Male Connector; Antenna length:14.5cm; Housing: Black.

Frequency: UHF 400MHz-960MHz ; Gain: 5dBi; Feature: with Magnetic Mounting Base;
Power On and Set Frequencies

Powering on the equipment is an essential step that shouldn’t be overlooked. First, turn on the receiver, then the transmitter. This guarantees a proper sync between them. If your devices have Automatic Frequency Selection, use it! This nifty feature helps your gear find the clearest channel all on its own. If not, manually synchronize them by pressing the synchronization button on the transmitter. After that, take a moment to check the signal levels on both the transmitter and receiver. Keeping them within ideal range helps avoid audio distortion, which nobody wants during recording. Remember, maintaining a clear line of sight between the transmitter and receiver is vital. Strong signals reduce dropouts, and trust me, your future self will thank you! For optimal audio quality, ensure your system operates at a 48kHz sampling rate to capture professional-grade sound during recording.
Test the Microphone

Testing the microphone is a critical step that can set the tone for your entire recording session. To effectively test the microphone, speak directly into it at a consistent volume, ensuring that your sound levels stay steady. Don’t forget to adjust the gain settings on the transmitter; you want clear audio without distortion. While testing, plug in those headphones to the receiver for real-time audio monitoring—trust us, it’s a game changer! Check for any pesky background noise like rustling clothing or unexpected environmental sounds. Finally, perform a test recording while moving around the area to evaluate the microphone’s signal strength and clarity. This way, you can confidently capture crisp audio without any surprise hiccups. Happy recording! For optimal performance, look for a microphone with signal-to-noise ratio of at least 58 dB to ensure the clearest possible sound transmission.
Monitor Batteries and Perform a Range Test
To keep the audio flowing smoothly, it’s essential to monitor battery levels and conduct a range test before your shoot. Always use fresh batteries for both the transmitter and receiver. This guarantees peak performance, helping you avoid those dreaded audio drops. Regularly checking battery levels can save you from unexpected shutdowns, which can ruin a perfectly good take. If you’re using rechargeable systems, make sure those batteries are fully charged—no one wants to sprint halfway through a scene because of low power! To find the best coverage, walk around your recording area while monitoring audio signal strength. Oh, and don’t forget to carry spare batteries; they’re your safety net for uninterrupted recording. Consider using a cardioid pickup pattern to minimize unwanted background noise during your wireless recording sessions. Happy filming!
Pro Tips for Clear and Professional Sound
Once your gear is powered and tested, it’s time to focus on capturing that crisp and clear audio that every filmmaker dreams of. First, always carry spare batteries for your wireless lapel microphone system—trust us, you don’t want to run out mid-interview! When the mic’s not in use, mute it. This keeps background noise at bay. It’s also smart to have a wired backup ready, just in case. Regularly walk around your recording space to guarantee a strong signal; a little exercise can’t hurt! Finally, perform a furthest channel scan for ideal performance. By choosing the right channel, you’ll avoid annoying interference from nearby devices. For optimal audio clarity, ensure you’re within 200-foot operating range of your receiver when recording presentations or events. With these tips, you’ll be on your way to audio excellence!
Common Mistakes to Avoid
Many aspiring filmmakers unknowingly make a few common mistakes when using wireless lavalier systems. One big mistake? Placing the microphone too far from the performer’s mouth. This can lead to a weak and dull live audio experience. Always double-check that all connections are secure; loose connections are a recipe for audio dropouts. Sound tests are your best friend, so don’t skip them—muffled sounds can ruin an otherwise perfect scene! Additionally, regularly scan for the clearest channel to avoid interference from nearby wireless devices. And remember, old batteries are the enemy! Fresh ones are essential to prevent annoying cutouts during pivotal moments. So, keep these tips in mind for seamless audio recording and avoid being that filmmaker with the “interesting” sound! For optimal mobility during filming, choose a wireless system with 65-foot range capabilities, allowing you to move freely while maintaining clear audio quality.
Maintenance of Wireless Lavalier Systems
Maintaining a wireless lavalier system is like giving your audio equipment a well-deserved spa day. To guarantee uninterrupted performance, check and replace batteries regularly—after all, nobody wants awkward silence during recordings. Clean the mic and connectors often to get rid of dirt; a little debris can ruin your audio quality over time. For storage, pop the system in a protective case to shield it from dust, moisture, and oh-so-unfortunate accidents. It’s also essential to keep your software and firmware updated for a smoother experience. Finally, don’t skimp on routine sound tests and frequency scans. These steps are key in the maintenance of wireless lavalier systems, so your audio won’t sound like it’s from the 1980s! For optimal performance, consider using a high sampling rate microphone that can support up to 192kHz for superior sound clarity during your recordings.
Selecting the Right Wireless Lavalier Mic
Choosing the right wireless lavalier mic can make all the difference in achieving high-quality audio. For ideal performance, consider a digital system over analog, as digital often reduces noise more effectively. Go for UHF frequency systems, specifically between 470–952 MHz, to avoid interference—VHF isn’t your best friend in this case. Automatic Frequency Selection? Yes, please! It makes syncing super easy and saves you from fiddling around. If your audio setup supports it, pick a mic that runs on 48 V phantom power, which can really bump up your sound quality. Finally, double-check compatibility with your gear. You wouldn’t want a great wireless lavalier mic that doesn’t connect, right? It’s all about achieving that crisp, clear audio without the hassle! For professional-grade results, look for mics with 48kHz/24-bit audio capabilities, which deliver studio-quality sound for content creation.
Recommended Products

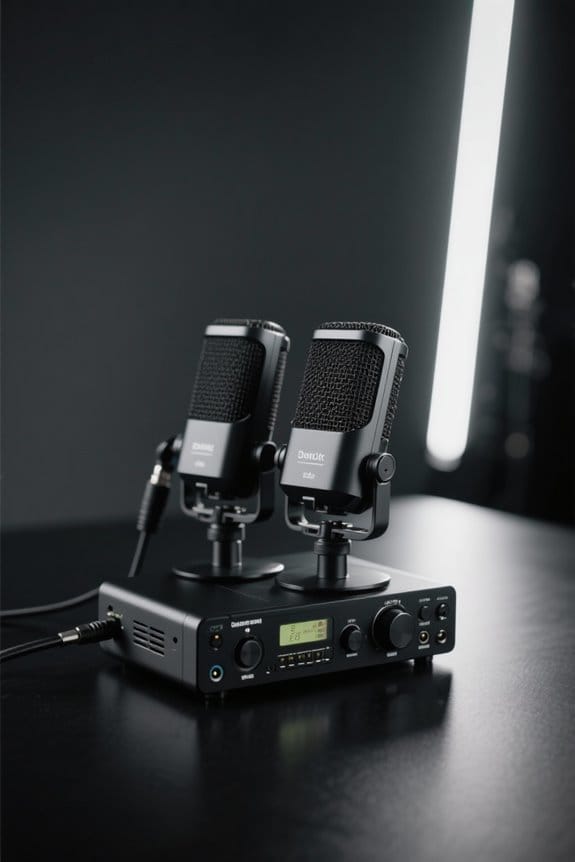
BUILT FOR LIVE: The dual wireless karaoke microphone for adults with the 48kHz/24Bit UHF digital circuitry transmits encrypted signals to avoid signal crosstalk and deliver delay-free accurate sound. 2x15 UHF tunable frequencies in 902 - 928MHz fend against crowded spectrum conditions, available for simultaneous multiset hookup. The bodypack connecting the headset/lapel mic via the 3-pin mini XLR jack and the cardioid dynamic singing microphone render liberate performance and pure sound.

Clear & Pristine Sound Quality: Professional cardioid dynamic capsule eliminates background noise and howling, delivering clear, pure, and full sound; perfect for classes, church services, weddings, performances, and speeches

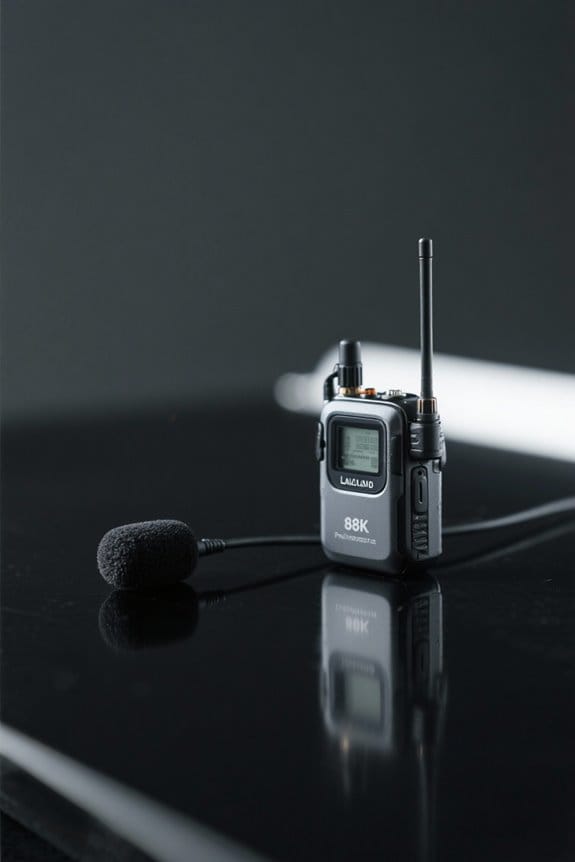
Features || Use This 500 MHz System Together with Four of Our 900 MHz Digital-Quad Systems to Accommodate Up To 20 Users || Each Channel Has Six Frequencies Available to Avoid Interference from Local TV Station || 24-Bit Digital Mic-on-Chip Technology Delivers a Clean, Professional Quality Signal || Wide Frequency Response (50-20,000 Hz) Ensures Natural Sounding Vocals || Each Channel Has a Dedicated Output and Volume Control, 1/4" Mixed Output Also Available ||
Understanding Signal Interference
In a world buzzing with gadgets and technology, understanding signal interference is essential for anyone working with wireless lavalier microphones. Signal interference can occur from competing frequencies nearby—think of all those Wi-Fi networks! To avoid this, selecting the clearest operating channel is critical during setup. UHF frequencies are the heroes here; they offer wider bandwidth and more channels, making them less prone to interference than VHF options. Remember, obstacles like walls and metal objects can degrade your signal, so keep a clear line of sight between transmitter and receiver. If you’re using a digital wireless system, you’re already ahead, as these are designed with advanced techniques to minimize interference. And don’t forget to scan for open channels regularly! Modern 2.4GHz technology helps significantly reduce lag and signal interruptions when capturing professional audio content.
Enhancing Audio Quality With Accessories
Boosting audio quality with accessories can make a world of difference when using a wireless lavalier microphone. A foam pop filter, for example, minimizes plosive sounds, while windshields or dead cats reduce outdoor wind noise. Both are essential in any microphone system setup. Using cable organizers can keep the mic cable tangle-free, preventing interference as you move around. Don’t forget the right adapters for connecting your lavalier mic to audio interfaces; they guarantee consistent power and signal. Finally, investing in high-quality batteries will save you from audio dropouts—trust me, nobody wants that mid-recording hiccup! These simple accessories can elevate your audio game and make your recordings sound more professional.
Recommended Products

Small but Mighty - The DJI Mic Mini lavalier microphone transmitter is small and ultralight, weighing only 10 g, [1] making it comfortable to wear, discreet, and aesthetically pleasing on-camera.

Ultra Compatibility: TP20 equipped with a slot that perfectly accommodate most sizes of wireless lavalier mics series like DJI Mic 1/2, Rode Wireless GO, Hollyland Lark and more. (Note: Currently not compatible with DJI Mic Mini)
Quantity of Package - Package includes 6pcs lavalier microphone clips, 6pcs foam windscreen covers and 6pcs lav mic plastic wire clips. In total of 18pcs.
Frequently Asked Questions
How to Record Wireless Lavalier Microphone?
To record with a wireless lavalier microphone, guarantee proper microphone placement on the subject, connect the receiver to the recording device, adjust audio levels, and perform a sound check to guarantee clarity and avoid interference.
How Do I Connect My Wireless Lavalier Microphone?
The connection process involves powering on the receiver and transmitter, ensuring synchronization between devices, and utilizing appropriate 3.5mm jacks to link the receiver to the recording unit, while maintaining a clear line of sight for ideal performance.
What Is One Drawback of Using Lavalier Mics?
One major drawback of lavalier mics is audio interference. Studies show that 67% of users encounter issues, where unwanted noise disrupts recordings, diminishing clarity and potentially ruining otherwise valuable content during essential moments of video production.
How to Use Lav Mic With Camera?
To use a lav mic with a camera, connect the receiver to the audio input, verify synchronization, and monitor audio levels. Consider wired alternatives if interference issues arise, providing a reliable option for consistent sound quality.