As an Amazon Associate, we earn from qualifying purchases. Some links on this site are affiliate links at no extra cost to you. Our recommendations are based on thorough research and editorial judgment.

Setting Up a Podcast Mixer: Channel Routing Explained
Setting up a podcast mixer might sound complicated, but it’s really just about a few key steps! First, connect your microphone with XLR cables for clear sound. Next, adjust the gain knobs, keeping an eye on those level meters to avoid peaking. Use AUX sends to add some fun effects, like reverb, but start low to prevent overload. Finally, monitor quality with headphones, ensuring everything sounds just right. Stick around, and you’ll uncover even more tips!
Key Takeaways
- Choose the correct input channel for each microphone, typically starting with INPUT 1 for the primary mic.
- Set gain knobs appropriately to achieve a clear signal without background noise, using level meters to guide adjustments.
- Utilize AUX sends for routing audio to effects processors, starting with lower levels to maintain mix clarity.
- Monitor individual channels using solo buttons and headphone features to ensure optimal audio quality before recording.
- Confirm audio routing to main outputs or sub-mixes for effective broadcasting, ensuring all channels are properly balanced.
Understanding Channel Routing Basics
When diving into the world of podcast mixer setups, understanding channel routing basics can feel a bit overwhelming, but it doesn’t have to be! A mixer’s channel strip provides essential controls, including the gain knob, which adjusts the input level for each channel. This is where the magic begins. For instance, the RØDECaster Pro II offers nine inputs for connecting microphones or devices. These inputs can be assigned to specific faders, enabling users to control individual levels effortlessly. Typically, the first three tracks handle main mix groups like Drums and Vocals, streamlining your workflow. By organizing these elements effectively, creators can guarantee peak volume control and clarity in their audio productions, making the mixing process a breeze rather than a headache. Using a quality microphone stand with adjustable tension controls helps maintain consistent audio levels during recording sessions.
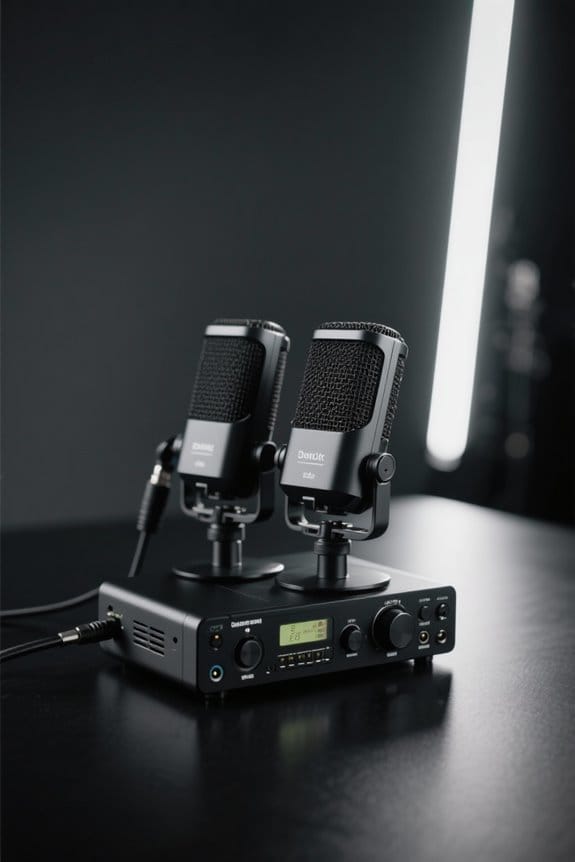
Connecting Your Microphone

Connecting a microphone to a mixer is an essential step in any podcast setup, and it can be straightforward with the right approach. Start by using an XLR cable, as it delivers superior clarity and can support phantom power for condenser microphones. Select the correct channel input—typically INPUT 1 for your primary mic. Next, adjust the gain knob to set the input level, ensuring your audio signal is clear without background noise. Don’t forget the solo button; it lets you monitor the mic input effectively, keeping an eye on those red lights that signal peaking. Finally, confirm that your microphone’s audio signal is properly routed to the main outs or any desired sub-mixes for effective broadcasting. For optimal recording quality, consider an interface with zero-latency monitoring capabilities to prevent audio delays and echoes during your session.
Recommended Products

[XLR Mic Input] One XLR microphone input interface is set on the gaming audio mixer, which is great to up your audio quality with your XLR setup. The XLR mixer is a stepping stone to upgrade your live streaming. Audio mixer offered built-in 48V phantom power which opens up more choices for mics. Directly use it with your condenser microphone but do not solve added peripherals. (NOT available for USB mic)

[4-Channel Design] Featured four individual control channels, the gaming mixer can be individually adjusted different devices. You will gain a improved using experience via push the volume fader.

This sound card is not compatible with 48V dynamic microphones or USB microphones. It only supports XLR microphones. (Note: Connecting an XLR microphone requires a 1/4" TRS to XLR cable, which is available as part of a promotional offer and must be added separately.)
Setting Up Input Levels

Adjusting input levels is an essential part of ensuring that a podcast sounds its best. Set the gain knob for each microphone input to achieve clear audio, avoiding excessive background noise. Use the level meter to check for peak performance—if those lights hit red, it’s time to dial it back! For dynamic microphones, XLR cables work best, while condenser mics need 48V phantom power for clarity. Keep volume faders “at unity” (0 dB) for balance, and don’t forget to unmute channels to hear what’s going on. Regularly monitor those input levels to prevent distortion, adjusting faders as needed. And remember, the mute button is your friend—don’t worry, it won’t judge your podcasting quirks! Consider using frequency analysis tools to identify and address any problematic audio frequencies in your recordings.
Recommended Products

【5-Channel Mixer with Multiple Inputs】3 combo XLR/6.35mm inputs for microphones or guitars, plus 6.35mm (L/R) and RCA (L/R) stereo inputs for CD players, keyboards, or computers. Connect up to 5 audio sources at once—ideal for small bands, podcasters, and karaoke setups that need to switch between mics, instruments, and background music without re-plugging cables.

[Balance Game/Chat Audio] Game:Voice balance on the PC gaming microphone lets you easily adjust the audio ratio of game to voice chat. Balance how much game sound and voice chat you want to hear, seamlessly shifting between immersion and strategy. Dial up the game audio to catch footsteps and rustling to lock the position of enemy for a competitive edge. When you stand apart from your squad, turn up the chat ratio to clearly hear the direction your teammate pointing for quicker reaction.

[Versatile Gaming Set] Enhance your gaming setup with the gaming equipment bundle, which includes dynamic microphone and gaming audio mixer. Streaming microphone for PC gaming is guaranteed to keep clear and smooth communication during the game playing and convey accurate information. Simple control of the gaming audio mixer allows you to adjust the pace of the game or live streaming.
Utilizing AUX Sends for Effects

AUX sends can be a game changer for podcasters looking to enhance their audio. By routing audio from multiple channels to an external effects processor, podcasters can layer effects during live recordings. Each channel typically has an AUX knob, letting you control the volume level sent to that processor. When starting out, it’s wise to set those AUX sends lower, avoiding overloads and muddiness in your mix. This allows for subtle additions like reverb or delay on vocal tracks, enriching the final product without disrupting the main mix. Don’t forget to properly route the return signals back into the mixer, ideally using dedicated return channels for enhanced control. After all, clarity is key—just like remembering to press record! For optimal vocal recordings, maintaining a signal-to-noise ratio of at least 96 dB will help ensure professional-grade audio quality during effects processing.
Recommended Products

Rugged, Metal Chassis & Exquisite Panel on 2 Sides

Professional DSP Audio Processing with 4-Level FBX Suppression: Built-in professional DSP sound engine delivers clearer vocals, richer music detail, and more immersive audio. The 4-level FBX feedback suppression system eliminates feedback instantly, allowing stable and distortion-free microphone performance in any environment.

Testing Audio Quality

Testing audio quality is essential for creating a polished podcast, and it starts with some careful listening. Podcasters need to connect with their audience, so whether monitoring on smaller speakers or larger reference ones, testing helps guarantee the best output level. Check individual channels using the headphone monitoring feature and the ‘PFL/SOLO’ button. This way, you can catch background noise before it ruins your recording. Adjust gain levels, keeping a close eye on indicator lights; if they’re turning red, that’s a definite sign of distortion. A/B testing different EQ settings while listening to playback will help you discover the perfect balance for vocals. Remember, even small changes in level can make a big difference in your podcast’s overall audio quality. For optimal monitoring clarity, consider using dimmable LED lights that can be adjusted from 10% to 100% brightness to reduce eye strain during long mixing sessions.
Recommended Products

[WELL-BALANCED SOUND] Large 50mm unit drivers featured on the wired headphones deliver dynamic bass, stable mids and accurate treble. Worked with 20Hz~20kHz frequency range, the FIFINE studio headphones is ideal for music lovers that presents brilliant experience enjoyment in DJ, mixing, monitoring or listening to music, and allows you to better understand your own voice when recording monitoring.

Studio-Grade Sound – 40mm drivers deliver deep bass, clear mids, and crisp highs for DJing, studio recording, mixing, and monitoring.

HI-FI SOUND: UPGRADED Professional DJ headphones MAONO MH601 is built-in 50 mm large aperture driver, for immersive sound, which can bring you better listening enjoyment. Exceptional clarity throughout an extended frequency range, with deeper, accurater bass response. Soft and comfortable close back ear pad reduce background noise to a certain extent, makes you focus on what you want to hear
Managing Outputs for Clarity
When it comes to managing outputs for clarity, podcasters should embrace versatility, especially with modern equipment like the RØDECaster Pro II. This mixer offers ten audio outputs, allowing for diverse routing options. By accessing the sub-mix settings, creators can control channel inputs and tailor their audio outputs to meet specific needs, all while maintaining balanced audio. Each input can be independently adjusted, ensuring peak clarity. The ‘Main Mix’ output uses levels from the main mixer faders, while the clever ‘Mix-Minus’ setup prevents feedback—an absolute lifesaver during remote interviews! Plus, the rotary encoder makes it easy to tweak levels quickly. With these features, mixing becomes a simpler, more manageable task—so go ahead, mix away! Consider using cardioid pickup patterns to minimize unwanted background noise and enhance the overall recording quality.
Recommended Products

【Sound Board for 3.5mm/Xlr/48V Dynamic Microphone】No complicated setup required! Just plug the live sound card into your PC, Mac, or mobile device, and start streaming or recording right away. This podcast equipment kit is designed to make your audio experience seamless and easy.

Essential Kit for Streaming Setup: MAONOCASTER G1 NEO is the essential gear for gamers and up-and-coming streamers diving into the world of gaming streaming. This gaming mixer not only delivers outstanding sound performance but also integrates customized sound effects and captivating RGB lighting to immerse you in gaming or streaming. Its compact design and user-friendly interface provide an enjoyable and easier gaming experience, making it easier for you to achieve victory

【Audio device connection】The 4 Channel Audio Mixer is features USB audio interface, XLR, and 6.35mm jack, with a+48V phantom power button for microphone/line/guitar/bass/keyboard input. All channels support 3-channel equalizer, ultra-low noise, simple functionality, suitable for professionals and music enthusiasts.(Note: Condenser Mics Require +48V Phantom Power).
Tips for Maintaining Audio Consistency
How can podcasters guarantee their audio sounds great across different episodes? One effective method is to establish a consistent mixing template that streamlines the mixing process while enhancing audio quality. Proper channel routing is vital; designate tracks for vocals, instruments, and sound effects for better audio management. Regularly testing mixes on various speaker sets—yes, even that old boom box—helps confirm sound quality translates well across different environments. Consider using a dynamic microphone setup like the Shure MV7X for superior voice isolation and minimal background interference. EQ adjustments are essential for rolling off unwanted frequencies, guaranteeing clarity. Meanwhile, volume faders should be used to achieve unity gain, maintaining a balanced mix without overwhelming any individual track. By following these tips, podcasters can enjoy smooth, professional-sounding episodes that keep listeners coming back. So, dial it in!
Frequently Asked Questions
How to Set up a Mixer for a Podcast?
To assemble a podcasting masterpiece, consult a mixer connections guide, focus on microphone setup tips, guarantee audio interface compatibility, and employ headphone monitoring strategies, alongside essential mixing techniques, for peak sound quality and listener engagement.
What Is Routing in a Digital Mixer?
Routing in a digital mixer involves directing audio signals through channel strips, allowing control over signal flow. Users manipulate EQ settings and mixing techniques to customize audio outputs, enhancing overall sound quality and creativity within audio interfaces.
How Many Channels Does My Mixer Need?
A mixer requires at least four channels to meet podcast requirements effectively. This accommodates various channel types and input considerations. Brands like Behringer and Yamaha provide essential mixer functionalities for quality digital audio production.
What Is the Basic Audio Routing?
Basic audio routing involves directing audio signals through various mixer types, adjusting microphone levels for clarity, and ensuring ideal sound quality. This process culminates in a balanced stereo output essential for effective podcast production.