As an Amazon Associate, we earn from qualifying purchases. Some links on this site are affiliate links at no extra cost to you. Our recommendations are based on thorough research and editorial judgment.

How to Configure Phantom Power Settings Safely
To configure phantom power safely, always start by lowering audio gains and volumes. Connect your condenser mic using a standard XLR cable, then activate the +48V phantom power on your interface or mixer. Wait a moment for the audio to stabilize before testing. Remember to turn off phantom power before disconnecting the mic to avoid those pesky loud pops. With just a few simple steps, you can keep your gear safe and sound, and there’s more to explore!
Key Takeaways
- Always lower audio gains and volumes before activating phantom power to prevent loud pops.
- Use a standard XLR cable for connecting the condenser mic to the power supply.
- Activate phantom power by enabling the +48V option on your audio interface or mixer.
- Wait a few moments after activation for audio stabilization before conducting a sound check.
- Turn off phantom power before disconnecting microphones to avoid damaging audio transients.
Understanding Phantom Power Basics
Phantom power plays an essential role in the world of audio recording. It’s a positive voltage—typically +48 volts DC—that powers condenser mics through the XLR connectors. The cool part? This power is “phantom” because it’s invisibly sent alongside your audio signals, no extra cords required. Many condenser microphones thrive on this electricity, while dynamic mics? Not so much—they’re like the low-maintenance friends who need nothing. Phantom power‘s voltage can legally range from 12 to 48 volts, with some mics happily operating between 9 and 52 volts. Just remember, disconnecting a mic while the power’s on can cause nasty pops that’ll make your ears cringe. So, always switch it off first—no one wants audio drama! For optimal performance, most modern phantom power supplies deliver a reliable 48V output that ensures consistent microphone operation across various recording scenarios.
Compatibility Check for Microphones

When diving into the world of microphones, how can one be certain everything’s compatible? First, it’s crucial to verify that the condenser microphones in question are designed to operate with phantom power. This power is needed for those with built-in electronics. Pay attention to voltage requirements; many models work within 9-52 volts, but standard phantom power usually delivers +48 volts ±4 volts DC. Also, check if your audio interface or mixer has phantom power capability, as not all do—some might even require an external supply. Finally, tread carefully with dynamic and ribbon mics, as the latter can be damaged if phantom power is mishandled. Similar to how 50,000 hour lifespan ensures longevity in LED fixtures, proper power management extends your microphone’s durability. Always refer to the manufacturer’s specs before connecting; it’s your best bet for compatibility!
Recommended Products

Delivers reliable 48V phantom power for condenser microphones and transfer sound signal to sound card in a compact, durable, plastic housing.

[Sturdy Material and Easy To Carry] The 48V phantom power is made of metal material, compact and sturdy construction, can accompany you to attend both indoor recording and outdoor performances.
Step-by-Step Configuration Process

Setting up phantom power might sound intimidating, but it’s easier than you think! Start by making sure all audio gains and volumes are turned down. This helps prevent damage to your speakers—and your ears, too! Next, use a standard XLR to XLR cable to connect your condenser mics, as other types won’t work properly. After plugging in the mic, activate the phantom power by switching on the 48v option on your audio interface or mixer. Wait a moment for stabilization before diving into your sound check. And remember, always turn off phantom power before disconnecting the microphone to avoid those heart-stopping loud pops. With this step-by-step process, you’ll be rocking your audio setup like a pro in no time! Unlike passive direct boxes, phantom-powered equipment requires an external power source for optimal performance.
Recommended Products

IN THE BOX: 10-foot XLR male to female microphone cable for XLR-compatible PA systems, speakers, and other sound equipment

Professional Audio Quality: Our XLR microphone cable is expertly crafted for use with professional microphones and recording equipment. Featuring high-quality 3-pin XLR connectors, this XLR cord ensures exceptional sound quality, making it ideal for studio and live recording environments

PROFESSIONAL SOUND QUALITY: With its omnidirectional feature, 2kΩ ohms± 30% output impedance, professional sound quality, this condenser mic delivers crisp and clear vocals without huffing making it ideal for any voice audio and speech application.
Safety Precautions During Setup

Before jumping into any electrical setup, it’s smart to remember a few safety tips that can save both gear and eardrums. First, always lower gains and volume levels before engaging or disengaging phantom power; this prevents loud pops that could damage your equipment. Wait a bit for phantom power to stabilize before disconnecting a mic, as this avoids potential electromagnetic interference. Hot swapping microphones? Just don’t do it—keeping phantom power on while connecting or disconnecting can create damaging transients. Ribbon mics are particularly sensitive to phantom power mishaps, so get familiar with their specific requirements. Finally, regularly check those high-quality XLR cables to guarantee consistent performance and avoid sound degradation. It’s all about keeping the vibes smooth! Using 480 Mbps data transfer cables ensures reliable signal transmission and helps maintain audio quality during recording sessions.
Identifying and Monitoring Issues

Steering through the world of phantom power can feel like tiptoeing through a minefield—one wrong step, and the audio experience could blow up! Before activating this external power, always turn down all gains and volumes to dodge loud pops that can damage your gear. After connecting a microphone, monitor those audio levels closely to catch any sudden loud noises. You’ll need a moment of patience too—waiting a few seconds after turning on phantom power helps stabilize the audio. Remember, while most condenser microphones can handle phantom power just fine, ribbon microphones are a whole different ball game. They’re sensitive to voltage imbalances, so check your gear’s specific requirements to avoid costly mistakes! For optimal performance with dynamic microphones like the Shure SM7B, ensure you have adequate gain of at least 60dB available.
Recommended Products

Pro performance with great pre-amps - Achieve a brighter recording thanks to the high performing mic pre-amps of the Scarlett 3rd Gen. A switchable Air mode will add extra clarity to your acoustic instruments when recording with your Solo 3rd Gen
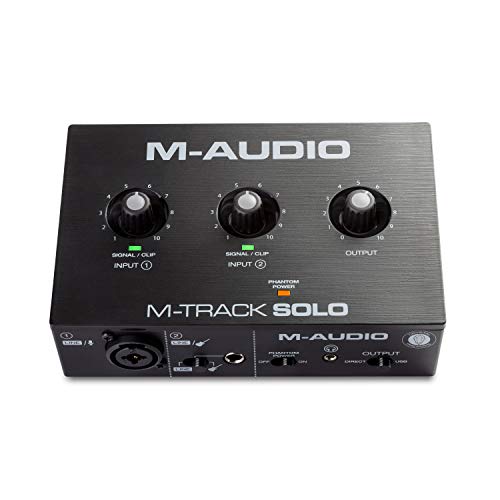
Podcast, Record, Live Stream, This Portable Audio Interface Covers it All - USB sound card for Mac or PC delivers 48kHz audio resolution for pristine recording every time
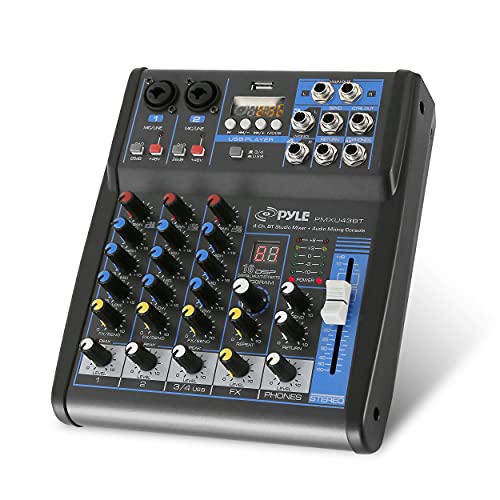
USB/FLASH READER/MP3 COMPATIBILITY - Connect your external USB, computer PC, flash drive or Bluetooth device to mix & record. Use the built-in controls to play/pause, skip tracks and switch between modes.
Troubleshooting Common Problems
After ensuring everything’s set up right, problems can still pop up when using phantom power. If you hear loud pops when connecting or disconnecting a microphone, turn down all gains first. It’s a good idea to wait a few moments after turning on phantom power to stabilize the system before disconnecting anything. Ribbon microphones are particularly sensitive to phantom power and can be damaged easily; handle them with care! Also, if you apply phantom power to dynamic microphones, watch for extra hum or noise—though they usually won’t get hurt, they might not perform well. Always check your microphone’s specifications to avoid performance issues. Remember, safety first, and troubleshooting doesn’t have to be scary! For optimal signal quality, consider using a balanced to unbalanced converter to minimize interference and maintain audio clarity.
Recommended Products

Bi-Directional RCA & XLR Converter: Seamlessly transforms RCA (unbalanced) to XLR (balanced) and XLR to RCA. It's the perfect solution for bridging consumer Hi-Fi gear with professional audio equipment, in either direction.

Thicker metal shell: This RCA to XLR cable plug features a sturdy, thickened metal shell to provide optimal durability and long-lasting performance even in the most demanding environments

RCA to XLR Conversion: The HUALEU RCA to XLR Cable is designed to convert XLR output interfaces from audio mixers or players to RCA female connectors. Easily connect to power amplifiers or active speakers for seamless audio transmission
Best Practices for Phantom Power Management
When managing phantom power, simple precautions can make a big difference. Always turn off phantom power before plugging in or unplugging condenser mics; the loud pops can seriously damage your gear. When you do activate phantom power, make sure the microphone is securely connected first, or you’ll risk audio mishaps. Lower all gains and volumes before flipping that phantom power switch—sudden loud noises may surprise you and your speakers! After turning it on, give it a moment to stabilize for peak performance. Last but not least, keep your microphone’s manual handy. Different models have unique power needs, and knowing them prevents potential risks. Trust us; your equipment will appreciate the extra care! Just like a dual monitor mount provides stability for screens, proper phantom power management ensures stable audio performance throughout your recording sessions.
Frequently Asked Questions
Is It Bad to Leave Phantom Power on All the Time?
Leaving phantom power on all the time can be risky for certain microphone types, like ribbon mics. While condenser microphones generally tolerate it, doing so may lead to damaging pops or accidents with equipment.
How to Protect Against Phantom Power?
To protect against phantom power, one should understand phantom power basics, guarantee all equipment is turned off when connecting microphones, and use high-quality cables, prioritizing microphone safety to prevent damage to sensitive models.
What Not to Do With Phantom Power?
Over 30% of audio professionals have reported microphone damage due to improper phantom power use. To prevent connection issues, always disconnect mics before switching on phantom power and never use it with ribbon microphones.
Can Too Much Phantom Power Hurt a Mic?
Excessive phantom power usage can indeed harm a microphone. Ensuring microphone compatibility with the specified voltage range, typically 9-52 volts, is essential to prevent potential damage and maintain ideal performance in audio applications.