As an Amazon Associate, we earn from qualifying purchases. Some links on this site are affiliate links at no extra cost to you. Our recommendations are based on thorough research and editorial judgment.

Proper Gain Structure: How to Set Recording Levels Correctly
Setting proper gain structure is crucial for clear recordings. Aim for input levels between -18 dB to -12 dB in your DAW, keeping meters in the yellow zone—clipping is a party crasher! Position your faders near zero dB for smoother adjustments, and monitor levels continuously to catch any unwanted spikes. Remember, using quality gear like a HyperX SoloCast can really help. If you thought that was all, there’s even more to improve your audio success!
Key Takeaways
- Aim to set preamp gain between -18 dB and -12 dB in your DAW for optimal recording levels.
- Use the console meter to maintain levels in the yellow zone, avoiding clipping in the red zone.
- Continuously monitor gain and adjust during loud performances to ensure consistent audio quality.
- Keep faders close to the zero dB mark for smoother adjustments and better clarity in your mix.
- Regularly review recorded audio levels and use tools like compressors to maintain mix integrity.
Understanding Gain and Its Function
When it comes to audio, understanding gain and its function can seem a bit tricky, but it doesn’t have to be. Gain amplifies a microphone’s weak signal to line level, which sound consoles and PA systems need to work correctly. The ideal input levels should sit comfortably within the yellow zone of the meter. If signals are too weak, it compromises sound quality, increasing noise and reducing dynamic range. This is where proper gain structure must come into play. Continuously monitoring gain while performing allows for real-time tweaks, keeping the signal in check and avoiding the dreaded red zone that warns of distortion. A good grasp of gain helps maintain the integrity of audio throughout recording and mixing. For optimal monitoring accuracy, a signal-to-noise ratio exceeding 80 dB helps minimize distortion during the gain staging process.
Setting Gain: Practical Steps and Techniques

Setting the gain correctly is essential for achieving the best audio quality possible. First, connect the microphone and check its functionality. An audio engineer should use the console meter to gauge input gain. Gradually increase the gain until the meter peaks in the yellow zone—avoid the red zone to prevent distortion, like avoiding a bad hair day. While performing or speaking at your loudest, fine-tune the gain for consistent recording quality. Keep an eye on meter readings throughout the audio path to verify all components stay within ideal levels. Remember, proper microphone placement enhances sound capture, leading to clear recordings. So, keep the signals strong but not clipping, and your listeners will thank you! Zero-latency monitoring capabilities found in modern podcast microphones allow you to make real-time adjustments to your gain settings with confidence.
Recommended Products

Round-table ready: record up to four microphones at once with Discrete, studio-grade preamps and up to +75 dB of clean gain for clear voices and plenty of headroom.

Get everything you need in one box, and start recording straight away
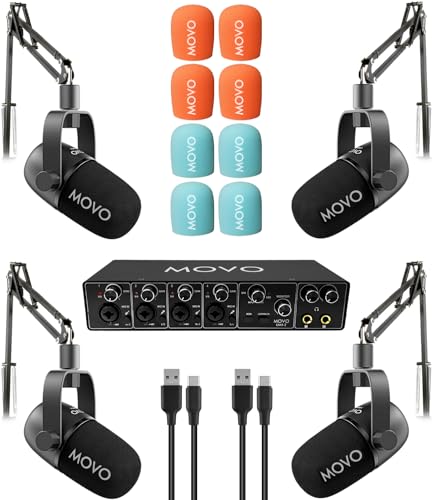
COMPLETE 4-PERSON PODCAST KIT – Everything you need to start recording with a team: UMX-2 4-channel USB audio interface, 4 CastMic dynamic microphones, and 4 tabletop stands. Unbox and start podcasting in minutes.
Common Pitfalls and Mistakes in Gain Setting

A common mistake in gain setting occurs when audio engineers rely too heavily on their ears rather than using meter readouts. Overestimating gain levels can easily lead to distortion, ruining a recording’s quality. It’s important to aim for the yellow zone on meters and avoid that pesky red zone. Some may think low fader positions are harmless, but they can cause wild fluctuations during adjustments—definitely not ideal. Additionally, ignoring meter feedback can result in clipping, which we all know is a party crasher. Last but not least, if the noise floor isn’t addressed, you’ll amplify annoying background sounds. Remember, avoiding these common pitfalls is essential for achieving proper gain structure in recordings. It’s all about balance! Modern amplifiers maintain excellent clarity with a signal-to-noise ratio exceeding 100dB, making proper gain structure even more critical for optimal audio performance.
Recommended Products

【Core Performance】350 MHz mixed signal oscilloscope with 4 analog channels + 16 digital inputs (LA probe required), up to 8 GSa/s (single‑channel) and standard analog memory 100 Mpts (single‑channel) for fast edges and long captures.

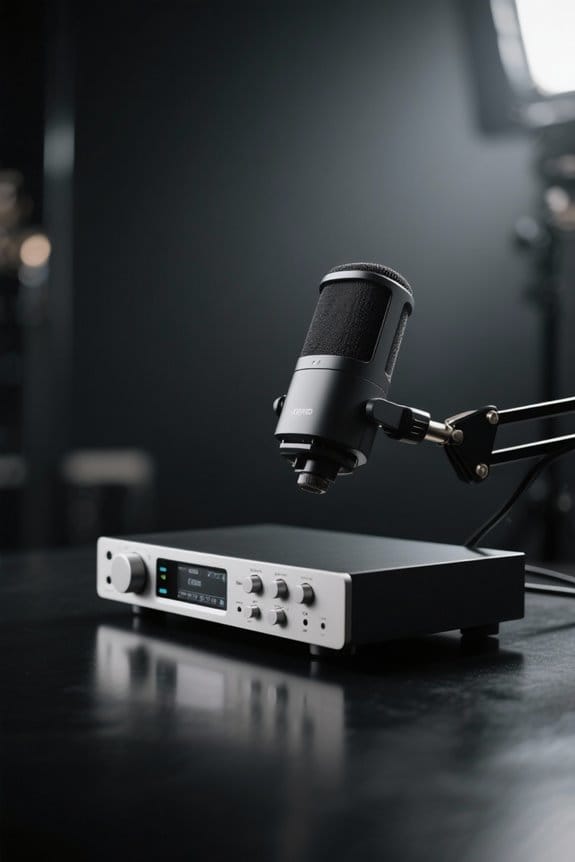
All In One: Music Streamer,DAP,DAC,Preamp all in DMP-A8, Each one of these jobs, it's up to the task. It will be a great component to your audio system. Easy control via 6" large LCD color touchscreen and Exclusive mobile APP for Android/IOS mobile phones and tablets.

AI-ENHANCED BUSINESS VERSATILITY - Designed for modern professionals, the HP EliteBook X Flip G1i Next Gen AI PC builds on the premium Elite x360 1040 heritage while bringing on device AI into everyday work. With Intel AI Boost and an advanced NPU delivering up to 48 TOPS, it enables responsive AI experiences for collaboration, multitasking, and efficiency. Long battery life with fast charging supports all day productivity. A 360-degree hinge enables four versatile modes: Laptop for everyday tasks, Yoga for easy sharing, Flip for hands-free viewing, or Tablet for intuitive touch interaction. HP Wolf Security provides always on, hardware enforced protection for secure business mobility.
Strategies for Optimizing Fader Levels
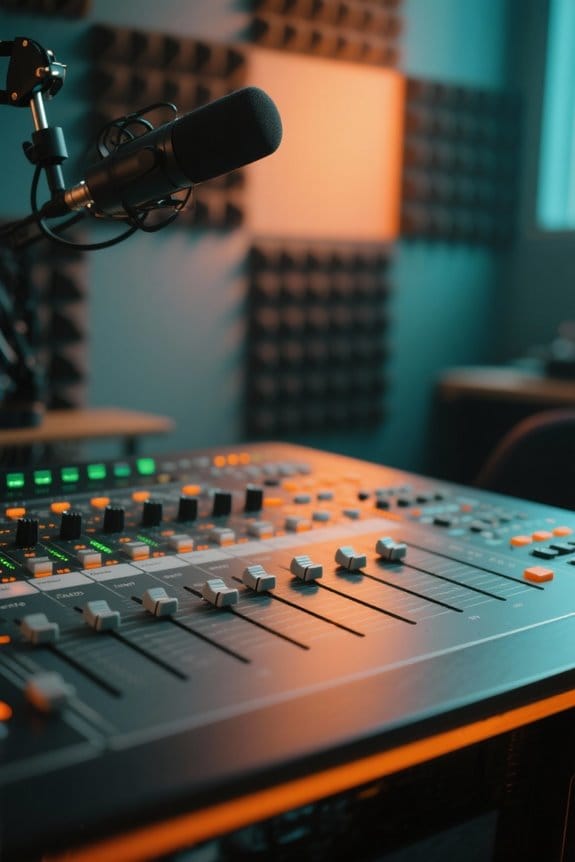
How can one achieve the perfect balance with fader levels? Keeping faders near the zero dB mark is key. This allows for smoother adjustments without dramatic volume jumps. You can also use subgroups or buses to manage levels across similar channels, helping maintain a balanced overall mix. By adjusting subgroup faders, individual faders can stay close to unity gain. This stable foundation is essential for mixing success. Fine-tuning individual fader levels related to subgroup settings enhances clarity, making your mix shine. Remember to regularly monitor those fader positions, as stray adjustments can lead to distortion and poor sound quality. After all, no one wants their masterpiece to sound like a hot mess! Using a recorder with HD 3072kbps recording capability ensures the highest quality audio capture during the mixing process. Happy mixing!
Recommended Products

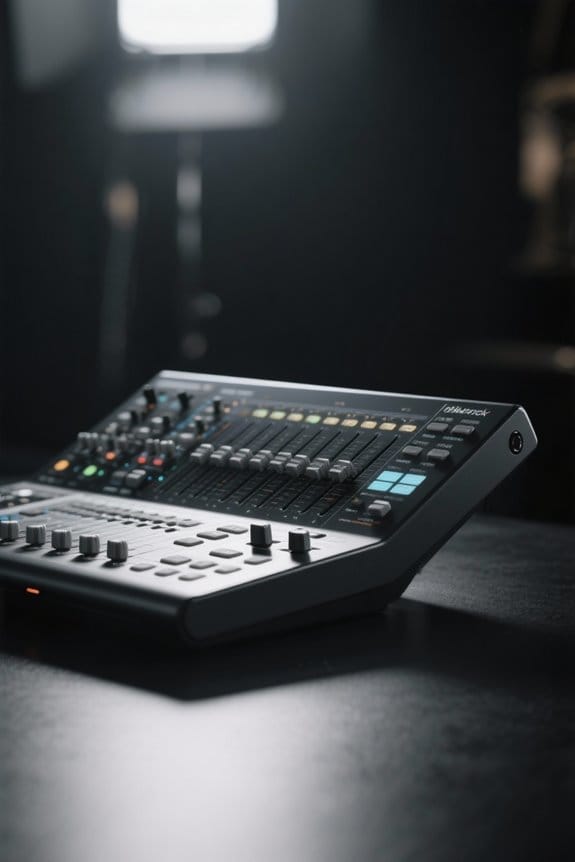
32 (16 - Si Expression 1, 24 - Si Expression 2) mono mic inputs

48 Input Channels, 36 Total Busses, PAFL Bus, 12 Stereo Mix (Aux or Group) + Main

STUNNINGLY CLEAR SOUND QUALITY - The DJM-A9 has been upgraded with stunningly clear sound quality, giving you the edge when it comes to taking your performances to the next level.
The Importance of Mastering Gain Staging

While it might seem like just a technical step in the audio process, mastering gain staging plays an essential role in achieving a polished sound. Proper gain staging guarantees audio signals stay at ideal levels, ideally between -18 dB and -12 dB in the DAW. Think of it like baking: too much heat can ruin the cake! By maintaining proper preamp gain, engineers enhance clarity and preserve background noise control. This balanced approach keeps signal levels steady, allowing each audio element to shine in the mix. Monitoring headroom helps prevent peaks that might lead to unwanted distortion. Utilizing tools like compressors protects mix integrity during dynamic moments, guaranteeing that every note sings beautifully. So, let’s keep those levels in check! Modern USB microphones like the RDE NT1 microphone offer ultra-low self-noise capabilities that make proper gain staging even more effective.
Clipping: What You Need to Know
Knowing the ins and outs of clipping is essential for anyone involved in audio production. Clipping happens when the audio signal pushes past the maximum level that can be captured, leading to distortion that sounds harsh and gritty. Ouch! Healthy recording levels should target around -24 RMS, giving you a good foundation. To keep clipping at bay, aim for peak levels around -6 to -3 dB. Remember, true peaks should never hit 0 dB. Maintaining ideal gain structure throughout the recording process is vital. Consistently monitoring levels will help you avoid that pesky distortion, ensuring the clarity and fidelity of your recordings. With a little care, you can capture the sound exactly as you want it—without the unwanted surprises! Using an interface with zero-latency monitoring capabilities allows you to catch potential clipping issues in real-time during your recording sessions.
Low Recording Levels and Their Impact
Low recording levels can be a sneaky enemy in the audio production world. When levels drop to around -30 dB RMS, it often leads to increased background noise, which nobody wants. Recording at low levels raises the risk of amplifying environmental sounds during post-processing, making the audio muddy. Plus, if you boost those low recording levels later, you might introduce distortion or unwanted artifacts. To guarantee a good starting point, aim for approximately -24 dB RMS—this is where clarity shines. Metering techniques are vital; always monitor your peak levels. Remember, it’s better to gain until you see the indicators light up instead of settling for those sneaky low levels. After all, clean sound is always the goal! Using a professional studio arm like the RDE PSA1+ with its damped internal springs can help minimize mechanical noise that might interfere with your recording levels.
Recommended Products
Up to 7000 patches can be saved in Iridium. Patches from Quantum can be loaded in Iridium and vice-versa.

For Hybrid Production in Studio & Stage, 4 Console-Grade SuperAnalogue Mic Pres

True to the original in design, manufacture, and performanceModeled after 1176LN blackface, D and E revisionsF.E.T. gain reductionPushbutton selection of compression ratios: 4:1, 8:1, 12:1, 20:1Ultrafast attack time20 microseconds to 800 microsecondsAdjustable release time50 milliseconds to 1.1 secondClass A line level output amplifierCustom-built Putnam-designed output transformerStereo interconnect operationContemporary styling and eye-pleasing industrial design
Volume vs. Gain: Clarifying the Difference
Understanding the nuances between volume and gain can feel a bit like untangling a messy ball of headphones. Gain refers to the amplification applied to an audio signal before it gets processed, while volume denotes how loud that signal sounds after mixing. Think of gain as the behind-the-scenes hero, ensuring recording levels are strong enough to minimize noise. Contrarily, volume is your show’s star, adjusted via mixer faders during the mixing phase. Maintaining a solid gain structure is key; it prevents unwanted noise and clipping later. And don’t forget to document those gain settings! Mistakes can easily compromise audio integrity. So, grasping this difference is essential for achieving recording excellence. Trust us, your sound quality will thank you! For optimal results, consider using a microphone with 24-bit recording capabilities like the HyperX SoloCast to capture the cleanest possible signal.
Best Practices for Maintaining Gain Structure
When it comes to capturing great sound, maintaining a solid gain structure can make all the difference. A good starting point is targeting RMS levels between -20 dB and -24 dB. This helps guarantee a clean mix while keeping pesky noise at bay. Use peak indicators wisely; aim for levels in the yellow zone and steer clear of the red zone to dodge distortion. Regularly check your input gains, keeping them just below clipping, and don’t forget to monitor levels throughout the mixing process. Proper microphone placement and sound checks are key for clarity. Low-level recordings can make background noise more noticeable, so keep things sounding crisp and clear. The Auto Gain feature on modern interfaces like the Focusrite Vocaster Two simplifies level setting with just a button press for optimal recording levels. Happy recording!
Recommended Products

Classic ISA mic preamp design featuring Lundahl LL1538 input transformer

DuoPre XLR Microphone preamps, including 48V Phantom power for condenser microphones and up to 69dB of gain. Each preamp uses two gain stages to provide a full and accurate sound across the entire gain range with enough power for even the most gain hungry mics.

Display: 15.6" FHD, Anti-Glare Wide View Angle 144Hz 7ms 72%NTSC | Operating System: Win 10 PRO
Frequently Asked Questions
How to Set Gain Levels for Recording?
To set gain levels for recording, one should employ gain level techniques that focus on audio level calibration. Recording best practices involve monitoring input levels, aiming for -18 dB to -12 dB while avoiding distortion.
How to Set Proper Gain Structure?
To establish proper gain structure, one should implement gain adjustment techniques, monitor levels throughout recording, and utilize recording equipment tips. This guarantees ideal audio signal processing, maintains clarity, and prevents distortion, enhancing overall sound quality.
What Is the 3 to 1 Rule When Recording?
In recording techniques, the 3 to 1 rule serves as a guiding star, ensuring ideal microphone placement. It reduces crosstalk, enhancing audio clarity by maintaining distances that promote clearer sound capture between instruments.
What Is the Ideal Gain Staging Level?
The ideal recording levels typically range between -18 dB and -12 dB, employing gain staging techniques to avoid audio distortion. Monitoring consistent peaks at -9 dB guarantees clarity and enhances overall recording quality during playback.