As an Amazon Associate, we earn from qualifying purchases. Some links on this site are affiliate links at no extra cost to you. Our recommendations are based on thorough research and editorial judgment.

Why Your Microphone Sounds Muffled and How to Fix It
A muffled microphone can be a real downer, right? Common causes include incorrect microphone positioning—aim for 6-12 inches from your mouth—and dust or debris blocking sound waves. Make sure to check your audio settings in Control Panel and update your drivers, as outdated ones can fog up audio quality. Consider investing in better gear, like high-impedance interfaces for clearer sound. And hey, if you want more tips to fix that frustrating sound issue, just stick around!
Key Takeaways
- Ensure proper microphone positioning, keeping it 6-12 inches from your mouth and aimed directly at the sound source.
- Check for obstructions like dust or thick windscreens that can muffle sound quality.
- Choose a quiet recording environment and improve room acoustics with soundproofing materials to minimize background noise.
- Regularly clean your microphone to maintain optimal performance and prevent dust buildup from affecting audio clarity.
- Update audio drivers through Device Manager, and consider investing in higher-quality equipment for enhanced sound quality.
Common Causes of a Muffled Microphone
When it comes to understanding why a microphone might sound muffled, it’s essential to contemplate several common causes that can affect audio quality. One major factor is placement; keeping the mic 6-12 inches away from your mouth usually works best. Dust and debris can also snag your sound waves, obstructing audio quality. Plus, if you’re using a windscreen that’s too thick, it might be like trying to talk through a pillow—not great! Low gain settings can flatten your sound, too. Finally, don’t forget about your environment; background noise or poor room acoustics can turn crystal-clear audio into a muddy mess. Using a cardioid pickup pattern microphone can significantly reduce unwanted background noise and improve overall sound clarity. With these insights, figuring out why your microphone sounds muffled can feel less like a mystery and more like a puzzle to solve!
Initial Troubleshooting Steps

Before diving headfirst into more complex fixes, it’s smart to start with some straightforward troubleshooting steps. First, hit the Windows key + X, and open the Settings menu. From there, navigate to Update and Security, where you can access effective troubleshooting options. Once you’re in, select the Troubleshooter, then Additional troubleshooter, and run the Speech troubleshooter. This nifty tool can help detect and fix common microphone problems. Afterward, test the microphone again—hopefully, the muffled sound is gone! Don’t forget to check the Audio settings too; incorrect configurations can lead to poor sound quality. If issues persist, it may be time to think about updating those audio drivers through Device Manager for better compatibility. Consider using a high-impedance direct box to ensure optimal signal quality and reduce unwanted noise interference in your audio setup. Happy troubleshooting!
Recommended Products

Pro performance with great pre-amps - Achieve a brighter recording thanks to the high performing mic pre-amps of the Scarlett 3rd Gen. A switchable Air mode will add extra clarity to your acoustic instruments when recording with your Solo 3rd Gen
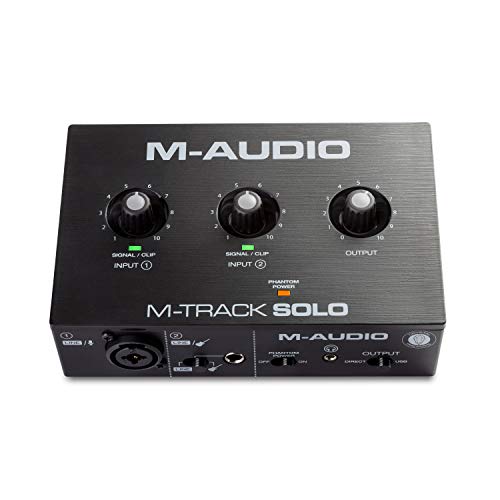
Podcast, Record, Live Stream, This Portable Audio Interface Covers it All - USB sound card for Mac or PC delivers 48kHz audio resolution for pristine recording every time

Podcast, Record, Live Stream, This Portable Audio Interface Covers it All - USB sound card for Mac or PC delivers 48kHz audio resolution for pristine recording every time
Updating Audio Drivers

Updating audio drivers is a crucial step in ensuring your microphone sounds its best. Sometimes, an outdated audio driver can lead to audio muffled and distorted sound quality, similar to trying to listen underwater. To begin, access Device Manager by pressing Windows key + X. Then, navigate to the Sound, video, and game controllers section. Right-click your installed audio driver and select “Check for hardware updates.” If the new driver doesn’t resolve the issues, you can always roll back to a previous version that worked fine. Just remember, once you’ve updated, restarting your system is essential. It’s the classic “turn it off and on again” approach, but for audio drivers, it gets the job done! Consider investing in an audio interface with zero-latency monitoring capabilities to ensure real-time feedback during your recording sessions.
Configuring Microphone Settings

Tweaking microphone settings can make a world of difference in sound quality. To begin, access the Control Panel and select the Large icons view, which simplifies finding Sound settings. In the Sound settings, head over to the Recording tab. If your microphone appears disabled, right-click it and select Enable. Don’t forget to set it as the Default Device so your computer prioritizes it for all Microphone Audio tasks. Additionally, cranking the volume slider to the maximum can help, but make sure to uncheck “Allow applications to take exclusive control of this device” for a smoother experience. After these configurations, testing the microphone in various applications is key — you might be amazed at how it shakes off that muffled microphone vibe! For optimal performance, consider using a shock mount system to minimize unwanted vibrations and handling noise during recording sessions.
Microphone Privacy Settings

After sorting out microphone settings, it’s time to contemplate how privacy may affect sound quality. First, check your microphone privacy settings in Windows. Make sure microphone access is turned on for your device. If this isn’t done, apps might struggle to detect the microphone, leading to muffled audio or silence—yikes! Also, it’s essential to check individual app permissions, so they can access your microphone too. Don’t forget to enable JavaScript if you’re using web-based apps. The right audio interface settings can provide up to 70dB of gain for crystal-clear sound quality. Once you’ve made these changes, test the microphone again to see if the audio quality improves. If things still sound off, a good old restart might do the trick. After all, even computers need a breather sometimes!
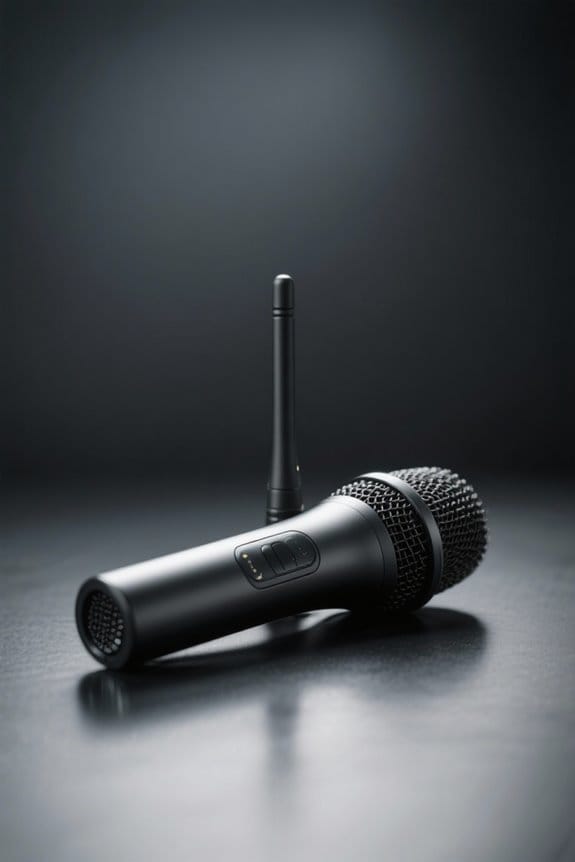
Choosing the Right Microphone
Choosing the right microphone can feel like a challenging task—like picking the perfect outfit for an important date. Understanding different microphone types makes this choice easier. Dynamic microphones shine in live performances, while condenser microphones are studio favorites because of their sensitivity and sound fidelity. For video production, shotgun microphones excel at capturing distant sounds, whereas lavalier microphones offer discretion for those in interviews. Don’t forget about polar patterns! Cardioid microphones can capture sound while minimizing background noise, a game changer for clearer audio. Choosing between wired and wireless options impacts mobility too. Wireless mics offer freedom, but watch out for potential interference. Pick wisely, and your audio will thank you! The Shure SM58 microphone has become a trusted industry standard for its exceptional vocal clarity and rugged construction that withstands the demands of live performances.
Recommended Products

[Natural Audio Clarity] Operated with frequency response of 50Hz-16KHz, the podcasting XLR mic delivers balanced audio range, likely to resonate with your audience. Directional cardioid dynamic microphone corded will not exaggerate your voice, while rejects unwanted off-axis noise for vocal originality and intelligibility during your PS5 gaming streaming video recording. (Tips: Keep the top of end-addressing XLR dynamic microphone AM8 facing audio source, and suggested recording range is 2 to 6 in.)

Enhanced Vocal Clarity: Tailored for vocal performances with a frequency response of 50Hz-15kHz, this cardioid dynamic microphone karaoke focuses on clarity and precision, making them perfect for singing and karaoke.

EXCEPTIONAL VOCAL CLARITY: This vocal microphone has a cardioid pickup pattern that isolates the main sound source while minimizing background noise and feedback, delivering clear and crisp vocal reproduction
Proper Microphone Setup and Positioning
A great microphone can only take you so far if it’s not set up properly. For the best sound, position your microphone 6-12 inches from your mouth. This range helps minimize muffling while capturing clear audio. If you’re using a directional mic, aim it directly at your voice or instrument to enhance clarity and reduce pesky background noise. Adjust the angle too; it’s key for the best recording results! Choosing a quiet space to record makes a world of difference. Trust me, eliminating background noise can be magical. Consider adding acoustic panels or soundproof curtains, which can greatly improve clarity by reducing echo and interference. Remember, no one wants to hear that suspicious cat meowing in the background! High-quality acoustic panels with NRC ratings above 0.9 offer superior sound absorption for professional-grade recordings.
Recommended Products

REDUCES NOISE INTERFERENCE– The XTUGA Microphone isolation Shield has three layers that work in tandem to reduce noise while recording. It particularly relies on ⅗ reflectors with a triangular high density thickened sponge insulator material which reduces the propagation of interference sound waves and creates perfect recording conditions that result in sublime recordings
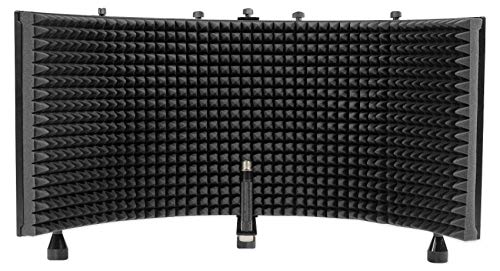
PROFESSIONAL SOUND ISOLATION: 2" high-density pyramid acoustic foam reduces room reflections for clean, studio-grade audio.

ELIMINATES UNWANTED NOISE: The Foldable Sound Recording Booth Shield features sound dampening foam that blocks unwanted sounds from your recordings. Creates an acoustic boundary around the microphone that improves vocal audio flow
Cleaning and Maintaining Your Microphone
Microphones are like delicate instruments, needing care to perform at their best. Regular cleaning is essential. Wipe the microphone’s surface with a soft, lint-free cloth to remove dirt and oils. A messy mic can be a sound engineer’s nightmare! For those tricky spots, compressed air or cotton swabs work wonders to clear dust from the ports. Don’t forget to replace pop filters and windscreens; they should be washed or replaced often to keep moisture and particles at bay. Also, store your microphone in a dry, dust-free space when not in use. Practicing routine checks helps maintain your mic’s hygiene, ensuring it continues to serve up crystal-clear audio during recordings. After all, nobody wants a muffled performance! Just like smart chip technology in power banks protects against damage, proper microphone maintenance safeguards your audio quality.
Recommended Products

32-IN-1 ALL-IN-ONE SET – One compact kit cleans your iPhone, AirPods, iPad, MacBook, keyboard, earbuds and camera lens, so you stop buying separate tools.

Phone Cleaning Kit: Designed as a top-tier iPhone cleaning kit and charging port cleaning kit, Also compatible with Android and Samsung cell phones. Equipped with specialized tools to clean USB-C/Type-C/Lightning charging ports, speakers, lenses, etc. Comes with a dedicated cleaner and brush for the screen

Miracle Spray for Electronics is the ultimate solution for keeping your screens and devices spotless—ideal for cleaning smart TVs, laptops, smartphones, tablets, monitors, touchscreens, and more. Our screen cleaning spray and ultra-soft microfiber cloth work together to lift away smudges, dust, and oily fingerprints, leaving a clear, streak-free shine on all your favorite electronics.
Enhancing Sound Quality in Various Environments
How can one guarantee the best sound quality in various environments? First, positioning the microphone 6 to 12 inches from the sound source is key to prevent a muffled sound. For that extra clarity, aim a directional microphone directly at the sound source; it really helps minimize background noise. Want to take it up a notch? Consider using soundproofing techniques like curtains or acoustic panels. This can considerably cut down on pesky ambient noise. Don’t forget that a clean microphone is essential, too—dust is its worst enemy! Finally, keep in mind that room acoustics make a difference, so opt for quiet spaces for the best results. Who knew some simple tweaks could transform your sound game? Using a reflection filter shield can eliminate up to 87% of ambient noise while preserving vocal clarity.
Recommended Products

The Microphone Isolation Shield features a sound-proof foam front and a ventilated metal back panel to eliminate noise during recording. Makes your vocal tracks that little bit clearer.(Includes desktop stand)

Suitable for Microphones: The penypeal microphone windshield is suitable for most XLR /USB microphones, condenser microphones with a removable jacket diameter between 50-75 mm.Comes with a holder for different size microhones.

♪【The package contains】♪: Microphone Isolation Shield x 1, Metal Thread Adapter x 2 (Adapt most microphones), Adjustable Stand x 1 and instruction manual. (The height of the isolation shield can be adjusted freely) *NOTE: Microphone is NOT included.
Frequently Asked Questions
How to Fix Your Mic if It Sounds Muffled?
To fix a muffled microphone, one should adjust the microphone settings for clarity, eliminate audio interference by enhancing recording environments, and make certain the microphone is clean and correctly positioned for ideal sound capture.
Why Does My Mic Sound Like It’s Underwater?
The microphone sounds like it’s underwater primarily due to improper microphone placement and incorrect audio settings. Blocked ports, high gain levels, or unsuitable equipment contribute considerably to this muffled, submerged quality during recordings.
How Do I Make My Mic Clearer?
To make a microphone clearer, one should adjust microphone settings, boost high frequencies for audio enhancement, guarantee proper positioning, regularly clean the device, and utilize a high-quality microphone to capture peak sound fidelity.
How Do I Fix My Mic Sound?
To fix microphone sound, one should adjust microphone settings and explore audio enhancements. Ensuring proper device selection, maximizing volume levels, and maintaining suitable distance from the mic will greatly enhance audio clarity and overall performance.