As an Amazon Associate, we earn from qualifying purchases. Some links on this site are affiliate links at no extra cost to you. Our recommendations are based on thorough research and editorial judgment.
Microphone Positioning Techniques for Different Voice Types
When it comes to microphone positioning techniques, knowing your voice type is key! Soprano voices shine with large-diaphragm condensers, positioned about 6 to 12 inches away. Bass voices thrive with dynamic mics, benefiting from the proximity effect. If you’re soft-spoken, moving closer to the mic helps capture every note. Don’t forget to use pop filters to catch those pesky ‘p’ and ‘b’ sounds! Stick around, and you’ll pick up more handy tips and tricks!
Key Takeaways
- Soprano voices should use large-diaphragm condenser mics positioned 6 to 12 inches away for clarity in high frequencies.
- Bass voices are best recorded with dynamic mics placed closer to enhance richness and warmth.
- Softer voices require closer mic placement (2 to 6 inches) for adequate gain and to avoid distant sound.
- Align the microphone height with the vocalist’s mouth to ensure tonal balance and reduce off-axis sound capture.
- Use pop filters 3 to 5 inches from the mic to prevent plosives while maintaining proper mic distance.
Understanding Different Voice Types
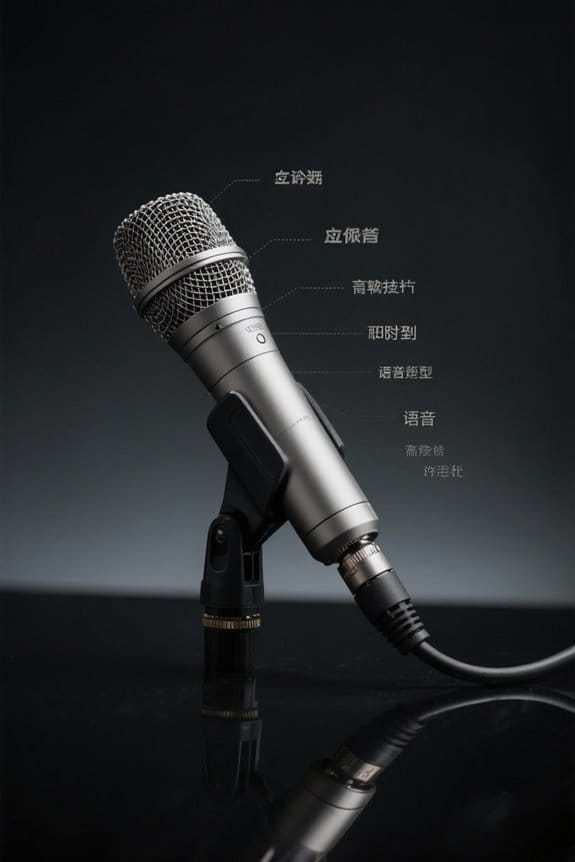
Voice types are more than just labels; they’re like unique fingerprints in the world of sound. Understanding different voice types—soprano, alto, tenor, baritone, and bass—plays an essential role in achieving ideal sound quality. Each voice has distinct tonal qualities that influence microphone placement techniques. For instance, a soprano’s bright sound might shine with large-diaphragm condenser microphones, which capture high frequencies beautifully. Conversely, bass voices often warm up with dynamic mics, enhancing their richness. Proper microphone technique is critical; softer voices may need to be closer to the mic for adequate gain, while powerful voices should stand back to avoid plosives. Finding the right distance can be a bit like dating—sometimes, you just need a little space! Professional content creators often enhance their voice recordings with shock mount systems to minimize unwanted handling noise and vibrations.
Microphone Types Best Suited for Vocal Recording

Choosing the right microphone can feel a bit like shopping for a pair of shoes—it’s all about finding the perfect fit! For vocal recording, three main microphone types shine. Dynamic microphones are tough cookies, ideal for live gigs, as they handle high sound pressure and isolate vocals nicely in noisy spaces. On the flip side, condensers require a bit of power but excel in studio settings, capturing every delicate note. They’re the go-to for those softer voice types. Don’t forget ribbon microphones! They deliver warm sounds but need gentle handling. The mic placement and type you pick can transform a good recording into a great one. So, whether you’re belting out notes or whispering secrets, choose wisely! A quality microphone with noise cancellation features will significantly enhance your audio clarity by reducing unwanted background sounds during recordings.
Recommended Products

Custom three-capsule array: This professional USB mic produces clear, powerful, broadcast-quality sound for YouTube videos, Twitch game streaming, podcasting, Zoom meetings, music recording and more

Clear Sound: Equipped premium chips and core, coupled with expert tuning, resulting in a pure, clean sound, providing high-fidelity reproduction that ensures a smooth and precise communication for your team.

[Convenient Setup] Plug and play recording USB microphone for PC, with 5.9-Foot USB cable included for computer PC laptop, is connected directly to USB-A port for recording music, computer singing or podcast. The office condenser microphone for computer is easy to use and install. (NOT compatible with Xbox and Phones)
Polar Patterns and Their Impact on Vocal Sound

Microphone polar patterns play an essential role in capturing vocal sound effectively. Cardioid mics, for instance, excel at isolating individual voices by minimizing side and rear noise. This is vital for clear and high-quality recordings. However, they do have a proximity effect: when positioned too close, they can boost low frequencies, possibly causing a boominess. Omnidirectional mics capture sound equally from all directions, making them great for group vocals or ambient recordings—just not so much for solo singers. Similarly, the figure 8 pattern can be useful for recording duets or separating instruments. The Shure SM58 microphone demonstrates exceptional vocal clarity through its balanced frequency response and uniform cardioid pattern. Ultimately, understanding these polar patterns allows for smarter microphone positioning and a better overall sound that suits the singer’s unique vocal style.
Recommended Products

EXCEPTIONAL VOCAL CLARITY: This vocal microphone has a cardioid pickup pattern that isolates the main sound source while minimizing background noise and feedback, delivering clear and crisp vocal reproduction

Optimized Vocal Reproduction: Crafted for excellent vocal performance, the PM-25S vocal microphone features a specially tuned EQ curve with warm, full-bodied lows and naturally bright highs. The balanced, neutral tone lets your voice sounds exactly as it should—rich, authentic, and expressive. With a wide dynamic range, this studio microphone captures every nuance, preserving the soul and power of your voice

Enhanced Vocal Clarity: Tailored for vocal performances with a frequency response of 50Hz-15kHz, this cardioid dynamic microphone karaoke focuses on clarity and precision, making them perfect for singing and karaoke.
Optimal Mic Placement for Dynamic Voices

When it comes to capturing the powerful sound of dynamic voices, placement truly matters. Position the microphone approximately 6 to 12 inches away to enhance clarity while reducing plosive interference. Align the mic height with the vocalist’s mouth for ideal tonal balance, or even slightly above. To tackle pesky plosives from letters like “p” and “b”, a pop filter should sit about 3 to 5 inches from the microphone. Don’t be afraid to experiment with angled placements, 15 to 30 degrees off-axis, to lessen sibilance and boost overall sound quality. For live settings, closer placement, around 2 to 6 inches, helps isolate the vocal and keep annoying background noise at bay. The cardioid pickup pattern effectively minimizes unwanted ambient sounds while focusing on the primary audio source. Happy recording!
Recommended Products

Double Layered Screen Pop Filters:The first screen blocks air blasts as any pop filter normally would; The gap in between then disperses any remaining air pressure, so by the time it passes the second screen, the blast is easily contained to produce great quality recordings.

Microphone cover set: 5 pieces foam mic cover, 2.9 x 2.5 inches, caliber size is 1.4 inches, suitable for most standard handheld microphone, not for headset mic

Cardioid Pick-up: Ccardioid pickup pattern that captures clear and crisp voice in front of the mic and suppresses unwanted background noise. Design for chatting, teleconferencing, recording, podcast
Techniques for Recording Softer Voices

Capturing the delicate tones of softer voices can be a thrilling challenge for any recording enthusiast. To get the best sound, mic placement is key. Positioning the microphone 6 to 12 inches away strikes a balance between clarity and background noise. A condenser mic works wonders, thanks to its sensitivity and rich frequency response. Plus, angling the mic 15º to 30º away from the vocalist helps reduce plosives—you know, those pesky “p” sounds. Adding a pop filter is a smart move too; it mitigates mouth noises nicely. Experiment with distances as close as 4 inches or as far as 8 inches to find what captures warmth without unwanted room echoes. For optimal clarity, consider using a microphone with high sampling rates of 192kHz to capture every nuance of the soft vocal performance. Happy recording, and may your soft voices shine!
Recommended Products

DUAL-LAYER POP FILTER: The first screen blocks air blasts as any pop filter normally would; The gap in between then disperses any remaining air pressure, so by the time it passes the second screen, the blast is easily contained to produce great quality recordings

♪【The package contains】♪: Microphone Isolation Shield x 1, Metal Thread Adapter x 2 (Adapt most microphones), Adjustable Stand x 1 and instruction manual. (The height of the isolation shield can be adjusted freely) *NOTE: Microphone is NOT included.
![Pop Filter,PEMOTech [Upgraded Three Layers] Metal Mesh & Foam & Etamine Layer Microphone Windscreen Cover Handheld Mic Shield Mask,Microphone Accessories for Vocal Recording,Youtube videos,Streaming](https://m.media-amazon.com/images/I/51ErUAzNUmL._SL500_.jpg)
▲▲NOT FOR BLUE YETI▲▲ WIDE APPLICATIONS - Our microphone pop filter suitable for 45 mm to 61 mm diameter microphones such as AT2020, AT2035, AT4040, AT2050, AT2020+, Samson Meteor , Scarlett CM25 ,CAD GXL2400, Apogee, Razer Siren X, BADAAX Mic, Rode NT1A, Rode NT-USB, MXL 770, MXL 910, MXL 2010, CAD U37, BM-800 and many other microphones.
Managing Proximity Effect for Vocal Clarity
Achieving vocal clarity is a thrilling yet nuanced endeavor, especially when dealing with the proximity effect. This phenomenon kicks in when a cardioid microphone is within 6 inches of a singer, boosting low-frequency bass response. For softer vocals, however, maintaining a distance of 12 to 18 inches helps reduce muddiness. Makers might also try off-axis positioning—angling the mic slightly to avoid overwhelming bass but keeping that crystal clear tone. For powerful voices, getting closer—around 4 to 6 inches—can create intimacy, though pop filters are essential to tackle those pesky plosives. Similar to how motion sensor lights automatically adjust sensitivity within a 120-degree angle for optimal performance, finding the right microphone distance requires careful calibration. Ultimately, it’s all about testing distances and positioning to find the sweet spot for each vocal type, ensuring balanced and engaging recordings that sing rather than shout.
Utilizing Off-Axis Techniques for Enhanced Sound
Utilizing off-axis techniques for enhanced sound can be a game changer, especially for those aiming to improve their vocal recordings. By positioning the microphone at about a 45-degree angle, artists can minimize annoying plosive sounds and sibilance. This technique helps keep the tonal quality smooth. Keeping a distance of 6 to 12 inches allows for voice warmth, avoiding any muddiness. When singers speak slightly off-axis, they can project their voice without harsh spikes. This is particularly useful when using dynamic microphones, which are less sensitive to off-axis sounds. Don’t forget to engage in monitoring during your recording session; small adjustments can make a big difference in sound clarity and reduce background noise. The cardioid pickup pattern featured in professional microphones like the Shure MV7X helps maximize the effectiveness of off-axis positioning. Who knew recording could be this much fun?
Acoustics and Their Role in Mic Placement
Proper acoustics play an essential role in microphone placement, dramatically affecting recording outcomes. Room acoustics can greatly influence clarity. Soft furnishings like curtains and carpets absorb sound, reducing those pesky echoes, while hard surfaces can create unwanted reverberation. Before recording, evaluating a room’s acoustics is critical; sounds reflecting off walls can muddle your voice, ultimately altering its quality. By choosing a quiet space with minimal noise, you set the stage for successful microphone placement. Using sound-absorbing materials, such as foam panels, can work wonders in your recording space, minimizing reflections. Remember, poor room acoustics can lead to phase issues and muddy recordings, so testing for reverberation before finalizing your microphone strategy is essential. Happy recording! Triple weave technology in acoustic curtains can block up to 99% of unwanted sound while maintaining optimal recording conditions.
Accessories to Improve Vocal Recording Quality
Recording high-quality vocals is like cooking a great meal; the right ingredients make all the difference. For starters, pop shields should be placed 3 to 5 inches from the microphone, softening those sharp plosive sounds. Shock mounts are essential, suspending the mic to cut down unwanted vibrations from footfalls or desk bumps. Want to get fancy? A boom arm helps maintain proper positioning, so you can dance – well, kind of – while recording. Acoustic panels soak up echo, markedly improving vocal quality, while microphone isolation shields provide a protective barrier against ambient noise. These accessories aren’t just optional; they’re game-changers. With the right tools, you’ll sound like a pro—without needing to audition for a musical! The most effective isolation shields feature high-density foam materials that can reduce audio wave interference and ensure professional-grade recordings.
Recommended Products
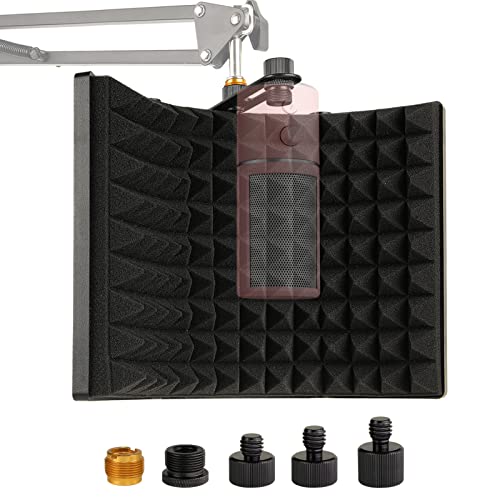
Eliminate Interference - The inner side of the microphone isolation shield is made of high density absorbing foam insulation that can reduce sound reflection, keep your voice and instrument sound clear and improve your studio recording effect. Dimensions: 7.48in tall and 10.8in wide.

Eliminate Interference - The inner side of the microphone isolation shield is made of high density absorbing foam insulation that can reduce sound reflection, keep your voice and instrument sound clear and improve your studio recording effect. Dimensions: 7.48in tall and 10.8in wide.

【Excellent noise reduction】Triple Sound Insulation,foldable Microphone Isolation with reflective layer+filter layer+absorbing layer.the high-density acoustic foam that eliminates audio wave bounces back and interference effectively.The reflection area and the absorption area reduce noise from external environments,works well to reduce ambient sound.
Adjusting Mic Positioning Based on Vocal Dynamics
Finding the right microphone positioning can truly transform a vocal recording. For powerful vocalists, positioning the mic about six inches away is best to boost clarity and manage harsh sibilance. On the other hand, soft singers should ideally maintain a distance of 12 to 18 inches to catch their delicate nuances. Remember to check the polar pattern of the microphone; cardioid mics should face directly at the sound source. Adjusting the microphone height slightly above the vocalist’s mouth can result in a fuller tone while minimizing plosive sounds. Experimenting with mic angles—15 to 30 degrees off-axis—can enhance sound capture, especially for dynamic performers. Mic technique is key to making voices shine without turning your room into a sound booth disaster! Adding a dual-layer pop filter can provide superior protection against unwanted plosive sounds while maintaining vocal clarity.
Common Mic Placement Mistakes to Avoid
While it might seem simple, mic placement is where many stumble during vocal recordings. A common mic placement mistake occurs when you position the microphone too far away, leading to distant sound lacking clarity. On the flip side, getting too cozy can cause plosive sounds, like “p” and “b,” to pop annoyingly. Using a pop filter can help—trust it!
Also, be mindful of your room acoustics. Hard surfaces can create unwanted reverberation, muddying the audio. Adjust your mic angle too! Neglecting this can pick up off-axis sounds, skewing tonal balance. Finally, don’t ignore the proximity effect. Getting too close can create a bass-heavy sound that may not suit every vocalist. Position the microphone thoughtfully for the best results!
Frequently Asked Questions
What Is the 3 to 1 Rule of Mic Placement?
The 3 to 1 rule of mic placement states that microphones should be positioned three times the distance from the sound source as their separation. This promotes vocal clarity, audio balance, and sound uniformity in recordings, especially during live performances.
What Are the Different Types of Microphone Placement?
Different microphone placements involve proximity for vocal clarity, angled positions for noise rejection, and distance variations depending on mic types. Proper acoustic treatment enhances dynamic range while mitigating the proximity effect in various recording environments.
How to Position a Mic for Vocals?
To position a mic for vocals, maintain appropriate mic distance to guarantee sound clarity. Tailor the setup based on vocal warm-ups, pitch variations, dynamic range, and singer styles, considering the recording environment for best results.
What Is the 3 1 Rule for Choir Mics?
The 3:1 rule for choir mics dictates that distance between microphones should be thrice that of their distance to vocal sources, ensuring sound quality and diminishing chaotic group dynamics for harmonious performances, regardless of mic types or vocal range.


