As an Amazon Associate, we earn from qualifying purchases. Some links on this site are affiliate links at no extra cost to you. Our recommendations are based on thorough research and editorial judgment.

Best Practices for Recording Interviews With Lavalier Mics
When recording interviews with lavalier microphones, clear audio is key. Position the mic 6-8 inches below each speaker’s mouth to capture their voice crisply. Use individual mics for each participant to minimize crossover noise. Tape them securely to prevent rustling sounds. Choose quiet spots and consider using directional mics to cut out background chatter. And don’t forget to check levels with headphones—trust us, it’s a game changer. Stick around to uncover more tips for flawless recordings!
Key Takeaways
- Position lavalier microphones 6-8 inches from each participant’s mouth for optimal clarity and to minimize background noise.
- Use individual microphones for each speaker to enhance audio quality and capture distinct voices during interviews.
- Conduct sound checks before recording to address audio issues and ensure proper microphone placement.
- Secure microphones discreetly with skin-safe tape to avoid handling noise and visual distractions in the frame.
- Choose a quiet recording environment and utilize noise-canceling technology to further reduce ambient noise interference.
Understanding Lavalier Microphones
Lavalier microphones, or lav mics for short, are fascinating little gadgets that make capturing clear audio a breeze. Designed to clip onto clothing, they allow users to move freely while ensuring excellent sound quality. Placed close to the mouth, these mics minimize unwanted noise, making them ideal for various applications like interviews and podcasts. Lavalier microphones come in wired versions for stable connections, or as a wireless lavalier microphone option for those who love to roam during their audio recording. With different pickup patterns like omnidirectional and cardioid, users can choose a mic that best fits their needs. Investing in a good lav mic means stepping up your game in quality audio—because nobody likes fuzzy sound! Modern wireless lavalier systems like the Hollyland Lark M2 can provide up to 40 hours of battery life with their charging cases, ensuring uninterrupted recording sessions.
Advantages of Using Lavalier Microphones for Interviews

When it comes to interviews, the right microphone can make all the difference. Lavalier microphones are a fantastic choice. They clip discreetly onto clothing, allowing hands-free movement. This not only reduces visual distractions but also keeps the focus on the conversation. Since they’re close to the speaker, lavalier mics capture high-quality audio while minimizing ambient noise, ensuring that every word is heard loud and clear. Their omnidirectional pickup pattern captures sound from all angles, making them great for multi-person interviews. Plus, they’re compact and easily integrate with both wired and wireless systems. This versatility means they’re perfect for any interview setting, whether you’re on a bustling street or in a quiet room—no complicated setups needed! With signal-to-noise ratios reaching up to 58 dB in many models, these mics deliver exceptional clarity even in challenging acoustic environments.
Proper Staging of Your Lavalier Microphone

To capture crystal-clear audio during interviews, proper staging of the lavalier microphone is essential. Positioning the microphone 6-8 inches below the speaker’s mouth boosts voice clarity while keeping it safe from neck muffling. Securing it with skin-safe adhesive tape guarantees it stays put, avoiding those annoying handling noises. Don’t forget to check compatibility with your recording device—using the right adapters like TRS or TRRS for wired Lav mics is a must! Minimize wire visibility by routing the cable down the back of the speaker’s clothing—who wants a distracting cable in the shot? Finally, conduct audio tests after setup. Adjust as necessary to ensure you’re ready for that sparkling sound quality! Using a microphone with AI noise cancellation helps eliminate unwanted background sounds in busy environments.
Recommended Products

【Ultra Universal Compatibility】: Mic handle has two installation methods(Strong Magnetic Adsorption and Slot Clamping). Perfect Fit for DJI Mic 1/2, DJI Mini, Rode Wireless GO, Hollyland Lark, as well as all other standard lavalier microphones on the market.

Important: Action cameras require official brand 3.5mm audio adapters (sold separately) to connect this microphone. Smartphones require a USB-C / Lightning to 3.5mm adapter to connect this mic. Refer to the compatibility table in images.
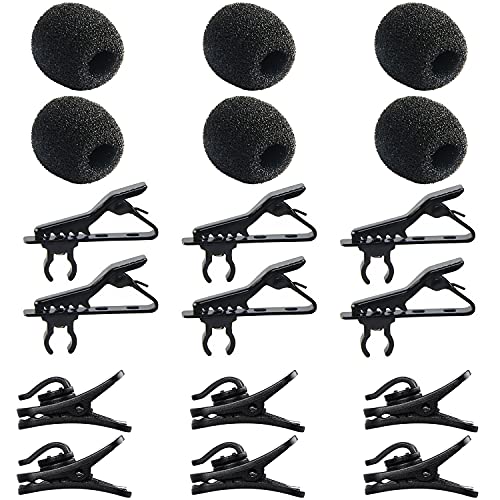
Quantity of Package - Package includes 6pcs lavalier microphone clips, 6pcs foam windscreen covers and 6pcs lav mic plastic wire clips. In total of 18pcs.
Ideal Placement for Optimal Sound Quality

Setting up a lavalier microphone perfectly is only half the battle; finding the ideal placement is where the magic truly happens. The mic should be 6-8 inches below the speaker’s mouth. This positioning enhances voice clarity and avoids muffled sounds often caused by placement too close to the neck. Secure it around the sternum for better audio pickup—trust us, your listeners will thank you. Don’t forget the microphone’s proximity to the mouth; it captures voices clearly while minimizing ambient noise. Secure it well to avoid handling noise. Consider using skin-safe adhesive tape for extra security. After all, an unwelcome noise can be more distracting than your Aunt Doris at a wedding! So, placement matters. For optimal results, look for microphones with noise reduction features that can help eliminate unwanted background sounds during your interview recordings.
Recommended Products

Dual Wireless Microphones for iPhone(Both for Lightning and Type C Port Devices) This dual wireless lavalier microphone set built-in noise reduction chip, real-time auto-sync technology, and 2.4G signal transmission with super low latency(0.008s), the sound picking-up follows the picture in real-time. Lapel microphone wireless can easily cope with various noisy environments and truly restore human voices.

【New Model Lavalier Wireless Microphone】: utilizes state-of-the-art Series V 2.4GHz digital transmission and proprietary , it delivers crystal-clear, incredibly stable audio with a range of up to 20m. True wireless is not restricted, it automatically pairs when turned on, no other operation is required, easy to operate, and can be used immediately, enjoying wireless freedom
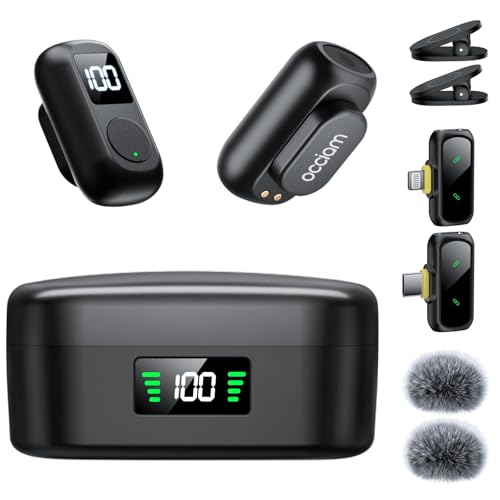
1. AI Noise Cancellation & Stable 328ft Wireless Transmission: Featuring omnidirectional microphones with -21dB to -40dB noise reduction depth,the professional wireless lavalier mic captures crisp human voice while suppressing wind,hum,and crowd sounds.Superior chip ensures stable,interference-free recording up to 328ft (100m Obstacle-Free),delivering studio-clear audio via 48kHz/24-bit resolution,80dB signal-to-noise ratio (pure recordings),and 120dB SPL (handles loud sounds without distortion)
Reducing Background Noise in Noisy Environments

Sound quality is essential for any recording, but it can be a real challenge in noisy environments. To tackle background noise, positioning lavalier microphones about 6-8 inches from the speaker’s mouth is key. This distance helps prioritize the voice over surrounding sounds, making it clearer. Using directional lavalier microphones is also beneficial, as they’re designed to focus on the speaker and minimize ambient noise capture. Don’t forget noise-canceling technology; it can be a lifesaver in reducing distractions. Additionally, consider using windshields or foam covers to combat unexpected sounds outdoors. Finally, thoughtful staging—by selecting quiet locations or adding sound-dampening materials like curtains—can greatly lower background noise levels in your recording space, setting you up for success! Similar to the cardioid pickup pattern featured in many professional microphones, lavalier mics can effectively isolate the primary audio source while reducing unwanted ambient sounds.
Recommended Products

The unique rotating design allows for flexible recording, while its cable routing design prevents accidental unplugging. Compact and easily concealable, suitable for interviews, vlogs, livestreaming, and more.

PROFESSIONAL-GRADE AUDIO: Achieve crystal-clear voiceovers for video tutorials, webinars, and podcasts with the Movo M1 omnidirectional lavalier microphone. Designed to capture every detail, this mic delivers broadcast-quality sound for content creators.
【Low Distortion】 Flat frequency response for perfect sound output, retains original voice quality, without making voice sound robotic and mechanical.
Wired Vs Wireless Lavalier Microphones
Which type of lavalier microphone works best for your needs? Wired lavalier microphones are dependable. They connect directly to your recording device, ensuring solid audio levels without interference or battery fuss—perfect for that calm, indoor video production. On the flip side, wireless lavalier systems offer freedom. They consist of a mic, transmitter, and receiver, ideal for outdoor shoots or when movement matters. The catch? Wireless setups can be tricky to manage, requiring careful pairing and attention to battery life. Plus, wired mics usually come at a lower initial cost, a nice perk for budget-conscious creators. So, weigh your options: stability of wired versus the flexibility of wireless, and choose what suits your style best! Modern USB lavalier microphones with high sampling rates of up to 192kHz deliver exceptional audio clarity for professional recordings.
Recommended Products

BUILT FOR LIVE: The single wireless karaoke microphone for adults with the 48kHz/24Bit UHF digital circuitry transmits encrypted signals to avoid signal crosstalk and deliver delay-free accurate sound. 15 UHF tunable frequencies in 902 - 928MHz fend against crowded spectrum conditions, available for simultaneous multiset hookup. The bodypack transmitter connects the headset/lapel singing microphone via the 3-pin mini XLR jack for free performance and pure sound, suitable for live performance.
Small but Mighty - The DJI Mic Mini Transmitter is small and ultralight, weighing only 10 g, [1] making it comfortable to wear, discreet, and aesthetically pleasing on-camera.

[INCREDIBLY SMALL] Weighing just 9g, LARK M2 wireless lavalier microphone is the lightest mini microphone on the market. With its lossless sound reproduction and top-of-the-line recording capabilities, it brings you unmatched recording performance. The wireless audio transmission can reach up to 1,000ft line-of-sight range. Perfect for filmmakers, vloggers, and podcasters.
Best Practices for Multi-Person Interview Setups
Capturing quality sound can be a challenge, especially when multiple voices are in the mix. For effective multi-person interviews, each participant should use their own lavalier microphone. Position these mics about 6 to 8 inches from their mouths to optimize audio clarity—nobody wants a mouthful of muffled sound! A mixer or audio interface is essential for managing all those inputs, allowing for easy sound level adjustments as the conversation flows. Don’t forget to harness noise-canceling technologies; they’ll really help dampen any background hubbub. And before diving into the interview, always conduct a soundcheck to tackle any microphone placement issues or other audio concerns. Remember, clear sound is key to capturing those golden moments! The most reliable lavalier microphones deliver a signal-to-noise ratio of at least 65 dB for pristine audio capture during interviews.
Utilizing Additional Audio Equipment
When diving into interviews, the right audio equipment can make a world of difference. Using high-quality audio recorders with XLR inputs captures sound from multiple lavalier mics, ensuring clarity and reducing background noise. And if you’re heading outdoors, don’t forget the windshields! They keep pesky wind noise at bay, helping maintain quality of the speakers’ voices. To catch any audio issues early, incorporate headphones for real-time sound checks. A dual-source setup, blending a digital recorder with lavalier mics, boosts audio fidelity while giving a backup track for syncing later. Also, handy extension cables and adapters can help get those mics in just the right position. Remember, good sound isn’t just important—it’s essential for a great interview! Just like NVMe portable SSDs offer reliable storage for your audio files with read speeds up to 2000MB/s, ensuring quick access to your recordings.
Recommended Products

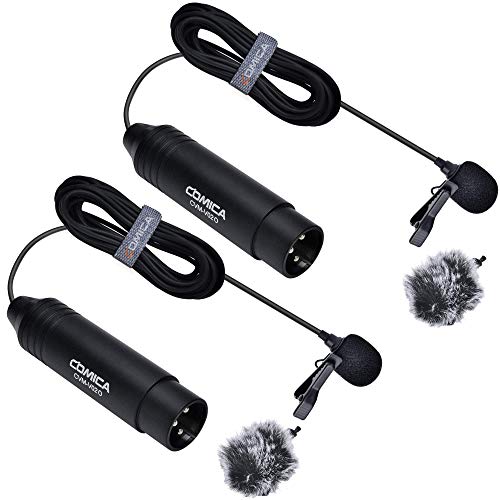
【Professional 3-Pin Lav Mic】 Featuring a 3-pin XLR connector Comica CVM-V02O lavalier microphone comes with a flat frequency response for perfect sound output. Compatible with cameras, recorders, or mixers with 3 pins Xlr Input such as Canon Sony Panasonic Camcorders ZOOM H5 H6 TASCAM, etc. This Lav mic is versatile for interviews, Youtube recording, video shooting, live streaming, broadcast, and more.

Element: Back Electret Condenser

SIMPLE SETUP, PRO-QUALITY RESULTS – Record in 32-bit / 96kHz for clear, detailed sound, perfect for interviews, podcasts, and everyday recording.
Maintaining Audio Quality During Recording
To maintain excellent audio quality during recording, it’s crucial to position the lavalier microphone just right. Ideally, place it about 6-8 inches below the speaker’s mouth. This distance helps capture vocals while reducing the risk of muffled sound. Using high-quality lavalier microphones, like those from Audio-Technica or Shure is key—it pays off in superior audio fidelity. To tackle pesky background noise, consider equipping the mic with a windshield. They’re lifesavers in noisy environments! Before jumping into recording, always conduct quick audio tests. This guarantees sound clarity is on point throughout the interview. Finally, think about a dual-source audio setup. A backup is always smart, right? After all, you wouldn’t want to lose that goldmine of interviews! For optimal performance, models like the RODE Wireless PRO offer 32-bit float recording capability, ensuring exceptional audio clarity even in challenging environments.
Tips for Post-Production Audio Enhancement
Post-production is often where the magic happens for recorded interviews. To enhance audio, start by using editing software to eliminate unwanted noise, especially in the essential frequency range of 300 Hz to 3 kHz. This helps improve clarity and allows voices to shine through. Next, implement EQ techniques to balance the audio spectrum, making certain that muddy or harsh tones don’t overshadow your sounds. Don’t forget to leverage compression; it keeps the quiet parts audible while preventing louder sections from distorting. A touch of reverb can make your audio feel more natural—great for less-than-ideal recording conditions. Finally, perform a mixdown to balance everything. This guarantees that listeners enjoy the conversation without shouting matches or whispers! For optimal results, ensure your recording maintains a signal-to-noise ratio of at least 70dB throughout the editing process.
Frequently Asked Questions
Are Lavalier Mics Good for Interviews?
In the forest of audio capture, lavalier mics thrived as nimble creatures, offering advantages like interview audio clarity and versatile mic placement techniques. Their affordability, along with options of wireless versus wired, enhanced their appeal for interviews.
What Is the 3 to 1 Rule for Microphones?
The 3 to 1 rule for microphones dictates proper microphone placement to enhance sound isolation, ensuring that each microphone is three times farther from another than from its sound source. This technique minimizes ambient noise during interviews.
What Is the Best Practice for a Lavalier Microphone?
Ideal lavalier microphone practice involves careful clip placement to guarantee sound quality, effective battery management for longevity, meticulous cable management to prevent noise, and awareness of background noise to enhance overall audio clarity during recording sessions.
What Is One Drawback of Using Lavalier Mics?
Lavalier mic limitations lead to audio quality concerns, as placement challenges may arise from wind noise interference and rustling fabrics. Furthermore, battery life issues can disrupt recordings, highlighting potential pitfalls in effective sound capture.