As an Amazon Associate, we earn from qualifying purchases. Some links on this site are affiliate links at no extra cost to you. Our recommendations are based on thorough research and editorial judgment.

How to Use Pop Filters and Windscreens Effectively
Pop filters and windscreens are key for clear audio! Pop filters should sit 2-4 inches from the mic, reducing those pesky P’s and B’s that pop like bubble wrap. Windscreens need to fit snugly over the mic to block wind noise and keep outdoor recordings professional. Keep ‘em clean and inspect regularly—after all, who wants dust ruining their sound? With these tips under their belt, they’re ready to tackle recording challenges head-on! There’s more to discover about optimizing audio tools.
Key Takeaways
- Position pop filters 2-4 inches away from the microphone for optimal plosive sound reduction during vocal recordings.
- Ensure windscreens fit snugly over the microphone capsule to effectively minimize wind noise and interference.
- Use a dual-layer nylon pop filter for increased protection against plosives and sibilance during recording sessions.
- Regularly clean both pop filters and windscreens to maintain sound quality and prevent build-up of dust and moisture.
- Inspect your equipment frequently for wear and tear to ensure long-lasting durability and optimal audio performance.
Understanding Pop Filters and Windscreens
When you’re diving into the world of audio recording, pop filters and windscreens might just be your new best friends. Pop filters shine by eliminating plosive sounds, like the explosive P’s and B’s, ensuring vocal clarity as they disperse bursts of air before reaching the microphone. On the other hand, windscreens, typically crafted from foam material, safeguard microphones from wind noise and ambient factors during outdoor recordings. For the best results, positioning is vital: place pop filters 2-4 inches from the mic, while windscreens need to fit snugly. Together, they can dramatically boost sound quality, making your recordings sound more polished and professional. So, why not give these tools a try? Your vocals deserve it! The dual-layer nylon filters provide superior protection against both plosives and sibilance compared to single-layer designs.
Recommended Products

Double Layered Screen Pop Filters:The first screen blocks air blasts as any pop filter normally would; The gap in between then disperses any remaining air pressure, so by the time it passes the second screen, the blast is easily contained to produce great quality recordings.

DUAL-LAYER POP FILTER: The first screen blocks air blasts as any pop filter normally would; The gap in between then disperses any remaining air pressure, so by the time it passes the second screen, the blast is easily contained to produce great quality recordings
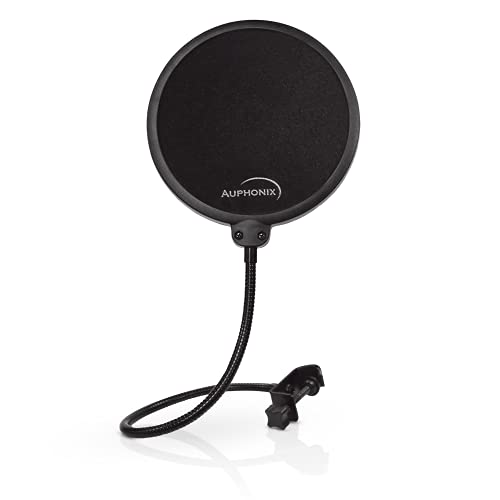
Clear Sound - Cut the post-production hassle of reducing pop sounds with our microphone pop filter. It features a double layer of mesh to ensure a smooth recording free of distortion.
The Importance of Choosing the Right Tool

Choosing the right tool can make all the difference in sound quality when tackling audio recording. Pop filters and windscreens each serve unique purposes. Pop filters are perfect for vocal recordings, as they help reduce plosive sounds caused by consonants like “P” and “B.” In contrast, windscreens are essential for outdoor scenarios, battling environmental factors like strong winds that can distort audio. For the best results, it’s wise to use both tools together—imagine the dream team of sound! Always check compatibility with your microphone and consider material and size for durability. A professional-grade pop filter might set you back about $20, but it’s a worthy investment for clearer recordings. Remember, the right choice truly mounts to the quality of your recordings! Just like IP67 rated equipment provides superior weather protection for outdoor lights, quality windscreens offer essential protection against harsh elements during outdoor recording sessions.
Recommended Products

Microphone cover set: 5 pieces foam mic cover, 2.9 x 2.5 inches, caliber size is 1.4 inches, suitable for most standard handheld microphone, not for headset mic

Microphone windscreens fit small lapel and headset microphones

Professional Windscreen - Designed for Audio-Technica AT2020,AT2020USB, AT2020USB+ mic. Package : 2 x Foam Wind Screen Cover. Note:Audio Technica AT2020 Microphone Not Included.
Setting Up Your Pop Filter

Setting up a pop filter correctly is key to achieving crisp, professional-sounding recordings. To maximize its effectiveness, position the pop filter 2-4 inches away from the microphone. This distance helps reduce plosive sounds without blocking the vocal signal. It’s a good idea to maintain a distance of 6-8 inches between the vocalist’s mouth and the pop filter to maintain the clarity of your recordings. Larger pop filters tend to work better since they capture more vocal plosives with their wider area. Additionally, make certain the pop filter is properly angled to reduce sound reflections. Don’t forget about regular cleaning, either; a grimy pop filter can affect sound quality in your recording session. A clean filter is a happy filter! The cardioid pickup pattern helps isolate vocals while the pop filter manages plosive sounds for optimal recording quality.
Recommended Products

Three-layer Screen Pop Filters:The newly upgraded three-layer structure provides superior airflow blocking and noise control, delivering high-quality recording results.It is an indispensable companion for professional recording studios.

360 Degree Flexible Gooseneck Holder, Convenient for Use

Standalone universal pop filter: Defend your microphone from plosive sounds and improve your recording quality. The HyperX Shield’s corrosion-resistant metal mesh filter is durable and easy to clean.
Properly Fitting Windscreens on Microphones
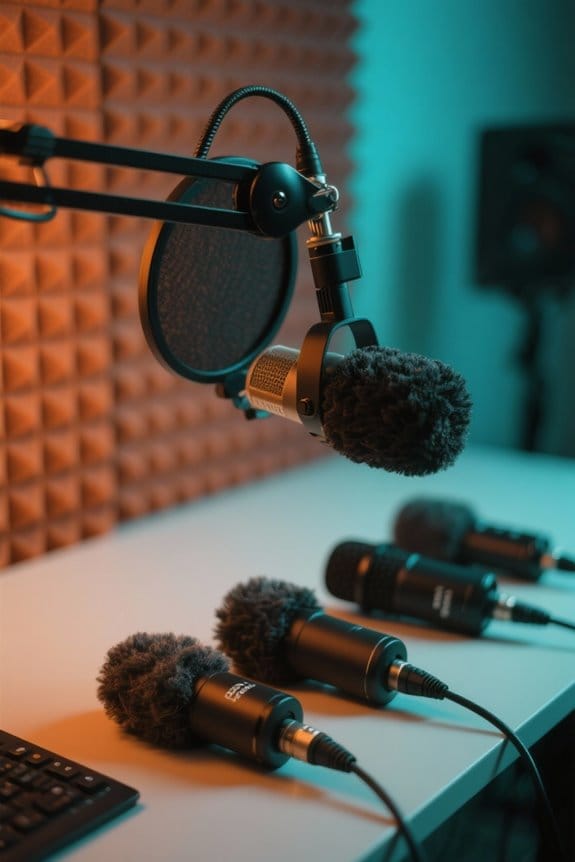
A great windscreen can be a game changer for your microphone, especially in outdoor settings. To guarantee peak performance, it is crucial to have a properly fitting windscreen. Choose a foam windscreen for light wind conditions, or opt for a furry windscreen in breezier environments. Make sure it snugly covers the microphone capsule, preventing wind noise from seeping in around the edges. Not too tight though—think Goldilocks here! Position it at a slight angle to improve airflow and reduce wind turbulence. Also, keep an eye out for moisture buildup and background noise, as these can impact sound quality. Remember, a clean windscreen works wonders, so don’t let dust or moisture make your mic’s life harder! Similar to how cable management systems help maintain a tidy workspace for monitor setups, proper windscreen positioning ensures optimal audio performance and reduced interference.
Recommended Products


PERFECT FIT FOR STANDARD MICS: Package includes 6 pieces of black foam microphone covers. Sized at 2.8 x 2.3 inches with a 1.4-inch caliber, these windscreens are designed to fit most standard handheld microphones perfectly (Note: Not suitable for headset mics).

Size: 30×22mm(1.18 x 0.87 inches); Caliber: 0.38 inches
Best Practices for Maintenance and Care

Keeping pop filters and windscreens in excellent shape is vital for achieving that crystal-clear audio quality everyone dreams about. To maintain performance, regularly clean your pop filters by gently wiping them with a damp cloth or mild soap, which prevents grime buildup. Always store these tools in a dry, dust-free environment—detaching them from mic stands can save them from unnecessary damage. It’s also important to inspect your equipment for wear and tear; damaged materials can seriously affect audio quality. Avoid prolonged moisture exposure, as it may degrade the foam. Finally, follow manufacturer care instructions for specific products to guarantee longevity. Remember, a little care goes a long way—think of it as a spa day for your audio gear! For optimal hygiene and performance, most high-density foam windscreens can be washed and reused multiple times without losing their shape or effectiveness.
Tips for Outdoor Recording Success
While great care for pop filters and windscreens can elevate audio quality indoors, the real challenge kicks in when venturing outdoors. Choosing a dynamic microphone with a thicker pop filter is vital for tackling wind noise. For lighter winds, a condenser mic does the trick. Foam windscreens are important; layer them with furry windshields in blustery conditions for added protection. Be certain these windshields fit snugly over your mic—nothing disrupts vocal clarity more than sneaky gusts slipping in. Position pop filters about 6-8 inches from the mic and aligned with its grille. Don’t forget your microphone stand! Test your outdoor recording setup in various weather scenarios to confirm everything’s working smoothly, that way, you won’t be talking to the elements instead of your audience. For optimal voice capture in windy conditions, consider using microphones with AI noise cancellation technology that can help reduce unwanted environmental sounds.
Recommended Products

Design for most standard lapel and headset microphones


ENHANCE AUDIO - Works best for outdoor recordings, you'll record only what you want recorded, this wind muff minimizes noise and ambient sounds
Frequently Asked Questions
Should I Use Both a Pop Filter and a Windscreen?
Using both a pop filter and windscreen enhances audio quality by providing plosive reduction and ensuring vocal clarity. This combination improves recording techniques across various environments, optimizing studio setups and maximizing sound quality with proper microphone placement.
How to Use a Pop Filter Correctly?
To use a pop filter correctly, position it 2-4 inches from the studio microphone, ensuring proper placement for plosive sound reduction. Regular maintenance and choosing the appropriate type can greatly improve sound quality during vocal recording.
How Far Away Should I Put a Pop Filter?
Like a tranquil breeze guiding sound waves, the ideal pop filter distance ranges from 2-4 inches from the microphone. Preferred placement enhances sound quality, plosive reduction, and equipment compatibility, respecting user preferences and studio acoustics in any recording environment.
Does a Windscreen Help With Plosives?
Windscreens can reduce plosive sounds, but are less effective than pop filters. In recording techniques, properly combining both in studio settings enhances voice clarity, audio quality, and sound isolation while addressing wind noise during vocal performances.