As an Amazon Associate, we earn from qualifying purchases. Some links on this site are affiliate links at no extra cost to you. Our recommendations are based on thorough research and editorial judgment.

How to Fix Hum and Buzz in Your Audio Recordings
To fix hum and buzz in audio recordings, start with checking for ground loops by plugging all your gear into the same outlet. Using balanced cables like XLR can help cut noise interference, while isolation transformers and line interactive UPS systems provide cleaner power. Keep audio and power cables apart, too. If buzzing persists, iZotope RX has great software tools for reduction. Stay tuned, because there are even more tips coming your way to help you tackle those pesky sounds!
Key Takeaways
- Use balanced audio cables (XLR or TRS) to significantly reduce noise interference in your recordings.
- Ensure all equipment is powered from a single outlet to minimize ground loop-related hum.
- Implement ground loop isolators to prevent unwanted current flow causing audio hum.
- Utilize software tools like iZotope RX’s De-hum module for effective hum reduction in post-production.
- Position microphones optimally and use shock mounts to minimize vibrations and background noise.
Common Noise Problems in Audio Recordings
When recording audio, most people don’t expect to deal with unwanted hums and buzzes, but they often do. Common issues include ground loops, which arise when devices are plugged into different outlets, creating annoying audio noise. Background noise can also stem from devices with motors or dimmer switches, so it’s wise to avoid those during recordings. Proper cable management is essential; overlapping power and audio cables can cause interference. It’s also helpful to use balanced audio cables like XLR or TRS to combat this effect. Notably, the type of microphone matters too. Dynamic mics may pick up more interference, so trying a condenser microphone could reduce the hum. Remember, a little prevention goes a long way in audio quality! Using a ground lift adapter can effectively eliminate hum and buzz without requiring external power or complex setups.
Understanding Ground Loops

Ground loops can wreak havoc on audio recordings, transforming clear sound into a frustrating hum. These pesky loops appear when multiple devices connect to different AC outlets, creating a circuit with their grounding paths. The annoying hum typically hits around 50 Hz or 60 Hz—just like your AC power supply! To tackle this issue, it’s essential to power all your equipment from a single outlet using a power strip. Think of it as a team huddle against noise! For stubborn buzz, a hum eliminator, like the Ebtech Hum X, can do wonders, filtering out that irritating sound. Don’t forget: keep your audio cables away from power cables to minimize interference. A little care goes a long way in achieving smooth audio! Noise cancellation technology, found in professional lavalier microphones like the DJI Mic 2, can provide additional protection against unwanted electrical interference.
AC Line Noise and Its Impact

Audio recordings can be interrupted by something as pesky as AC line noise. This unwanted hum often comes from motors, dimmer switches, or failing fixtures. It’s like an uninvited guest crashing your audio party! To keep recordings clean, avoid running motor-driven devices while recording. For a pro tip: using line interactive uninterruptible power supply (UPS) systems can help supply cleaner AC power. These devices don’t have to break the bank; even budget-friendly isolation transformers effectively reduce noise in AC lines. Pure sine wave output from modern UPS systems provides the cleanest and most stable power for sensitive audio equipment. So, with a bit of planning and some proper gear, you can greatly improve your audio quality. After all, who wants their masterpiece muted by annoying buzz? Your listeners will thank you!
Managing Cables and Connections

Effective management of cables and connections can make all the difference in achieving high-quality audio recordings. Always choose balanced audio cables, like XLR or TRS, over unbalanced ones such as RCA. This choice helps reduce noise considerably. Keep audio cables separated from power cables, as electromagnetic interference from the latter can introduce unwanted noise. Regularly check your cables and connections too; a loose connection is like a bad joke—nobody appreciates it! Using ground loop isolators can effectively prevent hum caused by unwanted current flow between devices. Finally, remember to organize your cables with proper management techniques. A tidy workspace keeps your creative flow unhindered and limits accidental disconnections. Trust us; your ears will thank you! For optimal sound transfer, consider using adapters with oxygen-free copper conductors which significantly enhance audio quality and minimize signal degradation.
Recommended Products

Professional Audio Quality: Our XLR microphone cable is expertly crafted for use with professional microphones and recording equipment. Featuring high-quality 3-pin XLR connectors, this XLR cord ensures exceptional sound quality, making it ideal for studio and live recording environments

IN THE BOX: 10-foot XLR male to female microphone cable (2-pack) for XLR-compatible PA systems, speakers, and other sound equipment
RF Interference: Prevention and Solutions

Even with well-managed cables and connections, interference from radio frequency signals can throw a wrench into the perfect audio recording. To tackle this noise, keep audio equipment at a safe distance from devices like cell phones and computers. Metal enclosures are a fantastic barrier—think of them as a Faraday cage protecting your precious sound. Using shielded cables, specifically designed for audio, helps stop pesky signals in their tracks. Also, route those audio cables away from power sources. Regularly check connections and consider adding ferrite beads to your cables; these little guys easily suppress unwanted RF noise. With these tips, you’ll keep your recordings clear—and who doesn’t want that? So, let’s keep the buzz to a minimum! For maximum sound clarity, consider installing acoustic foam panels which can effectively reduce echo and distortion in your recording space.
Recommended Products

Standard Audiophile Grade: This is a pair of 2m/6.5ft entry-level hifi RCA audio cables audiophile, which are constructed with 99.99% OFC cores and high-quality manufacturing, ensuring signal integrity with noticeable improvements in clarity, dynamic range, and noise reduction. Whether for beginner or mid-range systems, this shielded RCA phono cable is a reliable choice. NOTE: Choosing the right length is essential, add 20% extra length for routing flexibility. We offer custom length services

Minimalist (15" end-to-end) cable for highly portable operation

Reduce electro-magnetic interference and improve signal integrity
USB and HDMI Cable Noise Mitigation
The struggle against unwanted noise in recordings can feel like an uphill battle, especially when dealing with USB and HDMI connections. To improve audio quality, using USB cables with good shielding is essential. This dramatically reduces electromagnetic interference, resulting in a cleaner signal. Funny enough, incorporating ferrite noise suppressors can work wonders—they act like superhero shields against signal leakage!
For HDMI connections, don’t overlook the magic of ferrite beads. They filter electronic signals effectively, blocking unwanted currents. Plus, opting for external audio interfaces means less risk of radio frequency interference, which makes for fantastic audio integrity. Ultimately, investing in quality cables might be the best decision you’ve ever made for clearer recordings. So, level up your setup and hear the difference! High-quality cables with gold-plated connectors can filter out up to 98% of unwanted noise in your audio system.
Recommended Products

Coiled cable can stretch from 10 inches to 3 feet and prevents tangling and kinks

High quality 2m fabric-braided cable
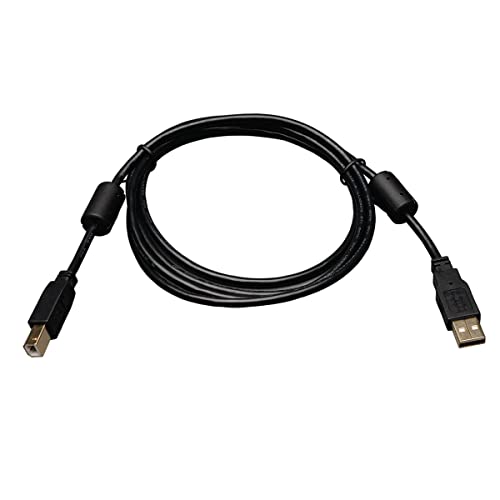
Supports faster data transfer rate (1.5 to 480 Mbps) for low speed and high speed devices, including multimedia applications
Addressing PC Audio Noise
When diving into the world of PC audio noise, it’s essential to recognize that pesky interference often lurks within the computer itself. This noise usually stems from electromagnetic interference created by internal components. To tackle this issue, using external USB or Thunderbolt audio interfaces can work wonders. These devices help minimize noise by keeping the sound separate from the computer’s inner workings.
Additionally, ferrite noise suppressors on USB cables can reduce signal leakage, boosting audio clarity. If you’re feeling adventurous, try PCI or PCIe audio cards to counteract internal disruptions. Testing different placements for your audio gear may also reveal unexpected noise sources. Regularly updating audio drivers helps keep everything running smoothly, making your recordings cleaner and more enjoyable. For optimal results, consider interfaces that support 48 kHz audio resolution to ensure exceptional sound quality in your recordings.
Recommended Products

Upgrade the Sound Quality: UGREEN Aux to USB adapter is the perfect solution for upgrading the sound quality of your laptop or desktop computer. With its high-resolution DAC chip, this adapter offers stunning audio quality that will completely transform your listening experience

Pro performance with great pre-amps - Achieve a brighter recording thanks to the high performing mic pre-amps of the Scarlett 3rd Gen. A switchable Air mode will add extra clarity to your acoustic instruments when recording with your Solo 3rd Gen

Capture every detail of your sound: Imagine the perfect take, every note and beat, captured as if by magic. That's the MAONO PS22 Lite audio interface—designed for the recording enthusiast and streamer in you. With high-resolution recording at 24-bit/192kHz and a dynamic range of 106dB, this USB audio interface for PC and Mac ensures your sound is as clear and realistic as the original performance
Troubleshooting Hum and Buzz
Troubleshooting hum and buzz in audio recordings can feel like hunting for a needle in a haystack, but it’s totally doable! Start by disconnecting all inputs; this helps identify pesky ground loops or faulty gear. If the hum disappears, you’ve pinpointed the issue. Remember, using balanced cables like XLR or TRS is key—they offer better noise cancellation than those old RCA cables. If ground loops are still an issue, consider investing in a ground loop isolator, like the EBTech Hum X, usually around $50. As you adjust volume and switch inputs, take note of any noise changes. Ultimately, capturing clean audio is a journey, but with some persistence, you can rid your recordings of unwanted buzz! Installing a high-density acoustic foam reflection filter behind your microphone can significantly reduce background noise and unwanted echoes in your recordings.
Software Solutions for Noise Reduction
After identifying the sources of hum and buzz, tackling them with software solutions can really enhance audio quality. For instance, iZotope RX’s De-hum module specializes in spotting and reducing that pesky 50 Hz or 60 Hz hum you might hear. It’s like having a noise detective on your side! You can also use EQ techniques to target specific buzz frequencies, clearing up your audio like wiping fog off a mirror. Adding a high-pass filter will cut out unwanted low-frequency noise without messing with your main audio. Plus, noise reduction tools automatically zap background buzz—super handy, right? And don’t forget volume automation to tame those annoying segments. Using a shock mount system can significantly reduce unwanted vibrations before they even reach your recording software. With these software solutions, your recordings can go from drab to fab!
Seeking Expert Advice and Community Support
How can anyone truly tackle hum and buzz in audio recordings without expert advice or community support? Engaging with online communities dedicated to audio recording can make all the difference. By sharing specific details about setups and issues, users often receive targeted advice. It’s like having a personalized troubleshooting session!
Participating in discussions can reveal effective fixes that worked for others. Plus, consulting audio pros, whether through local studios or specialized platforms, offers expert perspectives that can be invaluable.
And let’s not forget about continuous learning; webinars and community tutorials can enhance your skills and understanding of noise management. Using tools like modernEQ and modernReverb can significantly improve your audio restoration results. So, get curious, ask questions, and let the collective knowledge elevate your audio game!
Frequently Asked Questions
How to Get Rid of Buzz in Audio Recording?
To tame the buzzing frequency echoing in recordings, one must prioritize sound isolation through proper grounding, balanced cables, meticulous cable checks, and employing advanced noise reduction techniques in post-production for pristine audio clarity.
How Do I Fix My Audio Hum?
To fix audio hum, one should investigate ground loop sources and address cable interference. Ensuring proper cable connections, utilizing balanced cables, and applying noise reduction techniques will enhance clarity and eliminate unwanted hum effectively.
Why Is There a Buzzing Noise When I Record?
Buzzing noise during recording often stems from several buzzing causes, including faulty audio equipment connections, grounding issues, or electromagnetic interference. Proper cabling and microphone types can mitigate these sound disturbances, ensuring clearer recordings.
How to Get Rid of Static Noise in Recordings?
To eliminate static noise in recordings, utilizing static reduction techniques and implementing noise cancellation tools like iZotope RX can effectively enhance audio clarity. Additionally, proper cable management and secure connections are essential for minimizing interference.