As an Amazon Associate, we earn from qualifying purchases. Some links on this site are affiliate links at no extra cost to you. Our recommendations are based on thorough research and editorial judgment.

How to Eliminate Background Noise From Lavalier Microphone Recordings
To eliminate background noise from lavalier microphone recordings, position the mic near the speaker’s mouth, ideally around sternum level. Choose quiet spaces, away from noise, for recording. Use accessories like windscreens to block outdoor sounds, and secure cables to avoid rustling. Always conduct sound checks to guarantee levels are just right, aiming for peaks between -12 dB and -6 dB. For extra help, there are handy post-production tools available. And trust me, there’s more to explore!
Key Takeaways
- Position the lavalier mic close to the speaker’s mouth to enhance sound pickup and reduce background noise interference.
- Conduct your recording in a quiet location and perform sound checks to identify and minimize background noise sources.
- Utilize windscreens or furry covers on the mic when recording outdoors to mitigate wind noise disruptively.
- Implement good cable management and secure the mic using skin-safe tape to prevent rustling and movement noise.
- Use post-production software like iZotope RX or Audacity for targeted background noise reduction while maintaining audio clarity.
Best Practices for Lavalier Microphone Placement
When it comes to capturing clear audio with a lavalier microphone, placing it correctly is key to success. Ideally, you should position your lavalier mic close to the speaker’s mouth, around sternum level, to boost clarity and minimize background noise. For a cleaner look, secure the wire with skin-safe adhesive tape along the body—less movement means fewer distractions in your recording. Experiment with angles, too; tilting the mic slightly forward can really help in reducing echoes. If you find yourself in a windy spot, don’t sweat it—using a windscreen designed for lav mics can do wonders for sound quality. Always test audio in your actual recording space to get that perfect placement. It’s a bit of a science, but totally doable! An omnidirectional microphone design can pick up sound from all directions, so keeping the mic away from noisy jewelry or rustling fabric is essential.
Recommended Products

➤ 【Lavalier Foam Mic Covers Windscreen】- Kicada foam balls is suitable for most lavalier lapel microphone, specially for lav mics diameter between 7.0mm/0.27" to 10.0mm/0.39" around.

Choosing the Right Environment for Recording

Choosing the right environment for recording can elevate audio quality considerably. For those using lavalier mics, finding a quiet location is key. Look for soundproof rooms or areas far from traffic and crowds, as they drastically reduce background noise. Conducting sound checks beforehand helps spot sneaky noise sources, allowing for adjustments in mic placement. If indoors, consider adding acoustic treatments like foam panels or fabric drapes to absorb echoes. Timing is also vital; recording during off-peak hours can save you from unexpected interruptions. And if you’re outside, don’t forget to use a windscreen on your lavalier mic. After all, no one wants wind to crash their audio party, right? Installing high-density foam panels on your walls can provide superior soundproofing efficiency while tackling various frequency ranges in your recording space.
Recommended Products

Easy Installation with Self-Adhesive Backing: Our sound proof foam panels for walls come with a self-adhesive backing, making them easy to install without the need for tape or additional adhesives. Save time and hassle with our innovative design.
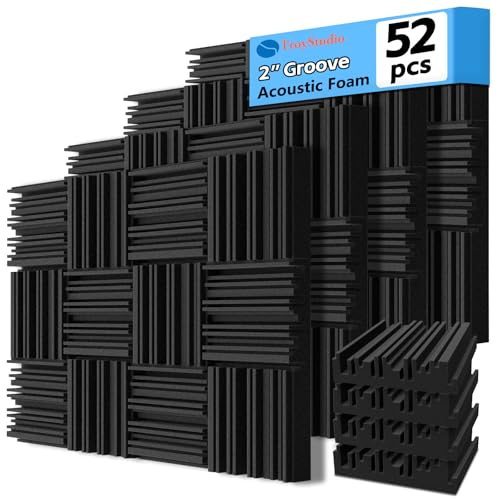
【SPECIFICATIONS】: Size - 12 X 12 X 2 inches, pack of 52; Coverage - 52 square feet; Weight - 0.12 lbs per panel; Material - Thick and high density polyurethane; Design - Periodic groove structure enhances both functionality and aesthetics

Exceptional Sound Absorption:These pyramid acoustic panels are engineered to effectively absorb sound waves, reducing echo and reverberation. With a high NRC (Noise Reduction Coefficient), they create a quieter, more acoustically balanced environment, ideal for recording studios, home theaters, and offices.
Utilizing Accessories to Minimize Noise

Several accessories can help minimize noise and enhance the quality of lavalier microphone recordings. Windshields or furry covers are lifesavers outdoors, drastically reducing annoying wind noise. Proper mic placement is key—keep that lavalier close to the speaker’s mouth and away from noisy sources. Additionally, good cable management can prevent those pesky rustling sounds created by clothes or equipment. Don’t forget to use skin-safe adhesive tape to secure the mic to the actor’s body; it minimizes movement noise during performances. For even better results, consider combining lavalier microphones with a boom mic or audio devices that feature noise suppression technology. Trust us; it’s worth the effort for clearer sound. Your audience will thank you for it! Installing acoustic foam panels in your recording space can significantly reduce echo and distortion, leading to more professional-sounding audio captures.
Recommended Products

[Package Contents] – Furry Wind Muffs and Foam Cover 5 Packs of each.

[🎸 CLEAN & SANITARY] - Lapel microphone windscreen can protect the microphone from dust, humidity, and human saliva, allow you to use the mic in an ease and comfortable mood, prolong the lifespan of the microphone as well as maintain personal hygiene for professionals who share devices among their associates.

5-Pack Broadcast Value: Multi-event windscreen kitincludes 5 furry covers. Lavalier wind muffs suit news/streaming/stage use - rotate covers between events for consistent audio quality
Techniques for Testing and Adjusting Audio Levels

Testing and adjusting audio levels can make or break a recording session. Start with a sound check to gauge background noise and set your mic correctly. Using a sound level meter app, aim for audio peaks between -12 dB and -6 dB. It’s all about capturing those crisp dialogues! Pay attention to the gain settings on your audio interface; too high can distort, but too low might lose clarity. Also, check the mic placement—keeping it close to the speaker improves pickup. Don’t be afraid to experiment here! Record short segments to test everything before diving into the final cut. Remember, a little patience goes a long way in capturing that perfect sound! Consider using a shock mount accessory to minimize unwanted vibrations and handling noise during your recording sessions.
Recommended Products

VERSATILE HOLD: The Shock-Mount Condenser Mic Clip has 5/8"-27 threading, making it compatible with a wide variety of mic stands and booms

▲ Universal for many mic types - Our professional suspension shock mount is a nice accessory for condenser microphones diameter ranging from 47mm to 53mm, such as AT2020/2020USB+/2020USBi/2020 xlr/2035/2050/2500/2500USB, AKG P100/P200/P120/P420/C3000B, MXL V67g/V67i, Rode NT1A/NT1, Heil PR40, Razer seiren x, Berhinger C-1, ATR 2500 USB, Neumann TLM102 and so on.

▶ Extensive Compatibility: Camera mic mount 1859 features a four-point suspension to accommodate Shotgun Mic microphone and other cylindrical on-camera microphones measuring 0.59-1.57" (15-40mm) in diameter
Post-Production Noise Reduction Strategies

Diving into post-production noise reduction can feel like a challenging task, but it doesn’t have to be! With tools like iZotope RX, you can achieve much better audio quality by minimizing unwanted background noise. For a budget option, software like Audacity and ReaFIR helps you capture noise profiles, allowing for targeted adjustments on specific frequency ranges, which can be a game changer. Remember, balance is key; excessive noise removal can lead to audio artifacts that no one wants to hear. Many video editing platforms come with built-in noise reduction features, although their effectiveness can vary. So, experiment a bit—finding the right tool can turn a good recording into one that’s fantastic! Happy editing! For optimal results, aim for recordings with a signal-to-noise ratio above 70 dB to ensure exceptional audio clarity before post-processing.
Recommended Products


Wireless Freedom, Clutter-Free Desktop: Cut messy cords and embrace true wireless recording. The DGM20W wireless usb gaming microphone eliminates cable mess with a minimalist design, freeing content creators to record anytime, anywhere without interference or space restrictions, enjoying total freedom to create,game streaming.
![MixPad Free Multitrack Recording Studio and Music Mixing Software [Download]](https://m.media-amazon.com/images/I/71ltIxIuz1L._SL500_.jpg)
Create a mix using audio, music and voice tracks and recordings.
Frequently Asked Questions
How to Reduce Noise in Lavalier?
To reduce noise in lavalier recordings, one must embrace audio clarity by positioning the microphone close to the speaker, using directional mics, and managing cables, much like a sculptor chiseling away excess marble to reveal form.
How Do I Stop a Microphone From Picking up Background Noise?
To stop a microphone from picking up background noise, guarantee ideal microphone placement close to the sound source and utilize sound isolation techniques. These methods effectively minimize ambient noise, enhancing the clarity of the desired audio.
Do Lavalier Mics Pick up Background Noise?
Lavalier microphones, particularly omnidirectional models, often face background noise challenges due to their design, capturing sound from all directions. Their placement and features greatly influence the degree of ambient noise picked up during recordings.
How to Remove Background Noise on a Mic?
Removing background noise on a mic is akin to clearing fog from a view. Effective noise reduction involves strategic mic placement, selecting quiet spaces, and leveraging software tools to refine audio quality during post-production adjustments.