As an Amazon Associate, we earn from qualifying purchases. Some links on this site are affiliate links at no extra cost to you. Our recommendations are based on thorough research and editorial judgment.

How to Identify and Fix Room Resonance Problems
Identifying and fixing room resonance problems is essential for great sound. Start by measuring your room, paying attention to dimensions and speaker placement. Keep speakers about 1.5 feet from the front wall and 3 feet from the sides. Use frequency analyzers, costing around $200 to $750, to pinpoint issues. Add bass traps and foam for absorption, targeting specific frequencies. Remember, continuous adjustments are vital for balance. Stick around, and you’ll discover more helpful tips on achieving perfect acoustics!
Key Takeaways
- Use frequency analyzers to visually identify problematic resonances by comparing the room’s frequency response with reference tracks.
- Adjust speaker and listener positions, ensuring a 7.5 ft equilateral triangle and adequate distance from walls to improve sound quality.
- Implement acoustic treatments, such as bass traps and sound-absorbing panels, to effectively manage specific frequency ranges in the room.
- Regularly reassess audio settings and room layouts, as changes in the environment can affect resonance.
- Monitor room acoustics continuously with software to detect and fix resonant peaks and nulls for enhanced clarity.
Understanding Room Resonances
Room resonances can be quite the sneaky troublemakers when it comes to sound quality. They occur when sound waves bounce off surfaces, creating certain frequencies that get amplified or diminished. These are called resonant frequencies, and they can really mess with your audio experience. Imagine a 50 Hz frequency, which has a wavelength of about 23 feet. To tackle this, you’d want to start acoustic treatment about 5.7 feet from the wall—fascinating, right? Positioning your speakers and listening area thoughtfully can help counteract these pesky resonances. It’s like playing a game of sound chess! And while bass traps are great, they need to be the right size and in the right spot to be effective. Installing multi-layer curtains can significantly improve sound absorption and help reduce unwanted resonances. So, happy listening!
Analyzing Room Dimensions and Speaker Placement
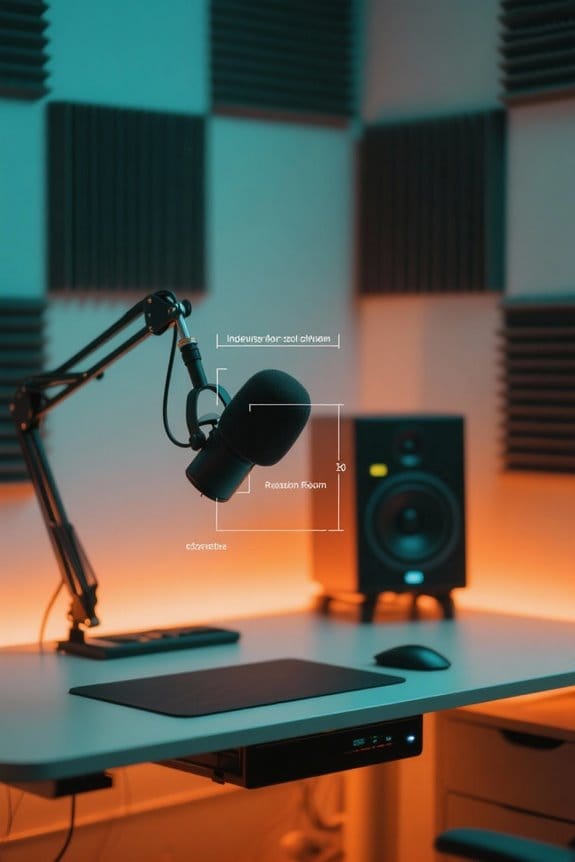
When it comes to optimizing audio in a space, dimensions and speaker placement play an essential role. In a 14ft x 12ft room, creating an equilateral triangle with the listener at 7.5ft enhances soundstage. Positioning speakers 1.5ft from the front wall and 3ft from the side walls minimizes early reflections that cause pesky resonance issues. Additionally, the listener’s spot affects bass response; adjusting from 2ft to 3ft from the back wall can address low-frequency resonances like 141Hz or 94Hz. Understanding room modes is fundamental here, as specific frequencies, like 47Hz, correlate with room dimensions. Want to avoid resonant problems? The sub crawl method can help find that sweet spot for subwoofers and elevate your listening experience tremendously. Using high-density acoustic foam behind your microphone can significantly reduce unwanted room reflections and improve overall recording quality.
Recommended Products

Enhanced Sound Clarity: Saiqiang speaker isolation pads can reduce vibrations and resonance, providing cleaner, more accurate sound from your studio monitors. Speaker pads size: 8" X 6.3" X 1.4" for 3-5 Inches Speakers
Enhanced Sound Clarity: Saiqiang speaker isolation pads can reduce vibrations and resonance, providing cleaner, more accurate sound from your studio monitors. Speaker pads size: 11" X 7.5" X 1.6" for 5-6 Inches Speakers.
Enhanced Sound Clarity: Saiqiang speaker isolation pads can reduce vibrations and resonance, providing cleaner, more accurate sound from your studio monitors. Speaker pads size: 13x10.65x1.8 Inch for 6.5-8 Inch Large Speakers.
Utilizing Frequency Analyzers for Detection

Identifying problematic resonances in a room can dramatically enhance audio quality, and frequency analyzers are invaluable tools for this task. With their ability to visually represent the sound frequency spectrum, frequency analyzers help pinpoint specific resonance issues. By applying a narrow band boost on an EQ and sweeping through frequencies, users can locate those pesky resonances that sound like bad karaoke.
Using a spectrum analyzer alongside reference tracks offers a clear comparison, highlighting troublesome areas that need attention. Advanced types, often priced around $200 to $750, even feature dynamic EQ capabilities, allowing for targeted sound adjustments. High-density foam panels provide effective absorption across various frequency ranges when properly installed. Regular frequency analysis while making changes guarantees an ongoing path to better room acoustics—because who doesn’t want an awesome listening experience without extra ringing?
Recommended Products

High-Resolution VFD Sound Level Meter: The AK2515 analyzer boasts a 25x15 resolution VFD display, ensuring accurate frequency band representation. It also includes a precise clock display, utilizing an SD3078 built-in crystal oscillator for ±3.8ppm accuracy, with a monthly error within 10 seconds, providing both functionality and style.

Perfect for use with room acoustic analyzers and audio measurement systems

Musical Resonance: The lights dynamically pulse to the rhythm of the music, creating an immersive audio-visual experience that enhances both sight and sound. Perfect for desktop, living rooms, parties to elevate visuals
Adjusting Listener Position and Speaker Arrangement

Sound quality can transform a good listening experience into a truly memorable one, and much of that hinges on listener position and speaker arrangement. Positioning speakers in a 7.5-foot equilateral triangle from the listening spot guarantees sound clarity. Place them 1.5 feet from the front wall and 3 feet from side walls to minimize early reflections—think of it as a cozy chat without interruptions.
Adjusting listener position is equally vital; moving just 2 or 3 feet from the back wall can dramatically change bass response. To enhance this further, try odd divisions of the room for both listener and speaker placement, as even ones may create those pesky nulls. Finally, the “sub crawl” method can pinpoint the best spot for your subwoofer, bringing harmony to your soundscape. Consider installing bass trap panels in room corners to maximize low-frequency absorption and improve overall acoustic quality.
Implementing Acoustic Treatments for Balance

How can acoustic treatments transform a room’s sound quality? By tackling resonance issues head-on, they can create a listening experience that’s clearer and more enjoyable. Using bass traps in room corners effectively addresses low-frequency pressures, which can mess up sound balance. Pair these with acoustic foams at first reflection points to catch those pesky mid and high frequencies, reducing chaotic echoes. For a real punch, thicker panels—like 12-inch bass traps—work wonders below 120Hz. Remember the quarter wavelength rule for placement; it helps absorption start at the right distances. And hey, after adding treatments, don’t forget to reassess your speaker and listener positions to fine-tune your sound environment. Your ears will thank you! Fire-retardant materials are essential when selecting acoustic panels to ensure both effective soundproofing and safety compliance in your space.
Recommended Products

Exceptional Sound Absorption:These pyramid acoustic panels are engineered to effectively absorb sound waves, reducing echo and reverberation. With a high NRC (Noise Reduction Coefficient), they create a quieter, more acoustically balanced environment, ideal for recording studios, home theaters, and offices.

【Acoustic Panels】Acoustic panels can efficiently reduce unwanted noise and echo, including reverb, flutter echoes, undesirable acoustic reflections, etc, making them ideal for treating specific areas on walls in studios or offices. The foam used in these studio foam wedges has a uniform density and firmness, ensuring consistent sound absorption.

【Unique Pyramid 3D Design】Our acoustic foam panels are an ideal option for absorbing flutter echoes, standing waves and reverberation or unwanted medium-to-high frequencies of sound. Widely used in home or professional studio, home theater, control room, musical instrument studio, bar, vocal booth, church, meeting room, podcast studio, etc.
Experimenting With Subwoofer Positioning
After using acoustic treatments to enhance the overall sound balance, the next exciting step involves experimenting with subwoofer positioning. One effective method is the “sub crawl.” This technique lets you find the best spot by moving the subwoofer around the room while listening from your main seating area. Remember, placing the subwoofer at one-third or one-fifth of the room length can help reduce pesky bass nulls caused by resonance. Centering it along the room’s width also packs a bass punch. Sure, getting it too close to walls can boost bass, but it might get muddy. Don’t forget to tweak your subwoofer’s settings to make sure it syncs smoothly with your main speakers, filling in the sound gaps beautifully. Happy experimenting! Using a LED strip light behind your audio setup can create ambient lighting that enhances the overall listening experience while reducing eye strain in dark rooms.
Recommended Products

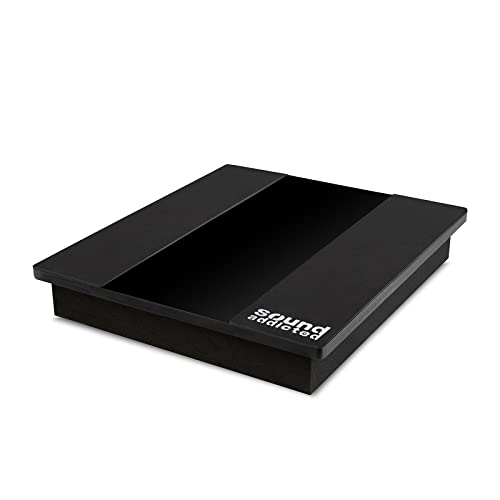
Affordable and discreet alternative to platforms and risers.
Studio Grade Audio Performance Anywhere: a must-have subwoofer isolation riser for any home studio. High-performance acoustic isolation pad eliminates vibrations and ensures crisp, clear speaker sound.

CREATES OPTIMAL SOUND: The Pyle Speaker Risers assist in achieving optimal audio performance. It reduces vibration and helps to eliminate unwanted levels of audio resonance while promoting the flow of 'clean' speaker sound projection
Identifying Specific Frequencies for Targeted Fixes
Room resonance can be a tricky puzzle to solve, but identifying specific frequencies is a great place to start. Using an EQ, you can boost a narrow band while sweeping through the frequency spectrum. This “sweep and destroy” method helps to uncover problematic areas, especially with bass issues—think kick drum rhythms resonating at those pesky 47Hz, 94Hz, and 141Hz. Utilizing a spectrum analyzer provides a visual representation that’s super helpful for pinpointing those particular frequencies needing attention. Don’t forget the quarter wavelength rule; for 50 Hz sounds, begin at about 5.7 feet from the wall for effective absorption. By experimenting with speaker placement, you can improve sound and enjoyment, turning your room from dull to dynamic without losing your mind! Consider using shock mount isolation to minimize unwanted vibrations that can interfere with accurate frequency identification during testing.
Best Practices for Ongoing Resonance Management
To maintain the best sound quality in any space, it is crucial to manage room resonance continuously. Pay attention to your room’s frequency response. Use acoustic measurement software to identify resonant peaks and nulls, providing a clear path for targeted fixes. Always check your physical treatments, like bass traps and diffusers, placing them at calculated quarter-wavelength positions. Experiment with speaker and listener positioning, moving them away from walls to optimize sound distribution. Incorporate broadband absorption materials—don’t skimp on thickness for lower frequencies. Finally, reassess your acoustics often; changes can alter resonance characteristics over time. Think of your room like a coffee: it needs regular stirring to prevent those pesky grounds from settling—nobody likes that! Consider installing panels with high NRC ratings above 0.9 to ensure maximum effectiveness in absorbing unwanted sound reflections and echoes.
Tools and Techniques for Advanced Resonance Control
Continuing the journey of effective resonance management, exploring tools and techniques becomes a game changer for anyone serious about sound quality. The “sweep and destroy” method is a favorite for many. It involves boosting a narrow frequency range and sweeping across the spectrum, making it easier to pinpoint those pesky resonances.
Advanced tools, like dynamic EQs, target specific trouble spots without altering the master bus’s overall sound. Ozone’s Spectral Shaper and Clarity Module resynthesize frequencies expertly, avoiding the filter artifacts that can ruin a mix. Don’t overlook room acoustics either; placing absorptive materials strategically can work wonders. Think of it as giving your sound an artisanal touch—less craft beer, more premium brew! Consider mounting your studio monitors on height adjustable stands to achieve optimal ear-level positioning and minimize unwanted resonance from desk surfaces.
Recommended Products
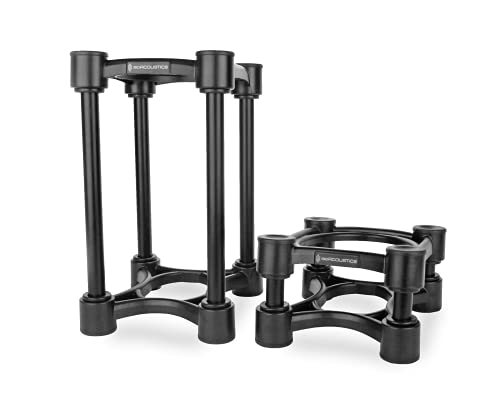
5.1” (130mm) Wide x 6” (152mm) Depth. 2.8” (71mm) Height in low setting. 8.25” (210mm) height in tall setting. 20lbs (9kg) weight capacity. Package includes 2 Stands.

Improve Listening Position: Elevate your studio monitors to the ideal listening height, ensuring accurate audio representation using this isolation pad for an angled speaker stand.

6.1” (155mm) Wide x 7.5” (190mm) Depth. 3” (76mm) Height in low setting. 8.25” (210mm) height in tall setting. 40lbs (18kg) weight capacity. Package includes 2 Stands.
Frequently Asked Questions
How to Get Rid of Room Resonance?
To eliminate room resonance, one should strategically install acoustic panels and bass traps in calculated locations. Adjusting placement and continuously evaluating treatments enables enhanced sound clarity, ultimately minimizing unwanted resonances throughout the space.
How to Solve Resonance Problems?
To solve resonance problems, one should employ acoustic treatment techniques, focusing on sound absorption. This includes strategically placing materials in corners and using equalization methods to target specific problematic frequencies, enhancing overall sound quality.
How to Find the Resonance of a Room?
To find room resonance, one conducts resonance analysis by measuring room dimensions and applying acoustic measurements. Methodologies include using frequency generators and spectrum analyzers to identify resonant frequencies affecting the overall sound quality of the space.
How to Find Problem Frequencies in a Room?
In a quiet forest, distant echoes disclose hidden paths. Similarly, frequency analysis and sound measurement uncover problem frequencies in a room, allowing the discerning listener to map out peaks and troughs, ultimately enhancing audio clarity.


