As an Amazon Associate, we earn from qualifying purchases. Some links on this site are affiliate links at no extra cost to you. Our recommendations are based on thorough research and editorial judgment.


How to Extend the Lifespan of Your Podcast Microphone

To extend the lifespan of a podcast microphone, regular cleaning and proper maintenance are essential. Start by cleaning it at least monthly with a lint-free cloth and 70% isopropyl alcohol. Don’t forget to remove windscreens and grills for a thorough wash! Store the mic in a cool, dry place and inspect it for wear regularly. Remember, these simple steps can keep your audio crystal clear. Stick around to discover more tips on microphone care!
Key Takeaways
- Clean the microphone regularly, at least once a month, to maintain sound quality and prevent deterioration of internal components.
- Store the microphone in a protective case to shield it from dust, moisture, and physical damage.
- Keep the microphone in a cool, dry place to minimize humidity exposure and enhance longevity.
- Use windshields or pop filters to protect the microphone from plosive sounds and reduce strain on its diaphragm.
- Inspect cables and connections frequently to identify any wear and prevent audio quality issues.
Why Clean Your Microphone?
Cleaning your microphone might seem like a chore, but it’s essential to the health of your audio gear. Over time, dust, dirt, moisture, and even saliva can build up, negatively impacting sound quality. A neglected microphone may lead to distortion in your recordings, and nobody wants that! To keep your gear in top shape, maintaining a cleaning schedule is key. This regular care and maintenance helps avoid exposing your microphone’s internal components to harm, enhancing longevity and sensitivity. Plus, in shared environments, keeping things clean isn’t just about sound; it’s about health too. A clean microphone delivers peak audio clarity and quality, making all the difference for pro podcasters aiming to captivate their listeners. So, don’t skip that cleaning! Most mic arm stands support between 3.3 to 5.5 pounds of weight, making them sturdy enough to protect your investment from accidental drops during cleaning sessions.
How to Clean Your Microphone

Maintaining a clean microphone is essential for anyone serious about sound quality. First, disconnect the microphone and let it reach room temperature to prevent condensation damage. For cleaning, a lint-free cloth dampened with a 70% isopropyl alcohol solution should gently wipe the body, avoiding sensitive areas like the diaphragm. Remember, foam windscreens and metal grills can be removed and washed with mild soap and water—just make sure to let them dry completely before reattaching! Dust and debris can hide in crevices, so use compressed air or a soft brush gently. Although it might feel awkward, “not dropping” is also key in avoiding signs of wear. Regular cleaning means better sound and a longer lifespan for your microphone. High-density foam windscreens are particularly effective at protecting your microphone from dust, moisture, and saliva while maintaining optimal voice clarity.
Recommended Products

32-IN-1 ALL-IN-ONE SET – One compact kit cleans your iPhone, AirPods, iPad, MacBook, keyboard, earbuds and camera lens, so you stop buying separate tools.

Phone Cleaning Kit: Designed as a top-tier iPhone cleaning kit and charging port cleaning kit, Also compatible with Android and Samsung cell phones. Equipped with specialized tools to clean USB-C/Type-C/Lightning charging ports, speakers, lenses, etc. Comes with a dedicated cleaner and brush for the screen

Miracle Spray for Electronics is the ultimate solution for keeping your screens and devices spotless—ideal for cleaning smart TVs, laptops, smartphones, tablets, monitors, touchscreens, and more. Our screen cleaning spray and ultra-soft microfiber cloth work together to lift away smudges, dust, and oily fingerprints, leaving a clear, streak-free shine on all your favorite electronics.
How to Maintain Your Microphone

To extend a microphone’s lifespan, proper maintenance is key. Using a protective case is essential for maintaining ideal conditions. Store your microphone in a cool, dry place to avoid exposure to dust or damage. Regularly clean the microphone with care by using a soft cloth and a gentle brush—it’s like giving your mic a spa day! Windshields or pop filters can protect against plosive sounds and strain on the diaphragm, which helps extend the life of your equipment. Don’t forget to check cables and connections; a little inspection can prevent audio quality drops down the line. Always follow the manufacturers’ guidelines to guarantee your podcast sounds exceptional for years to come! Your microphone will thank you. For optimal performance in noisy environments, consider microphones with active noise reduction capabilities that can reduce ambient sounds by up to 40 dB.
Recommended Products
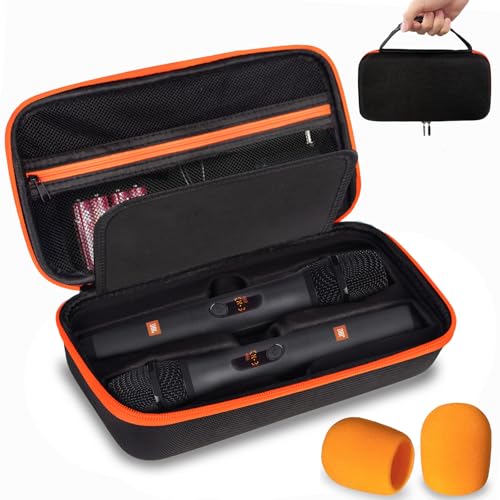
Ultimate Protection Wireless Microphones Case: Specifically tailored for JBL Wireless Two Microphone System, featuring a durable hard shell with a soft protection pad and two EVA trays inside, providing a secure and snug fit for dual handheld microphones, keeping them safe from impacts and scratches. Not Only for JBL mic, the EVA tray size: 9.25x1.95x1.25In

【Designed For】Go Pro Hero 13/Hero 12/Hero 11/Hero 10/Hero 9 Black.
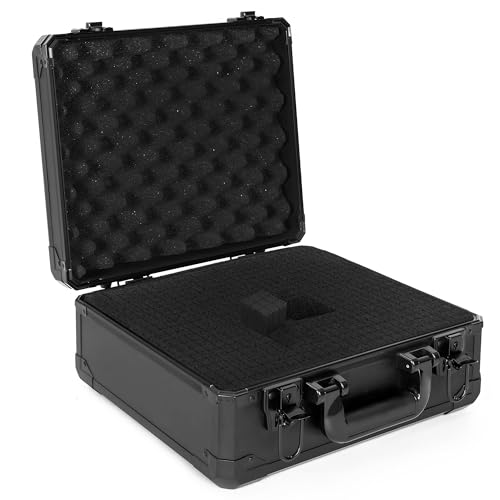
【ITHWIU Protective Hard Case】We design this hard case to storage and transport some precise and valuable instruments, such as camera, lenses, electronic product, microphone, etc.
How Often to Clean and Maintain Your Microphone

A microphone can only shine if it’s given proper care. To keep your microphone in peak condition, clean your microphone at least once a month. If you use it frequently, especially in shared spaces, aim for a quick cleanup after each use—this really enhances sound clarity! Be mindful of environmental factors, like humidity and dust, as these might require more frequent checks. Speaking of checks, don’t forget to look for signs of wear and tear every few months. Frayed cables or loose connections can hinder performance. Following the manufacturer’s guidelines for storage and regular maintenance is essential, ensuring your microphone lasts longer. A little attention goes a long way—after all, nobody wants a grumpy microphone on their podcast! Using a protective storage case during transport will prevent physical damage and extend your microphone’s lifespan.
Recommended Products

Regular cleaning of your devices is one of the best practices of preventative maintenance to enhance their lifespan.

【Differences from other products】-- Compared with other products, we have added a high-grade metal double-ended crowbar, which can be used in conjunction with nylon double-ended crowbar to meet your various needs; we also added 4 handle rocker caps and 4 handle screws are easy to replace; we have improved the arc-shaped tweezers to make it easier for you to grasp small PS4 and PS5 accessories.

[COMPLETE SCREWDRIVER SET FOR PS4 PS5]: This kit include the MUST HAVE T9 torx security screwdriver for ps4 with PH0 PH1 phillips screwdriver, and PH00 phillips can be used to remove these tiny screws on PS4 and PS5 controller perfectly.
How to Test Your Microphone

Testing your microphone is vital for achieving that perfect sound. To start, connect your podcast microphone to your computer and open your recording software. Capture a short audio clip to evaluate sound quality and clarity. After recording, listen for distortion, background noise, or any volume inconsistencies. These red flags indicate potential issues that need fixing. If something’s off, adjusting your microphone’s position or settings can make a big difference—think of it like finding the sweet spot! Don’t skip this step, as regularly testing your microphone helps avoid issues early and guarantees consistent sound quality during those vital podcasting sessions. Similar to how gradual illumination technology helps optimize lighting conditions, a systematic testing approach ensures optimal audio performance. Repeat the process if needed; you’ll thank yourself later, especially during a live event!
Recommended Products

[Natural Audio Clarity] Operated with frequency response of 50Hz-16KHz, the podcasting XLR mic delivers balanced audio range, likely to resonate with your audience. Directional cardioid dynamic microphone corded will not exaggerate your voice, while rejects unwanted off-axis noise for vocal originality and intelligibility during your PS5 gaming streaming video recording. (Tips: Keep the top of end-addressing XLR dynamic microphone AM8 facing audio source, and suggested recording range is 2 to 6 in.)

Cut the Cables, Free to Pod - Dynamic microphone MAONO PD200W hybrid enjoy 3 ways for broadcast audio: go wireless for maximum freedom, USB for easy plug-and-play on phone, tablet, or computer, or XLR for a pro-level stable setup with audio interfaces

Studio-Quality Sound for Clear Podcast Recording – The K66 USB podcast microphone delivers studio-quality, broadcast-level audio using a high-performance condenser capsule and cardioid pickup pattern that focuses on your voice while reducing unwanted background noise. Designed as a reliable microphone for PC, it features a wide 40Hz–18kHz frequency response and a 46kHz sampling rate to reproduce rich lows, smooth mids, and clear highs for natural, detailed vocals. With –45dB ±3dB sensitivity, it captures balanced sound without distortion during expressive speaking. Ideal for podcasting, voice-over, online classes, meetings, and professional content creation.
Additional Considerations for Microphone Care
While some might think that microphones only need a good cord and a plug, caring for these essential podcasting tools goes much deeper. First off, it’s vital to avoid exposure to extreme temperatures and humidity, as these conditions can harm the microphone diaphragm. Regular care includes cleaning with a soft brush or microfiber cloth at least once a month to keep dust at bay. Furthermore, using a windscreen or pop filter minimizes plosive sounds, helping to extend your microphone’s lifespan. Storing microphones in a durable case, in a dry, cool, dust-free environment protects them from moisture and physical damage. Finally, inspect and replace worn cables to guarantee peak performance during podcast production. Trust me, your microphone will thank you! For optimal sound quality during interviews, position the microphone at chest level placement to ensure clear audio pickup without interference.
Recommended Products

Double Layered Screen Pop Filters:The first screen blocks air blasts as any pop filter normally would; The gap in between then disperses any remaining air pressure, so by the time it passes the second screen, the blast is easily contained to produce great quality recordings.

Suitable for Microphones: The penypeal microphone windshield is suitable for most XLR /USB microphones, condenser microphones with a removable jacket diameter between 50-75 mm.Comes with a holder for different size microhones.

Microphone windscreens fit small lapel and headset microphones
Frequently Asked Questions
What Is the 3 to 1 Rule for Microphones?
The 3 to 1 rule for microphones dictates that ideal microphone positioning involves maintaining distances, improving sound quality. Environmental factors, effective shock mount and windscreen usage, acoustic treatment, and proper cable management enhance performance and facilitate routine maintenance.
Why Do People Put Socks Over Their Mics?
Around 70% of podcasters use DIY solutions, like socks, for mic protection. Socks enhance sound quality by acting as a pop filter, provide moisture barriers, facilitate acoustic control, and prevent dust, while serving as an aesthetic choice.
What Is the Life Expectancy of a Microphone?
The life expectancy of a microphone ranges from 5 to 15 years, influenced by durability factors, environmental impacts, usage frequency, and effective microphone maintenance tips, including cleaning techniques, handling precautions, storage practices, and repair options.
How to Make a Microphone Work Again?
To restore a microphone’s functionality, one must explore microphone troubleshooting tips, ensuring power supply checks, cable maintenance techniques, and cleaning microphone surfaces, while adjusting software settings and monitoring sound quality to address common connection problems effectively.