As an Amazon Associate, we earn from qualifying purchases. Some links on this site are affiliate links at no extra cost to you. Our recommendations are based on thorough research and editorial judgment.

How Room Acoustics Affect Microphone Recording Quality
Room acoustics greatly affect microphone recording quality, influencing clarity and detail. Ideal reverberation time is between 0.1 and 0.3 seconds for vocals. Hard surfaces can cause unwanted echoes or muddiness. Proper placement of acoustic panels and bass traps can help absorb sound, reducing distractions. For best results, keep microphones at least three feet away from walls. Don’t worry—it’s easier than it sounds! Stick around to discover more tips on enhancing your recording environment.
Key Takeaways
- Room acoustics significantly influence recording quality by affecting the clarity and presence of vocals and instruments.
- Proper acoustic treatment reduces unwanted echoes and background noise, enhancing sound fidelity during recordings.
- Material selection is crucial; soft and porous substances absorb sound effectively, minimizing muddiness in small spaces.
- Microphone placement must avoid reflective surfaces to prevent phase issues and ensure clean sound capture.
- High-density acoustic panels with NRC ratings above 0.9 greatly improve clarity by absorbing unwanted reflections in the recording environment.
Importance of Room Acoustics
Room acoustics play an essential role in determining the quality of recordings, and this is something that can’t be overlooked. The way sound behaves in a room can make or break your sound quality. Factors like room size, materials, and furnishings affect acoustics considerably. For instance, a shorter reverberation time of 0.1 to 0.3 seconds is ideal for capturing vocals clearly, while instruments might thrive with a bit more echo. Acoustic treatment is vital; untreated spaces can lead to muddiness and unwanted echoes. Plus, background noise from outside can sneak in and ruin your hard work. Adjusting microphone positioning helps prevent phase issues caused by reflections—these can cancel out or boost certain frequencies. It’s all about harmony! Using a high-density acoustic foam reflection filter can eliminate up to 87% of ambient noise in your recording space.
Understanding Isolation and Absorption

When it comes to achieving great recording quality, isolation and absorption play essential roles. Isolation prevents unwanted noise from interfering with your recordings. You’ll want to seal off sound movement between your space and the outside world. True soundproofing can be pricey, but sound absorption acts as a budget-friendly alternative. Soft, porous materials, like acoustic panels and bass traps, are effective at soaking up sound energy. These materials turn noise into heat—yes, it’s science! DIY acoustic panels can also help, allowing you to enhance sound absorption without breaking the bank. Just remember, where you place these materials is vital; it can greatly reduce room reflections and keep those annoying echoes at bay. Who knew sound treatment could be this fun? High-density foam panels are particularly effective for sound absorption and come in various designs like pyramid and wedge styles to maximize sound diffusion.
The Role of Sound Reflection

Sound reflection can dramatically influence the quality of your recordings, turning a clear performance into a muddy mess if left unchecked. When sound waves bounce off hard surfaces, they can create unwanted reverberations, clouding your recording. This is where room acoustics come into play. Poorly treated rooms can alter perspectives, resulting in unclear audio. Yet, don’t panic! Strategic placement of acoustic panels and bass traps can help minimize these reflections. Even your everyday curtains and bookshelves can act as savvy sound absorbers or diffusers. By reducing muddiness, these adjustments can significantly enhance recording quality, allowing every detail of vocals or instruments to shine. So, embrace your inner sound engineer, and create a space that listens as well as it records! High-quality acoustic panels with NRC ratings above 0.9 are particularly effective at absorbing unwanted sound reflections and improving overall recording clarity.
Recommended Products

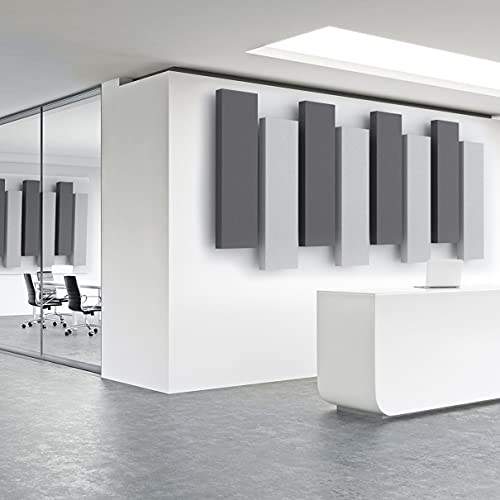
360° ROTATION: The Room Divider 360° is a high-quality portable partition that helps you maximize the use of your facility’s space. Each Room Divider panel rotates 360° for infinite configuration possibilities using a patented 360 degree hinge.

Tested Performance: Up to 26 dB sound reduction; NRC 0.89 absorption; KCL third party test data available; built for sound isolation and acoustic control

12 Piece Kit contains 8 wall panels and 4 ceiling panels, each panel is sized 24" x 48" x 2"
Managing Phase in Recordings

Achieving high-quality recordings isn’t just about what you play; it’s also about how you capture the sound. Phase is fundamental in this process. When microphones pick up the same sound source, time delays can lead to misalignments, causing certain frequencies to cancel each other out. This can make your recordings sound muddy and unclear. That’s where room acoustics come into play. By using acoustic treatments, you can minimize reflections, helping to maintain sound fidelity. Furthermore, careful microphone placement is vital. Positioning mics correctly reduces the chance of phase issues, ensuring sound waves align nicely. So, managing phase effectively lets you create recordings that pack a punch and sound crystal clear, not like a fuzzy radio station from the ’90s! Triple weave technology in modern acoustic curtains can block up to 99% of unwanted sound reflections, making them an excellent choice for creating controlled recording environments.
Impact of Room Size on Sound Quality

Room size plays a pivotal role in determining sound quality in recordings. Larger rooms often provide ideal acoustic parameters, thanks to improved reverberation characteristics that enhance clarity. These spaces typically allow longer reverberation times, great for music. In contrast, smaller rooms can cause issues like standing waves and muddy sound due to excessive reflections. To avoid this, smaller spaces should steer clear of parallel walls and non-integer ratios, ensuring better sound quality. Remember, when people fill a performance venue, they absorb sound, which can alter the perceived reverberation time. So, consider room size carefully—it can mean the difference between crisp, clear vocals and a recording that sounds like it’s trapped in a tin can! Using a microphone with super-cardioid pickup patterns can help minimize unwanted room reflections and focus on capturing the intended sound source.
Recommended Products

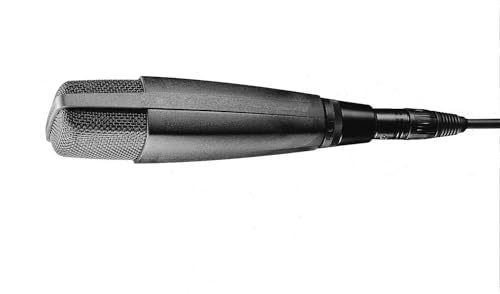
Three distinct tube microphones at the flip of a switch. FORWARD is bold, present and modern, but never harsh. NEUTRAL is smooth and earthy with a natural balancing of sibilant sounds. GENTLE is dark and sultry with a warm vintage feel, ideal for taming bright or abrasive sound sources.

A bidirectional figure-8 polar pattern captures sound equally from front and rear while efficiently rejecting sound from the side.

Techniques for Acoustic Treatment
While many might think that acoustic treatment is just about tossing some foam panels onto the walls, the reality is far more nuanced. Effective acoustic treatment involves a blend of absorption panels, bass traps, and diffusers. Absorption panels can help reduce unwanted reverberation, aiming for a time of 0.1 to 0.2 seconds for crisp vocals. Bass traps are crucial for keeping those pesky low frequencies around 200 Hz to 5 kHz in check. Meanwhile, diffusers scatter sound above 600 Hz, enhancing the room’s audio experience. Proper placement matters too—think of placing absorption panels in the corners and diffusion panels on the rear walls. With mindful design, your recording space won’t just sound good, it’ll sound amazing! Quality acoustic panels with high NRC ratings above 0.9 deliver optimal sound absorption performance for professional-grade results.
Recommended Products

Recommended use: Queen/Full Headboard. This set is sized to cover a 120" X 46" area in a configuration of 16 individual panels. Measurements per panel: 11.5"H x 30"W x 1.5"D (2.5"D once mounted with the bracket system)
High NRC Rated Core .95 or higher avg.

High NRC Rated Core .95 or higher avg.
Consequences of Poor Acoustics
Poor acoustics can really ruin a recording session before it even begins. When sound waves bounce around untreated rooms, unwanted reverberation occurs, muddling vocals and instruments. Ideally, reverberation times should be around 0.1-0.2 seconds for clear recordings. Without proper absorption panels, excess echoes can create comb filtering effects, distorting the original audio. Background noise from HVAC systems or outside sources can easily mask important sounds, upsetting audio clarity. You don’t want to be battling sound levels like NR-15 and NR-20 either! Finally, standing waves may amplify certain frequencies and throw the tonal balance off, especially in small rooms. It’s like trying to play a symphony in a tin can—fun for a second, but not ideal for recording! Installing high-density foam panels can effectively reduce reverb and echo while providing superior sound absorption for clearer recordings.
Equipment Influence on Recording Quality
When it comes to recording quality, the right equipment can be a game-changer. Microphone quality plays an essential role, especially in untreated rooms where poor room acoustics can wreak havoc. Choosing directional microphones, like cardioid types, helps cut down on annoying ambient noise, focusing on the desired sound instead. Placement is significant too; being close to your source lets the clear sound win against reflected echoes. Think of it this way: a dynamic mic can handle loud sounds well, while a condenser mic might pick up too much room detail. Plus, misaligned microphones can lead to those pesky phase issues, making recordings sound muddy. So pay attention to your gear—good equipment can save a lot of headaches later! The Logitech Blue Yeti offers versatility with four distinct pickup patterns to accommodate various room acoustic challenges.
Recommended Products
Rugged professional microphone
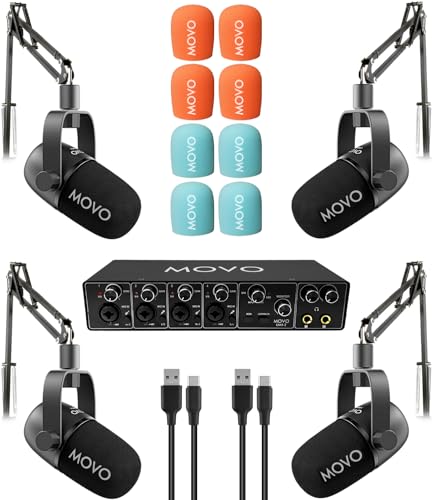
COMPLETE 4-PERSON PODCAST KIT – Everything you need to start recording with a team: UMX-2 4-channel USB audio interface, 4 CastMic dynamic microphones, and 4 tabletop stands. Unbox and start podcasting in minutes.
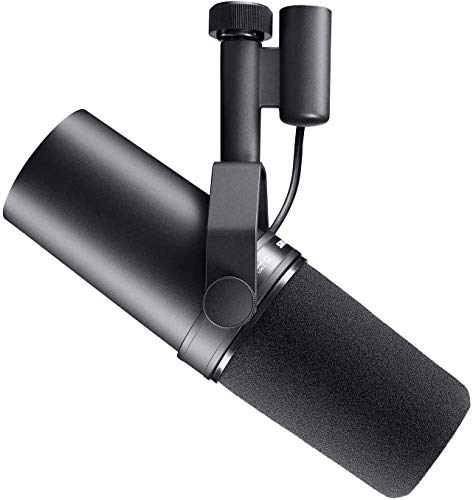
NATURAL VOCALS: Engineered with a dynamic cartridge and wide-range frequency response, the Shure SM7B captures warm, balanced vocals with exceptional clarity, making it ideal for singing, podcasting, voiceover, and professional studio recording
Practical Tips for Improving Acoustics
Improving room acoustics doesn’t have to feel like rocket science, even if it sometimes seems that way. Start by installing acoustic panels and bass traps; they’re fantastic for reducing echoes. Positioning these in corners can smooth out bass frequencies, clearing up muddiness in recordings. Next, consider your microphone placement—avoid those reflective surfaces! If you can, keep mics at least three feet away from walls. Using diffusers on your walls helps scatter sound waves, improving overall sound quality. And let’s be real, bigger rooms usually mean better acoustics; small, untreated spaces can wreak havoc. With these simple changes, your recordings can elevate from “meh” to “wow”—and that’s a sound investment you’ll be glad you made! For optimal sound absorption, look for acoustic panels with NRC rating 0.92 which effectively handle both high and low frequencies.
Recommended Products

[Professional absorption] - A few of our panels strategically placed outperform an entire wall of foam or polyester panels. Foam and polyester poorly absorb high frequencies, requiring many panels. Moreover, at medium-low frequencies, they are very ineffective, resulting in an unbalanced sound filter and a poor sound experience. In choosing our acoustical solution, you not only enhance performance but also save on costs.

Thick Fiberglass Core: Olanglab acoustic panels combine a high-density fabric cover with a porous fiberglass core for superior sound absorption, achieving an absorption coefficient up to 0.95 for effective noise reduction and acoustic treatment.

【Lifetime Warranty for FREE Replacement 】 You can have no worries to pruchase as we guarantee your lifetime replacement. As we all know the panels requires to be replaced if you moving or any wall problems happens. You can count on us for lifetime.
Frequently Asked Questions
What Is the 38% Rule Room Acoustics?
The 38% rule in room acoustics advises placing absorption materials approximately 38% from the front wall, optimizing microphone placement. This positioning minimizes sound reflection and enhances clarity by managing room shape and incorporating acoustic foam effectively.
What Is the 3 to 1 Rule for Microphones?
The 3 to 1 rule emphasizes proper microphone placement, recommending a distance of three times the sound source proximity to minimize background noise and sound reflections, enhancing recording techniques for clearer high frequencies and reducing phase cancellation.
How to Acoustically Treat a Room for Recording Vocals?
To effectively acoustically treat a recording room, one should use sound absorption materials, employ diffusion techniques, consider room dimensions impact, and utilize portable sound booths for ideal vocal reflection control, enhancing overall sound quality.
How Does Room Size Affect Acoustics?
Room size considerably impacts acoustics, as room dimensions dictate sound reflection and diffusion. Larger spaces enhance reverberation time and manage low frequencies better, while smaller rooms often struggle with clarity due to excessive reflections and shorter decay times.


