As an Amazon Associate, we earn from qualifying purchases. Some links on this site are affiliate links at no extra cost to you. Our recommendations are based on thorough research and editorial judgment.

How to Use Room EQ to Compensate for Acoustic Problems
To use Room EQ effectively, start with a quality measurement microphone placed at ear height, away from walls. Take multiple sound measurements to identify any frequency peaks or dips. Save your data in .snr format, and use Room EQ software to make adjustments. Tweak the gain carefully—keeping it near 0 dB prevents distortion. After adjustments, compare sound quality with Room EQ activated versus bypassed. There’s a whole world of acoustic solutions waiting to be explored next!
Key Takeaways
- Use a quality measurement microphone to accurately capture the room’s frequency response and identify acoustic problems.
- Position the microphone at ear height, away from reflective surfaces, for reliable measurement results.
- Conduct multiple measurements across the room and save the data in .snr format for Room EQ software analysis.
- Activate Room EQ and make precise EQ adjustments using either Bright or Neutral reference profiles to enhance sound quality.
- Compare processed and unprocessed frequency responses to evaluate the effectiveness of your EQ adjustments and fine-tune as needed.
Understanding Room Acoustics
When diving into the fascinating world of room acoustics, one quickly discovers how much the environment influences sound. Room acoustics are shaped by the dimensions, materials, and furnishings within a space. These factors can create issues like echoes and standing waves, causing uneven sound distribution. Ever sat in a church auditorium and wondered why the music sounded muddled? That’s room acoustics at play! Reflective surfaces often bounce sound around, leading to distortions. To tackle this, room correction techniques can help. Using acoustic treatments such as panels or baffles absorbs sound energy, reducing unwanted reflections. Think of it as giving your space a sound makeover—an investment in clearer audio that’s well worth the effort! Quality acoustic panels with high NRC ratings above 0.9 provide the most effective sound absorption for problematic spaces.
Importance of Measurement Microphones

Understanding room acoustics is just the beginning of creating great sound. A quality measurement mic is key for gathering accurate sound data. It captures the room’s and speakers’ responses without any annoying coloration. Brands like dbx and Dayton Audio offer reliable models that pinpoint frequency response anomalies. Identifying these issues is essential for effective equalization in any room setup. Some mics need phantom power from a preamp, while USB ones are the superheroes of simplicity—just plug and play! Investing in a good measurement microphone can really boost the effectiveness of Room EQ, providing precise data for needed acoustic corrections. So, before you plunge into adjustments, think about that trusty measurement mic—it’s the Sherlock Holmes for your sound! For optimal results, consider using fixed attenuation pads to prevent audio clipping when taking measurements in particularly loud environments.
Recommended Products

AVENTAGE: our top-tier line featuring premium build quality and sound performance
Processing and detection is real time FFT ~1Hz resolution in the 20Hz .. 200Hz band.

Timeless Ribbon Tone: Delivering the iconic tonal experience at the center of recording and broadcast history, the WA-44 faithfully recreates the warm and vintage tones of the legendary RCA 44 ribbon mic of the 1930s.
Setting Up Your Equipment

Setting up your equipment is the next exciting step in achieving stellar sound quality. First, select a measurement microphone from trusted brands like dbx or Dayton Audio. Connect it via USB or a preamp providing phantom power. Position this microphone at ear height in your listening area, steering clear of reflective surfaces for accurate sound capture. Remember, it’s all about precision! Conducting 5-10 measurements across the room will help you gather a solid frequency response. Finally, install Room EQ software compatible with your OS—VST, AU, or Foobar2000 work well. After your measurements, don’t forget to save the frequency response as a .snr file. This file will be your roadmap for adjustments, guiding you to great sound! Consider placing your audio equipment on a heavy-duty rack stand that can support up to 550 pounds to minimize unwanted vibrations during measurements.
Recommended Products
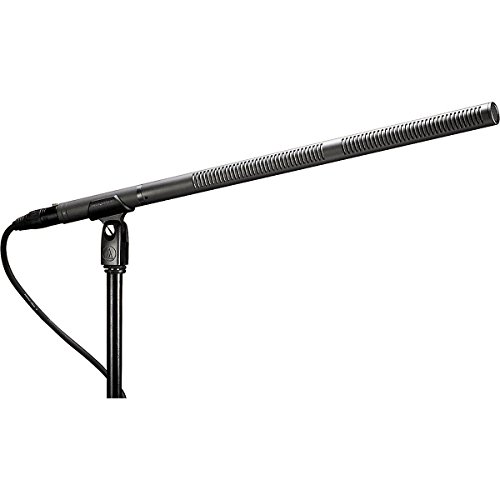
Designed for video production and broadcast (engine/EFP) audio acquisition

KEEPS DEVICES RUNNING DURING POWER OUTAGES: Reliable 1350VA / 810W UPS battery backup that protects home office electronics and keeps essential devices powered during blackouts, surges, and unexpected power interruptions

MAXIMUM CLARITY: The Audix ADX18 mini gooseneck condenser mic is specially designed to capture vocals with the utmost clarity for public speaking.
Conducting Acoustic Measurements
Conducting acoustic measurements is essential for capturing how sound behaves in a given space. To get started, position a measurement microphone—USB or conventional—at ear height, avoiding reflective surfaces. This setup helps capture the true sound environment effectively. For best results, take 5-10 evenly distributed measurements throughout the listening area, which will provide a thorough frequency response. Don’t forget, if you’re using conventional microphones, they’ll need phantom power from a preamp. Once you’ve captured the frequency response data, save it as a .snr file. This file will come in handy for further processing with Room EQ software, available in various formats like VST or AU. Just think of it as a sonic selfie! Consider adding egg crate panels to your space for enhanced sound absorption and more accurate measurements.
Recommended Products
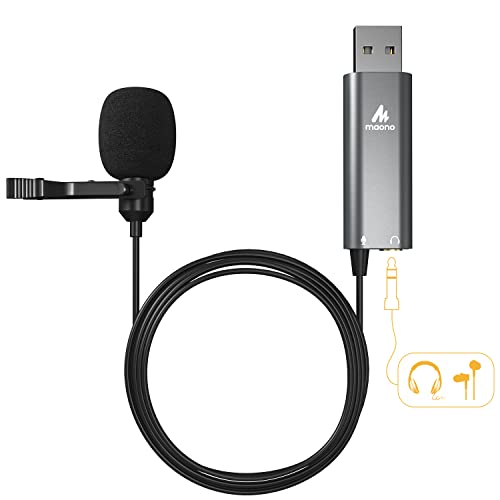
Clear Sound: Supports high sampling rate: Support high sampling rate:192kHz/24bit, features a highly sensitive sound pickup mic head, metal clip, and USB plug which comes...
Analyzing Frequency Responses

When sound waves bounce around a room, they create a complex dance of frequencies, some peaking and others dropping like a roller coaster. Analyzing frequency responses helps identify resonance issues that mess with sound quality. To do this accurately, you’ll need a specialized measurement microphone—think of it as your acoustic detective. By taking 5-10 measurements across the listening area, you gather essential data. The frequency response graph will show a white line depicting the overall sound response, with peaks and dips marking problem spots. Plus, comparing processed versus unprocessed responses helps you see just how effective your room corrections are. It’s like before and after photos, but for your ears! Using a high-density acoustic foam isolation shield can significantly reduce unwanted reflections and improve measurement accuracy. Happy listening!
Making EQ Adjustments
After identifying the pesky peaks and dips in your frequency response, it’s time to make those EQ adjustments. First, save the measurements to activate Room EQ. Next, choose either a Bright or Neutral reference. Then, adjust the vertical slider to tackle specific resonances. Make sure to use the white line in the graph as your guide—it represents your target. It’s important to avoid making boosts below this line to prevent overcompensation. You may also want to experiment with the slider’s position; tweaking it can help with annoying low frequencies, like rattling. When you’ve made changes, switch between Room EQ and Bypass modes to hear if you’ve truly improved your sound. Don’t forget to save your presets as .snr files for next time! Using a supercardioid pickup pattern can help reduce unwanted background noise when recording in problematic acoustic spaces.
Recommended Products

Audio reference measurement microphone with unique calibration file

Unique calibration file for each product with sensitivity (SPL monitoring), Frequency
THE ENNOLOGIC DECIBEL METER provides accurate sound level (decibels or loudness) readings from 30 to 130 dB with ±1.5 dB accuracy. It is the ideal tool to discover if something at your workplace or in your neighborhood is too loud, potentially causing hearing damage. Loudness is highly subjective and difficult to determine without proper equipment. Use this Type 2 decibel meter to get convincing data for any situation.
Reducing Resonance Peaks
Reducing resonance peaks can feel like a formidable task, but it doesn’t have to be! By using Room EQ Wizard, you can analyze your room’s acoustic response and pinpoint those tricky frequencies begging for attention. A specialized measurement microphone is essential here; standard mics often miss the subtle details. Once you identify the peaks, it’s time to fine-tune. Typically targeting the 30–4000 Hz range works best. Just adjust the vertical slider to control how much you cut those pesky peaks. Higher settings can even banish low-frequency rattles! Remember, experimenting with these settings and taking multiple measurements helps guarantee a balanced frequency response, making your sound as smooth as butter—without the sticky mess! Installing high-density foam panels in your room corners can significantly enhance your EQ efforts by naturally absorbing problematic bass frequencies.
Fine-Tuning Your Settings
Fine-tuning settings in Room EQ can feel like stepping into a sound chef’s kitchen, where the right adjustments create a delicious auditory feast. Start by adjusting the vertical slider to manage resonances while ensuring a balanced sound profile. Experiment with different reference frequency responses, like Bright or Neutral, to find what tickles your ears most. Just as ultra-quiet fans operate at 25-28 dB for distraction-free environments, your EQ adjustments should aim for similar peaceful listening conditions. Don’t forget to use that sound comparison method—toggle Room EQ and Bypass for a fair evaluation. Keep the gain slider at 0 dB; it’s essential to avoid distortion that could ruin your audio experience. Finally, save those cherished settings as .snr files. They’ll make future adjustments a breeze, even if your room’s acoustics decide to act up unexpectedly!
Exploring Additional Acoustic Treatments
How can anyone truly transform their listening space into an acoustic paradise? One key method is using acoustic panels on walls and ceilings. These dampen sound and help manage tricky frequencies. Oh, and let’s not forget about those sneaky reflective surfaces—acoustic baffles can tackle them head-on!
Then there’s room layout. Simply rearranging furniture might greatly improve sound distribution. For example, placing a couch away from walls can help reduce echoes. The choice of materials also matters; thick carpets and heavy curtains enhance sound absorption.
Regular assessments are essential, too. As life changes, so does your room’s acoustics. Keep adjusting those treatments to maintain ideal sound quality—you wouldn’t want to live in a sonic disaster, would you? Just like NVMe portable SSDs offer reliable data storage, proper acoustic treatment provides consistent sound quality in your space.
Recommended Products

Includes 4 Pieces per Case | 31.68 Square Ft. Per Case | Case Weight 48 lb |TILE SIZE: 9.5 in. W x 120 in. L x 0.8 in. T

[ Low Noise Level ] Equipped with 2 layers of soundproof laminated glass, and Acoustic Insulation Structure walls 6 layers (Aluminum frame structure, Film-laminated Steel Panel, PET Sound-absorbing Board, Eco-friendly Acoustic Panel, Premium Textured Fabric), the booth achieves 35dB(±5dB) reduction, ensuring a peaceful, private workspace.

SPECS - Length: 96" | Width: 80" | Material: Cotton and Polyester with Zig-Zag Stitching | Weight: 12 lbs each | Blanket and Thread Color: Black | Use: Sound Absorption, NOT Sound Blocking or Sound Proofing | NRC Rating: 0.35 | Quantity: (60) Sound Blankets
Community Resources and Support
Finding the right acoustic solution is often a collaborative effort. Engaging with fellow church tech personnel in online forums can yield valuable tips and share best practices. Community support is essential here, as members discuss their experiences with measurement microphones and how these tools enhance room correction and overall sound quality. Sharing visual aids, like images of sound setups, can help diagnose acoustic challenges faster. Plus, collaboration allows for a rich exchange of recommendations for equipment and advanced Room EQ techniques tailored to specific room characteristics. Ultimately, these discussions inspire others facing similar issues, turning obstacles into manageable solutions. So, don’t be shy—join the conversation and let the community guide you. After all, two (or more) heads are better than one! Modern LED lighting solutions can significantly reduce power consumption by up to 85% compared to traditional options, making them ideal for energy-efficient church installations.
Real-Life Applications of Room EQ
What would a church auditorium sound like if it were properly tuned? You can imagine clear sound that enhances worship. By using Room EQ Wizard software, churches can tackle frequency issues that muddy sound. For instance, high-quality measurement microphones from Dayton Audio make a big difference in detecting those pesky resonances.
Combining Room EQ adjustments with acoustic treatments, like baffles and panels, can minimize unwanted sound reflections. This teamwork leads to a more balanced audio experience. Plus, AV professionals often share tips that speed up optimization for unique challenges. So, whether you’re in a church or a cozy venue, Room EQ can help create that perfect listening environment. Who wouldn’t want that?
Frequently Asked Questions
What Is the 38% Rule Room Acoustics?
The 38% rule in acoustic design posits that speaker and listening positions should be set at roughly 38% into a room’s length, promoting even sound distribution and slaying the dreaded specters of standing waves.
How to Fix Bad Acoustics in a Room?
To fix bad acoustics in a room, one should employ sound treatment techniques, including installing acoustic panels and baffles, to absorb unwanted frequencies and reflections, enhancing clarity and overall sound quality in the environment.
What Is the Best EQ Setting for Acoustic Guitar?
The best acoustic guitar settings involve reducing 200-300 Hz for muddiness, boosting 3-5 kHz for clarity, and enhancing 8-12 kHz for brightness, making thoughtful adjustments to an equalizer frequency essential for ideal sound quality.
Can Room EQ Wizard Improve Sound Quality?
Yes, Room EQ Wizard can greatly improve sound quality by analyzing frequency response and facilitating sound calibration. Its detailed measurements guarantee precise adjustments that enhance clarity and detail, addressing acoustic issues effectively within the listening environment.


